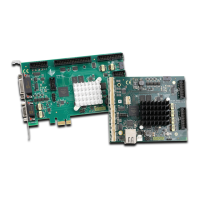
RTC6 boards
Doc. Rev. 1.0.21 en-US
2 Product Overview
54
• Coordinate transformations in the virtual Image
Field (incl. “Global Online Positioning“), see
Chapter 7.3.3 ”Virtual Image Field”, page 169
– 29-bit position coordinates (virtual Image
Field): objects larger than the real Image Field
are possible
• Position monitoring of iDRIVE scan systems
(1)
by
backward transformation of actual position
values, see Chapter 8.1.3 ”Monitoring the
Positioning”, page 214
• Automatic self-calibration, see Chapter 8.10
”Automatic Self-Calibration”, page 275:
– Optimization of previous functions
– ASC hardware check
• Jump Mode, see Chapter 8.1.5 ”Jump Mode”,
page 217
• Cycle synchronization, see Chapter 7.4.10
”Synchronization of the RTC6 Clock Cycle and an
External Clock Signal”, page 207
Controlling the Laser
• The signal levels of the Laser Control Signals are
no longer determined by a jumper configuration.
Instead, they are software-configured, see
set_laser_control
• LASER Connector with all Laser Control Signals at
the RTC6 PCIe Board slot cover, see Chapter 4.6.1
”LASER Connector”, page 73, 9-pin female D-SUB
connector only by the SCANLAB laser adapter, see
Section ”Laser Adapter (Accessory)”, page 76
• LASER Connector configurable by software
command, see Chapter 7.4.2 ”Configuring the
LASER Connector”, page 187
• Laser Control Signals with 15 ns resolution and
20 mA output current
• Standby signals in YAG modes, see Chapter 7.4.4
”YAG Modes 1, 2, 3, 5”, page 190
• YAG Mode 5: Time between FirstPulseKiller signal
and first laser pulse in YAG mode is freely
programmable, see Chapter 7.4.4 ”YAG Modes 1,
2, 3, 5”, page 190
• Laser Mode 6: LASERON signal synchronized with
a continuously-running LASER1 signal, see
Chapter 7.4.6 ”Laser Mode 6”, page 194
• Pulse Picking Laser Mode, see Chapter 7.4.8
”Pulse Picking Laser Mode”, page 196
• Laser pulse period, pulse length or analog output
are also programmable within a Polyline between
two vectors – where the laser remains on
(2)
, see
“short list commands” in Section ”Normal, Short,
Variable and Multiple List Commands”, page 302
• Commands for position-dependent, speed-
dependent, vector-defined and encoder-speed-
dependent laser control, see Chapter 7.4.9
”“Automatic Laser Control“”, page 197
Interfaces for Peripheral Equipment
• 16-bit digital output, see Section ”16-Bit Digital
Input Port and 16-Bit Digital Output Port”,
page 78, and Chapter 9.1.1 ”16-Bit Digital
Output Port”, page 282:
– Level of output signals selectable by a jumper
(3.3 V or 5 V)
– LATCH signal for synchronization of data
transmission
• 8-bit digital output port, see Section ”8-Bit Digital
Output Port”, page 81 and Chapter 9.1.2 ”8-Bit
Digital Output Port”, page 283:
– Provided at the EXTENSION 2 socket connector
(on the RTC4, this socket connector is named
“LASER EXTENSION”)
– LATCH signal for synchronization of data
transmission
– Adjustable ”stop output value”
• Analog output ports, see Section ”12-Bit Analog
Output Port 1 and 2”, page 74, and Chapter
9.1.4
”12-
Bit Analog Output Port 1 and 2”, page 283:
– 12 bit resolution
– 0…10 V (0 V…2.50 V no longer available)
– Adjustable ”stop output value”
• 16-bit digital input port, see Section ”16-Bit
Digital Input Port and 16-Bit Digital Output Port”,
page 78, and Chapter 9.2.1 ”16-Bit Digital
Input Port”, page 288.
– SYNC signal for synchronization of data
transmission
(1) See Glossary entry on page 27. (2) Is switched off with the RTC4.