Printer NVM backup PCA
Removal of the NVM PCA
1. Switch o the printer and remove the power cable.
2. Remove the Front Cover, see Front Cover on page 261.
3. Remove the Cutter Door, see Cutter Door F9A30-67006 on page 378.
4. Remove the Left Cover, see Left Cover MFP SV Kit F9A30-67012 on page 268.
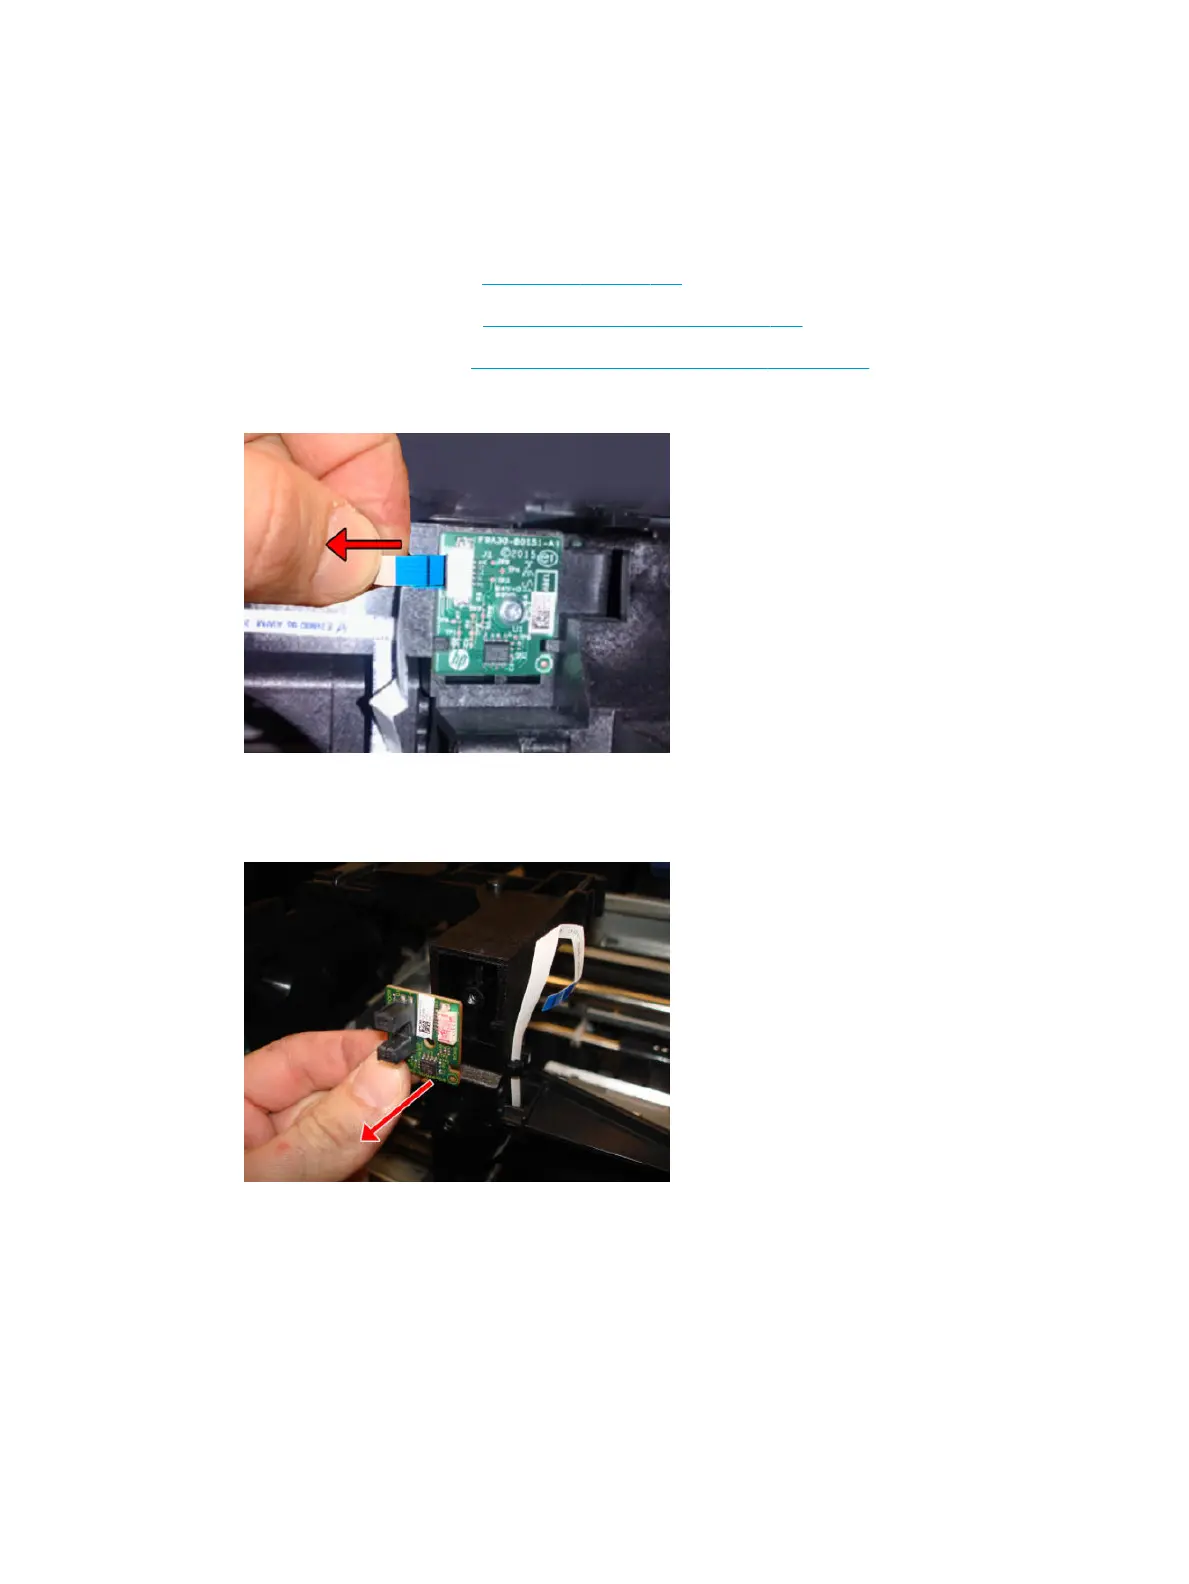
5. Disconnect the at cable.
6. Remove one T-10 screw.
7. Remove the PCA.
Removal of Printer Back Up NVM PCA
The cable needs to be replaced only if it is clearly damaged or if the replaced sensor fails to work.
1. Slide down the at cable to detach it from the hook.
ENWW Printer NVM backup PCA 305
 Loading...

