2 - 9
IPN 074-397-P1G
HAPSITE Smart Operating Manual
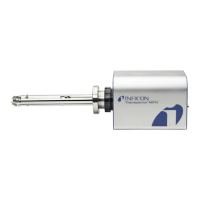
2.3.4 Install Battery
Insert the battery by sliding it into the rectangular opening to the left of the gas
canisters. Press and listen for the battery to click into place. Once the battery is
installed, gently pull on the battery to make sure the battery is locked in place
correctly. See Figure 2-13.
Figure 2-13 Battery Insertion
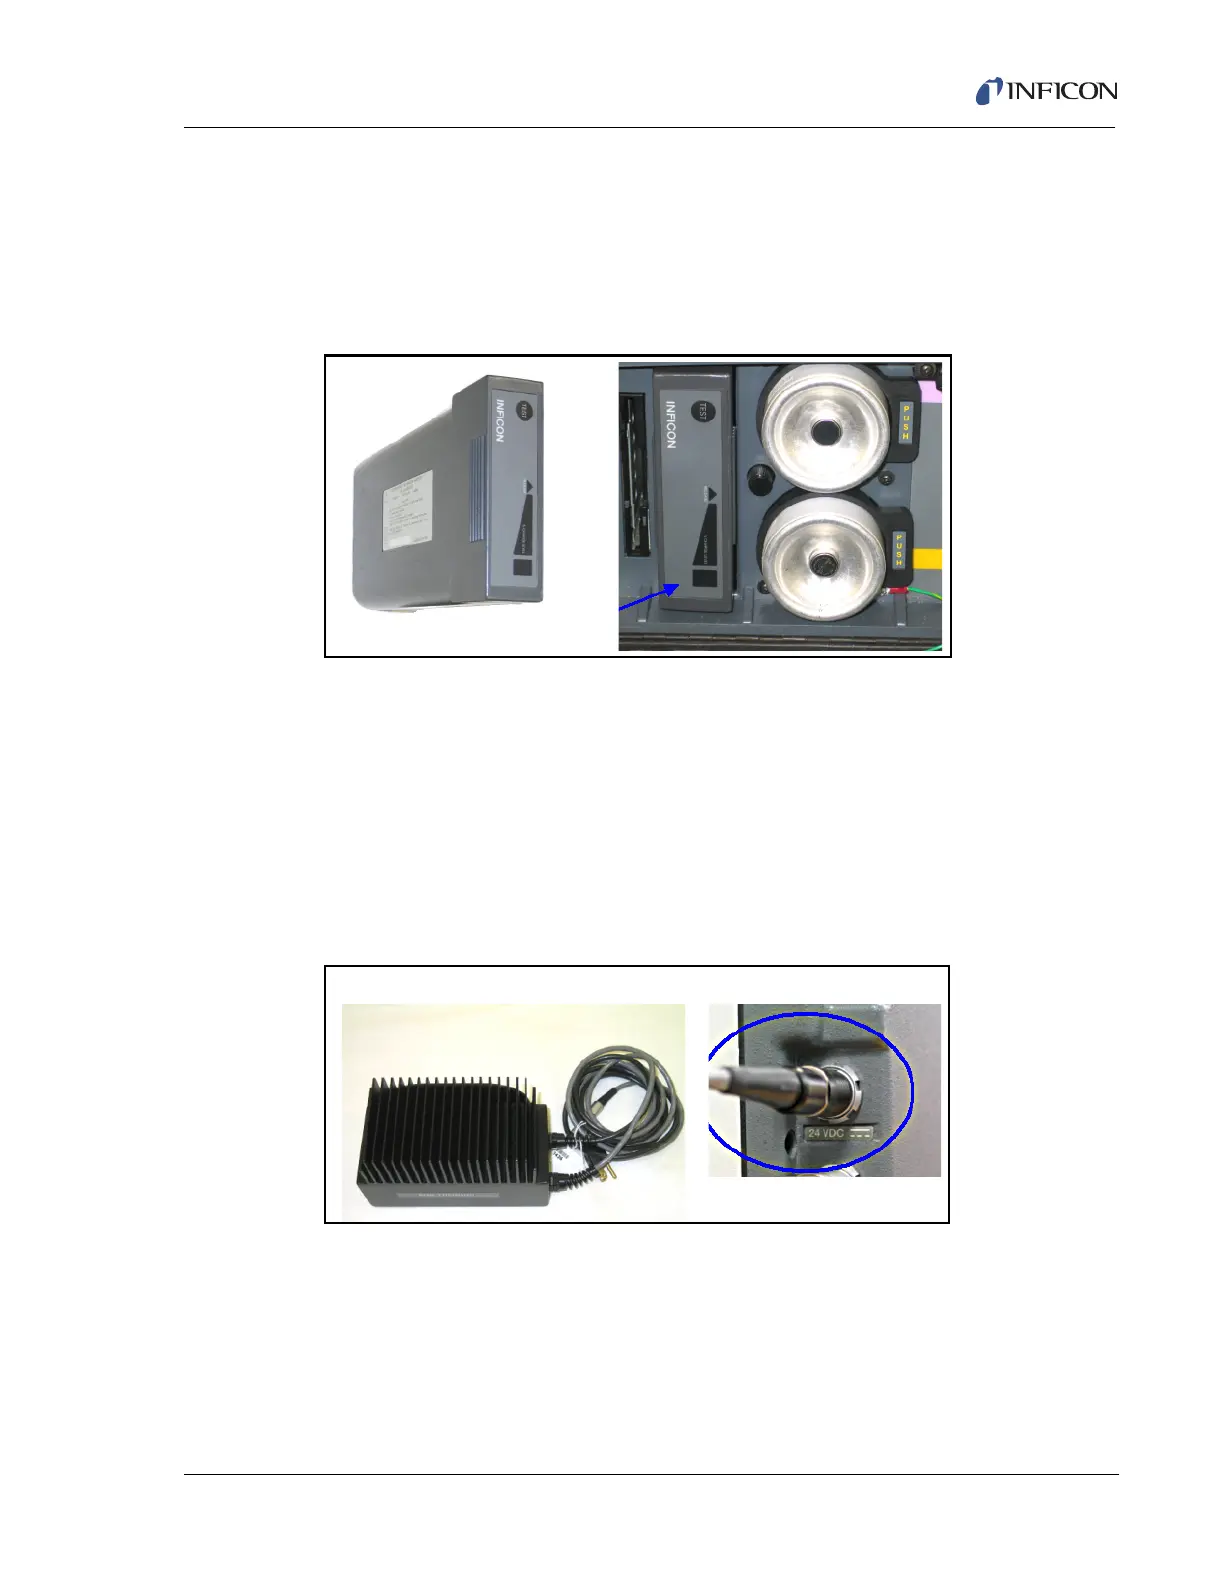
2.3.5 Connect the AC To DC Power Converter Power Supply
The AC to DC power converter plugs into the four prong plug on the left side of the
HAPSITE (when facing the front of the HAPSITE). A red dot on the connector
aligns with the corresponding red line on the receptor of the HAPSITE (if the red
dot is not visible on the HAPSITE, the red dot on the power supply should be facing
forward.) Plug the AC to DC power converter into a 110 V(ac) outlet. See Figure
2-14.
Figure 2-14 The AC To DC Power Converter Power Supply and
Correct Connection to the HAPSITE
2.3.6 Connect Laptop (if desired)
The HAPSITE Smart has two possible configurations for connecting to a laptop
computer. The standard connection is via a crossover ethernet cable. All
instruments manufactured starting in December 2006 will have a wireless
communication connection option. Older instruments may also have the wireless
option if a wireless upgrade was installed.
AC To DC Power Converter Power Supply Connection To HAPSITE