05/2014
3-28
DC SC2020
3.2.2 How to use the image quality troubleshooting (IPS)
Version 1.1
Image Quality Troubleshooting
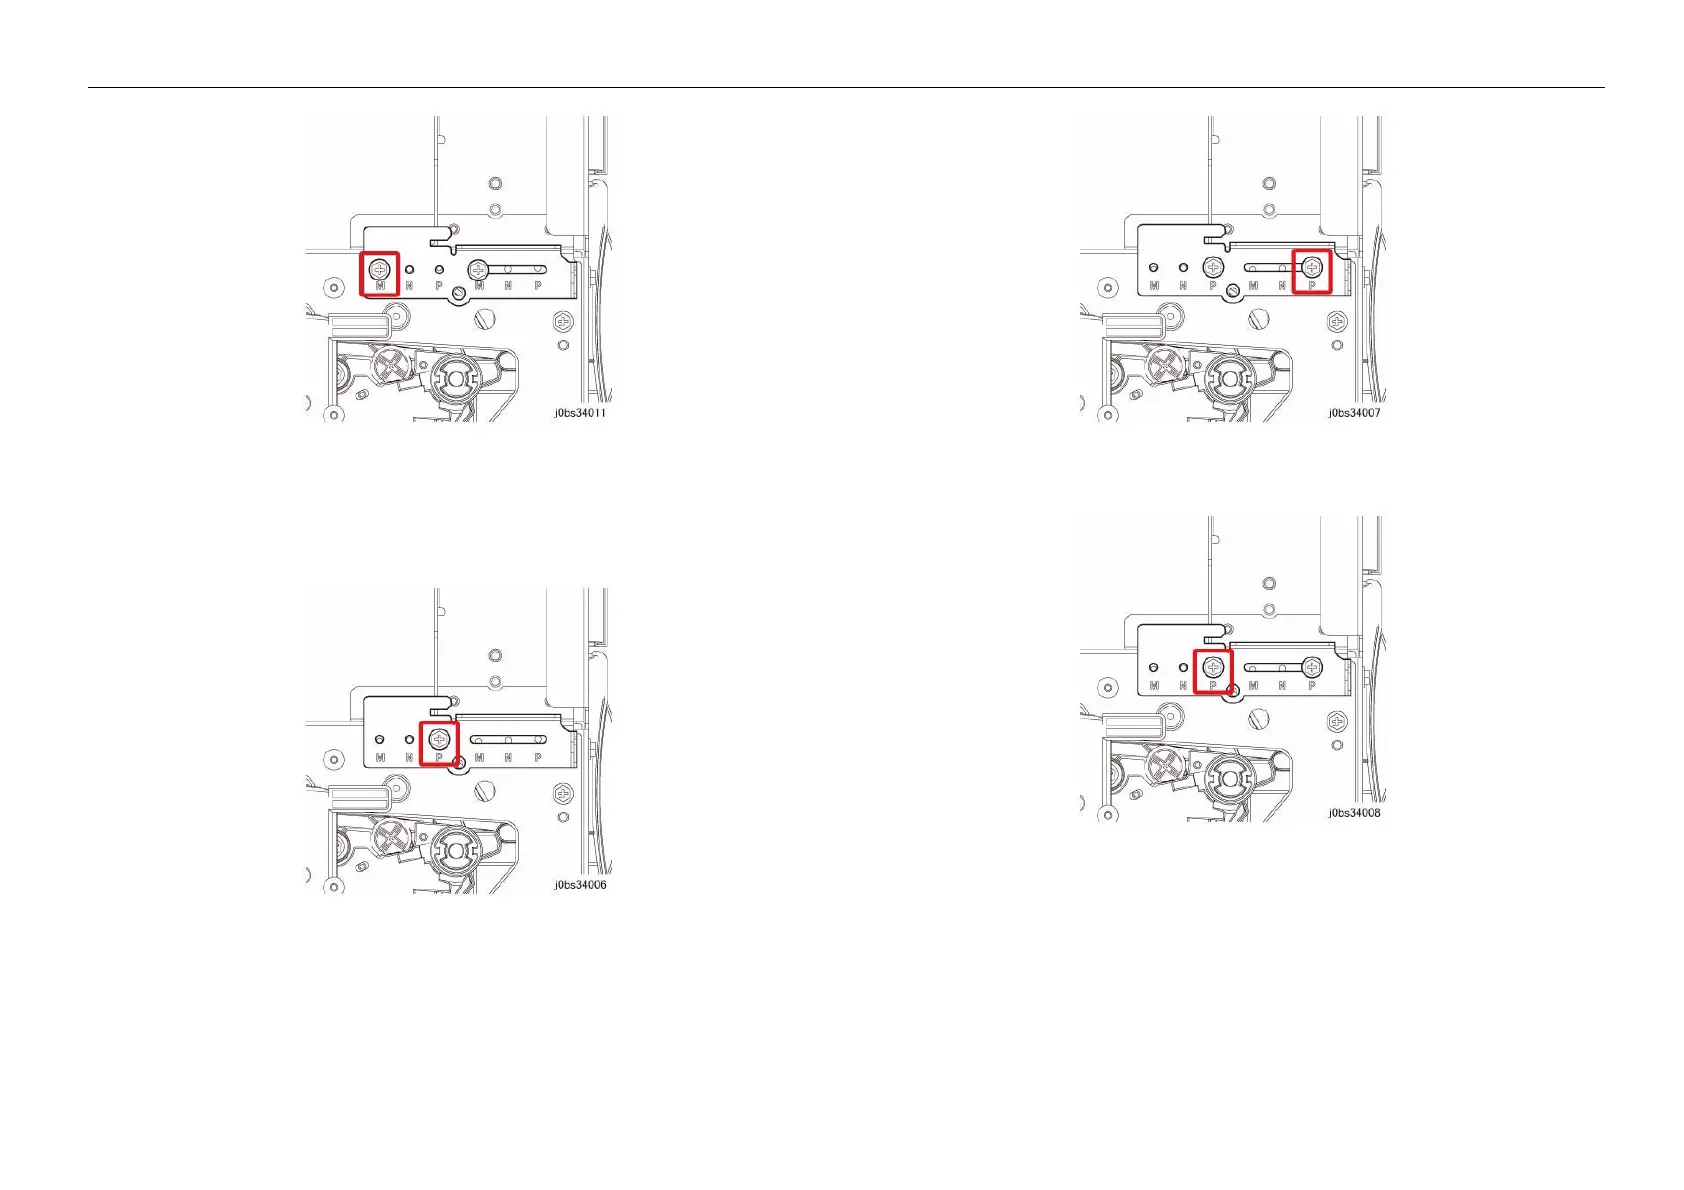
Figure 5 j0lbs34011
iv. Install the Fusing Unit.
(2) Move the adjustment bracket to N -> P when the paper wrinkle appears on the right side.
i. Temporary tack the Screw in the left P hole.
Figure 6 j0lbs34006
ii. Fasten the Screw in the right P hole.
Figure 7 j0lbs34007
iii. Tighten the left P Screw.
Figure 8 j0lbs34008
iv. Install the Fusing Unit.
3. Usage flow of the Alignment Adjustment Bracket
NOTE: Use this when pepr wrinkles (*1) has been generated due to interaction.
(1) Paper wrinkle due to interaction
• Paper wrinkle due to interaction between the Fusing Unit, Transfer, and Regi
• Cause: The positional relation between the various Sub Rolls is wrong, which degener-
ates the transport form of the paper and results in wrinkles being generated in the Fusing
Unit.

 Loading...


