05/2014
4-9
DC SC2020
Disassembly/Assembly and Adjustment
2. LPH
Version 1.1
REP 2.1.1 FFC Cable (Y, M, C, K)
Parts List on PL 2.1
Removal
WARNING
When turning OFF the power switch, check that the "Data"
lamp is OFF and that there is no Job in progress.
Turn OFF the Power Switch and make sure that the screen dis-
play or energy-saving LED is turned off.
Check that the power switch is OFF and unplug the power plug.
CAUTION
To prevent the light fatigue of the Drum, either wrap the removed
Xero Unit by using a sheet of black paper or store it in a black bag.
NOTE: Place the drop cloth or newspapers at the servicing area to
keep the site clean.
1. Prepare a sheet of black paper (x4) or a black bag (x4).
2. Remove Y,M,C,K of the Xero Unit. (REP 8.1.1)
3. Remove the Deve Unit of Y,M,C,K. (REP 5.1.1)
4. Remove the IBT Belt Unit. (REP 6.1.1)
5. Remove the Front Cover. (REP 19.1.1)
6. Remove the Inner Cover. (REP 19.1.2)
7. Remove the Right Cover. (REP 19.1.3)
8. Remove the Rear Cover. (REP 19.1.5)
9. Remove the HVPS. (REP 18.1.1)
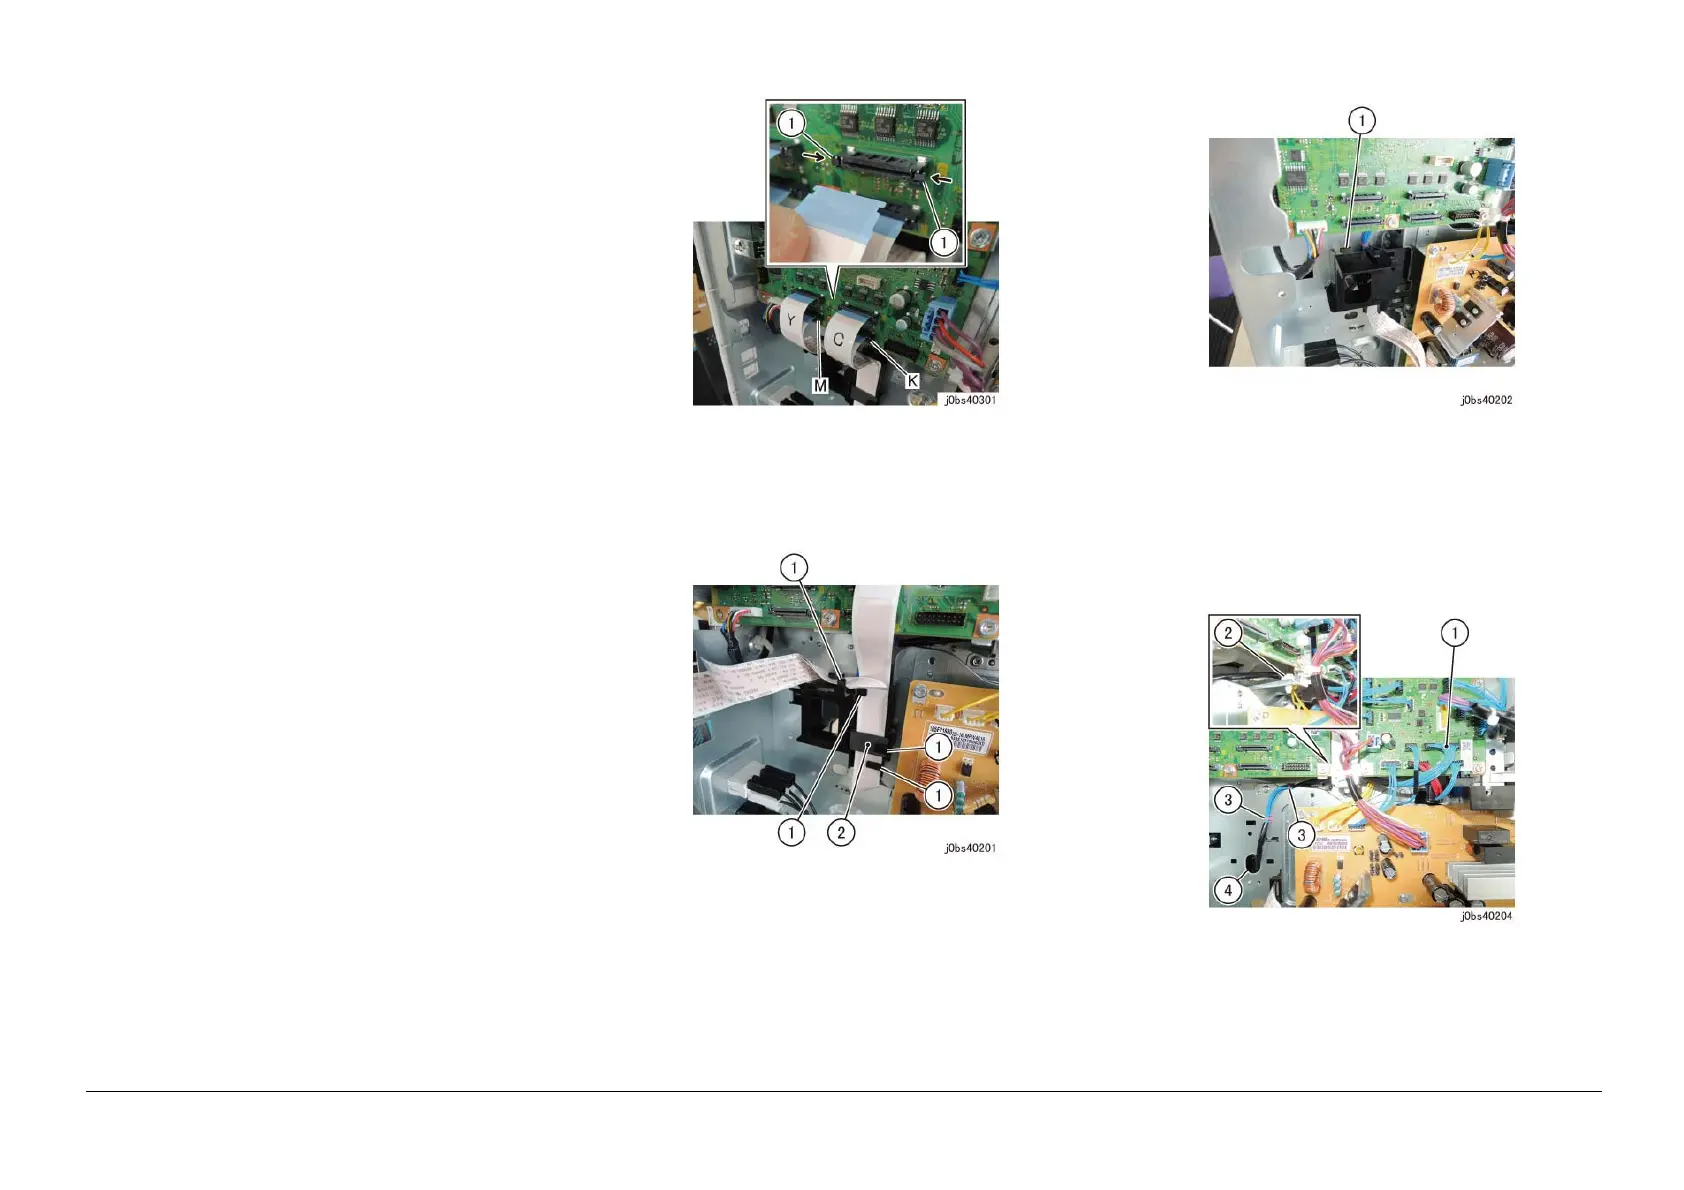
10. Remove the FFC Cable (x4) connection in the order of FFC
Cable C, K, Y, M. (Figure 1)
(1) Push Buttons (x2) simultaneously towards the direction of
the arrow and straightly remove the FFC Cable.
Figure 1 j0bs40301
11. Remove the FFC Cable from the FFC Cable Guide. (Figure 2)
(1) Remove the FFC Cable from Hook (x4).
(2) Leave the Core on the FFC Cable.
Figure 2 j0bs40201
12. Remove the FFC Cable Guide. (Figure 3)
(1) Release the Hook and remove the FFC Cable Guide.
Figure 3 j0bs40202
13. Remove the fixation of the Wire Harness from the Marking
Guide. (Figure 4)
(1) Disconnect the connector.
(2) Remove the cable band.
(3) Remove the cable band (x2).
(4) Place the Wire Harness inside the machine.
Figure 4 j0bs40204
14. Release the clamp and remove the wire harness. (Figure 5)
(1) Release the clamp and remove the wire harness.

 Loading...


