05/2014
4-20
DC SC2020
5. Development
Version 1.1
Disassembly/Assembly and Adjustment
REP 5.1.2 Dispenser Drive (YM)
Parts List on PL 5.1
Removal
WARNING
When turning OFF the power switch, check that the "Data"
lamp is OFF and that there is no Job in progress.
Turn OFF the Power Switch and make sure that the screen dis-
play or energy-saving LED is turned off.
Check that the power switch is OFF and unplug the power plug.
1. Remove the Toner Cartridge (Y, M). (PL 5.1)
2. Remove the Rear Cover. (REP 19.1.5)
3. Remove the Drive PWB. (REP 18.2.1)
4. Remove the ESS PWB. (REP 18.2.2)
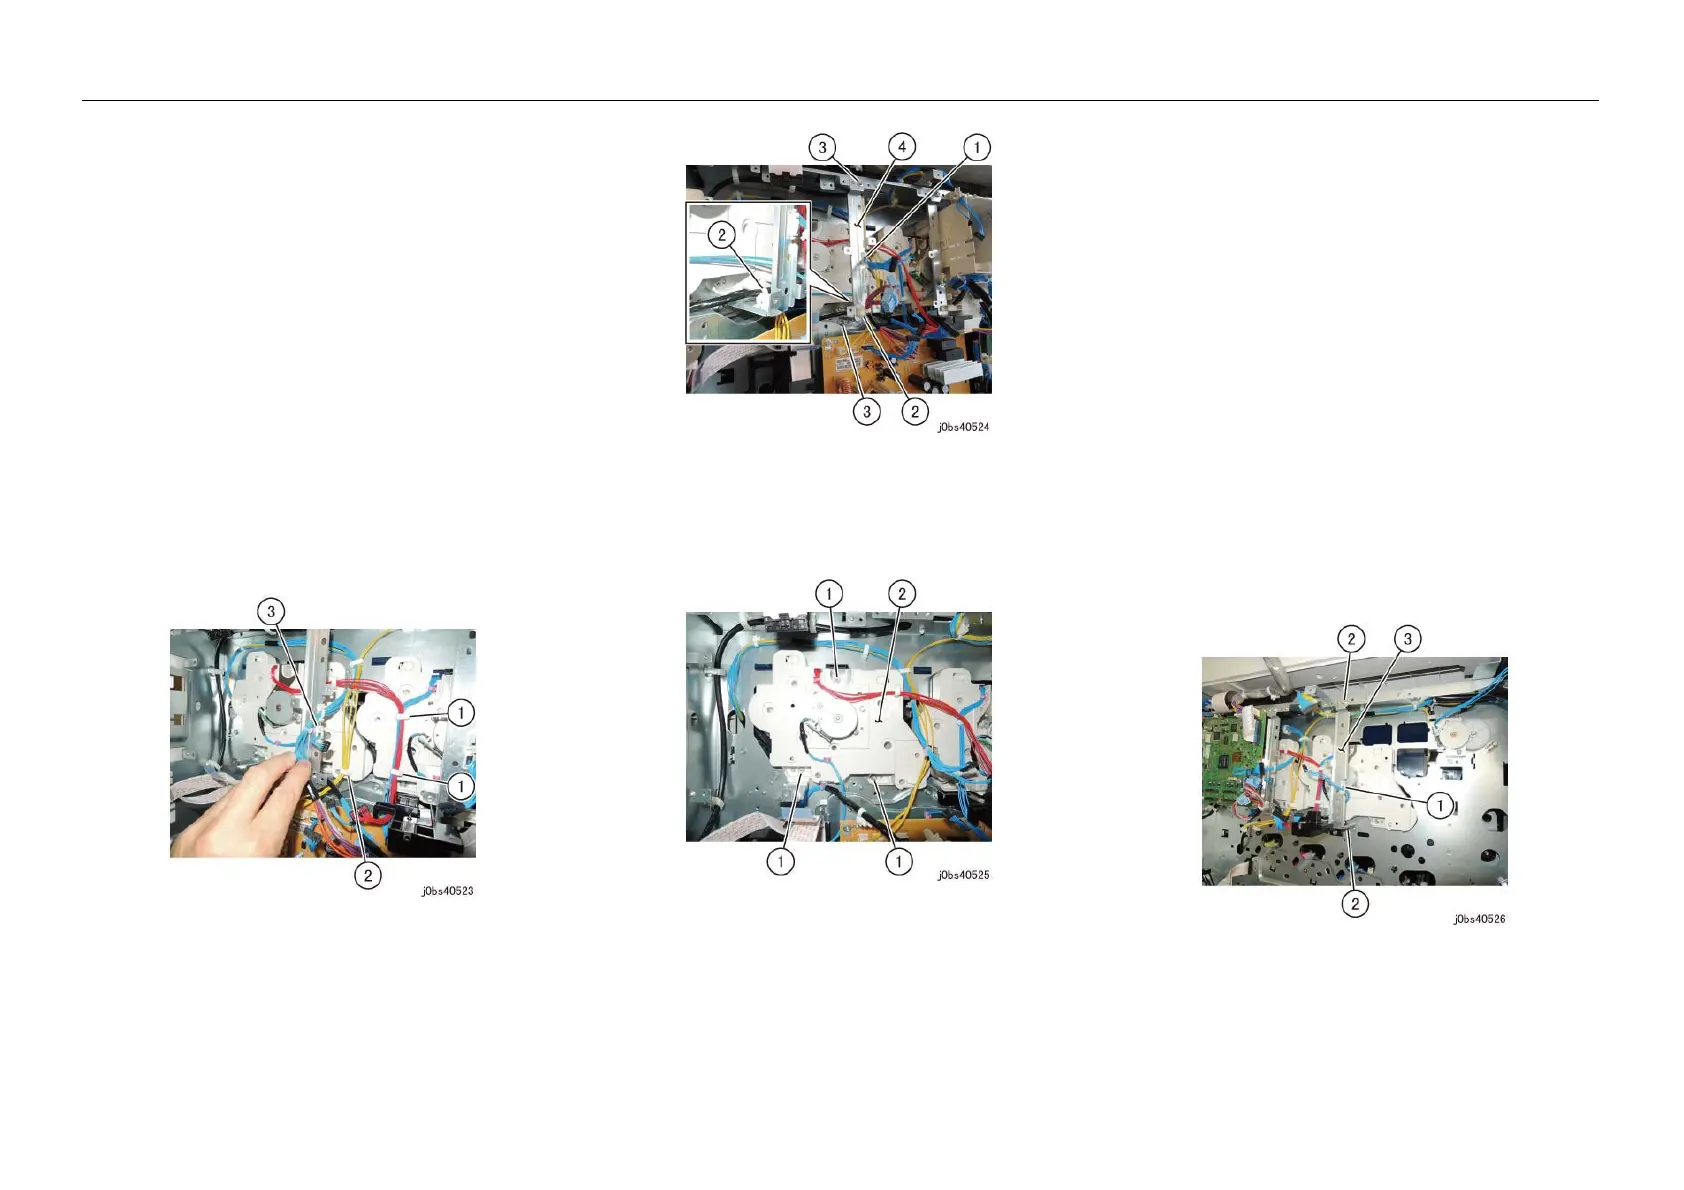
5. Release the Wire Harness of the Dispenser Drive (YM) from
the Clamp. (Figure 1)
(1) Release the clamp (x2) and remove the wire harness.
(2) Release the clamp and remove the wire harness.
(3) Release the clamp and remove the wire harness.
Figure 1 j0bs40523
6. Remove the PWB Bracket. (Figure 2)
(1) Release the clamp and remove the wire harness.
(2) Remove the cable band (x2).
(3) Remove the screw (x2).
(4) Remove the PWB Bracket.
Figure 2 j0bs40524
7. Remove the Dispenser Drive (YM). (Figure 3)
(1) Remove the screw (x3).
(2) Remove the Dispenser Drive (YM).
Figure 3 j0bs40525
Replacement
1. To install, carry out the removal steps in reverse order.
REP 5.1.3 Dispenser Drive (CK)
Parts List on PL 5.1
Removal
WARNING
When turning OFF the power switch, check that the "Data"
lamp is OFF and that there is no Job in progress.
Turn OFF the Power Switch and make sure that the screen dis-
play or energy-saving LED is turned off.
Check that the power switch is OFF and unplug the power plug.
1. Remove the Toner Cartridge (C, K). (PL 5.1)
2. Remove the Rear Cover. (REP 19.1.5)
3. Remove the Drive PWB. (REP 18.2.1)
4. Remove the ESS PWB. (REP 18.2.2)
5. Remove the Dispenser Drive (YM). (REP 5.1.2)
6. Remove the LVPS. (REP 18.3.1)
7. Remove the PWB Bracket. (Figure 1)
(1) Release the clamp and remove the wire harness.
(2) Remove the screw (x2).
(3) Remove the PWB Bracket.
Figure 1 j0bs40526
8. Remove the Wire Harness of the Dispenser Drive (YM) from
the Dispenser Drive (CK). (Figure 2)
(1) Release the clamps (x2).
(2) Remove the Wire Harness from the Clamp (x2).

 Loading...


