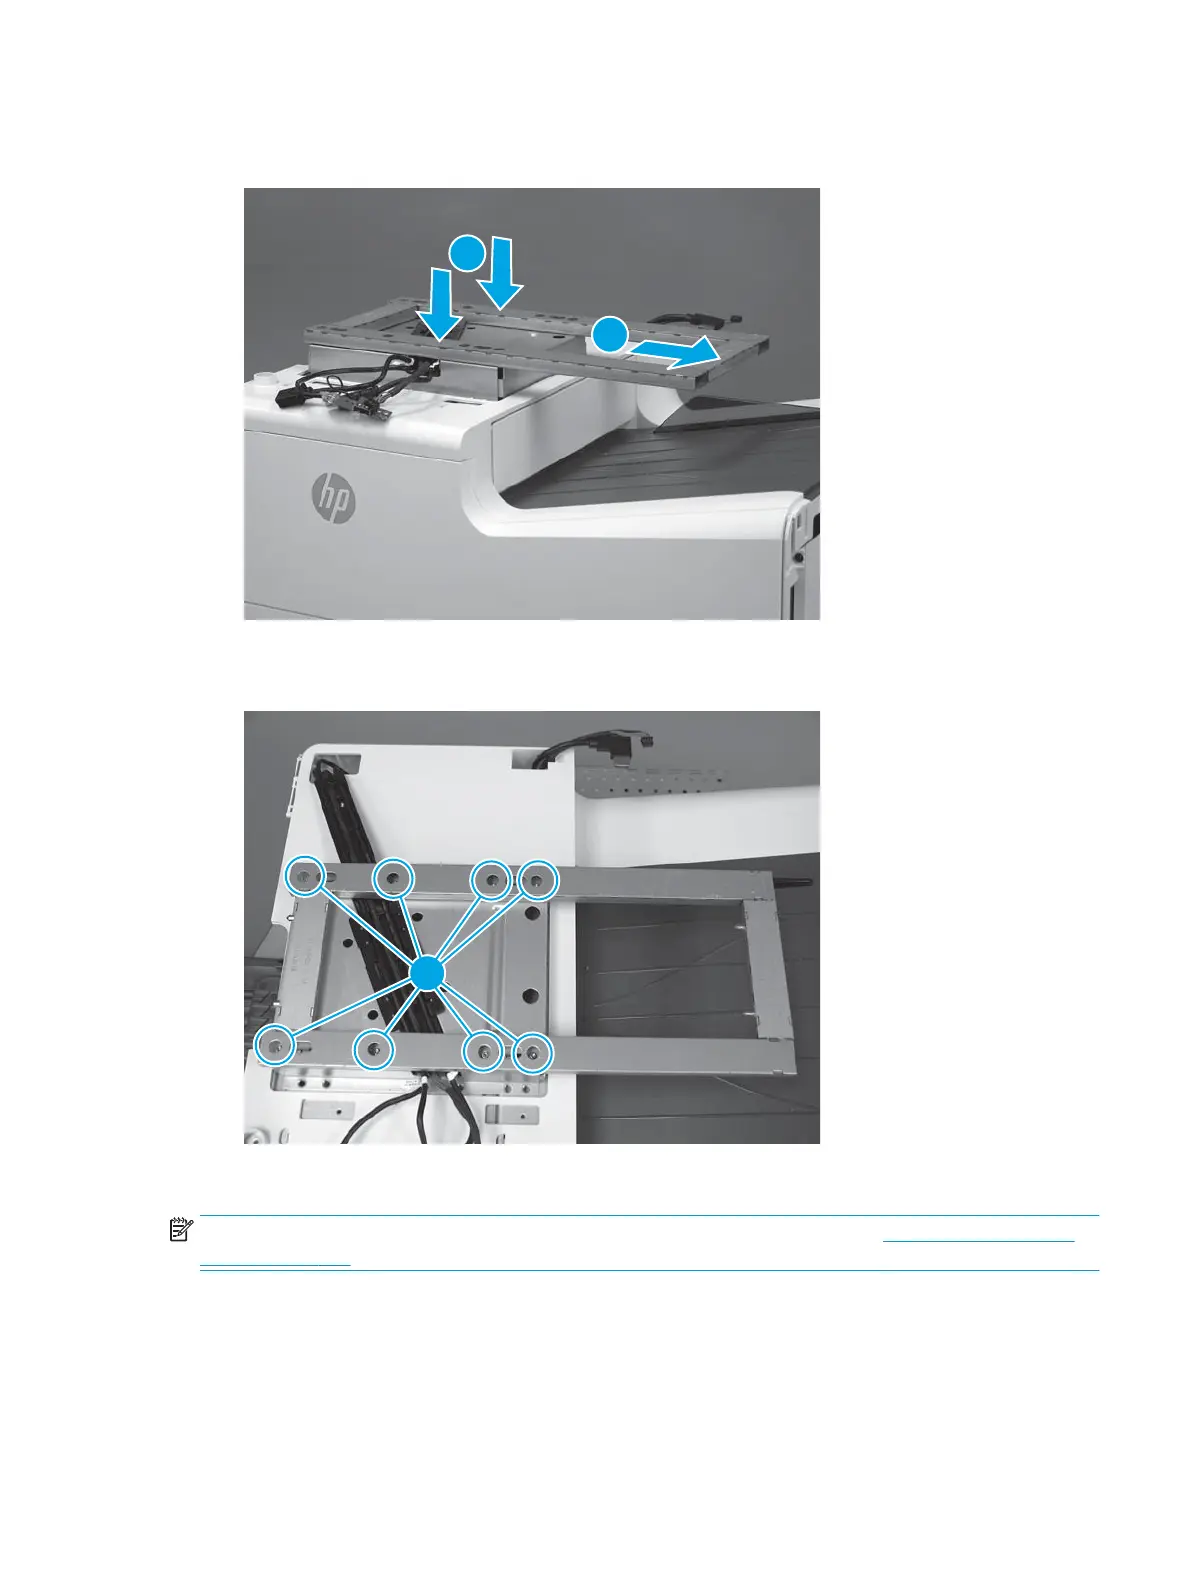
10. Position the bracket on the printer, and then slide the bracket to the right to engage it.
Figure 1-367 Slide the bracket right
11. Install eight screws (callout 1).
Figure 1-368 Install eight screws
Step 16: Install the top cover (556)
NOTE: This step is for the 556 printer. For the 586 printer, skip this step and go to Step 17: Install the rear
cover on page 248.
1. Optional step: If a replacement top cover is being installed, install the output bin ap by exing the
center of the ap and installing the right- and left-side hinge pins in the holes in the cover.
ENWW Removal and replacement procedures 245
 Loading...