Post service test
Make sure that the printer initializes to a Ready state.
Send a fax from the printer to verify that the fax function is operating correctly.
Send a fax to the printer to verify that the fax function is operating correctly.
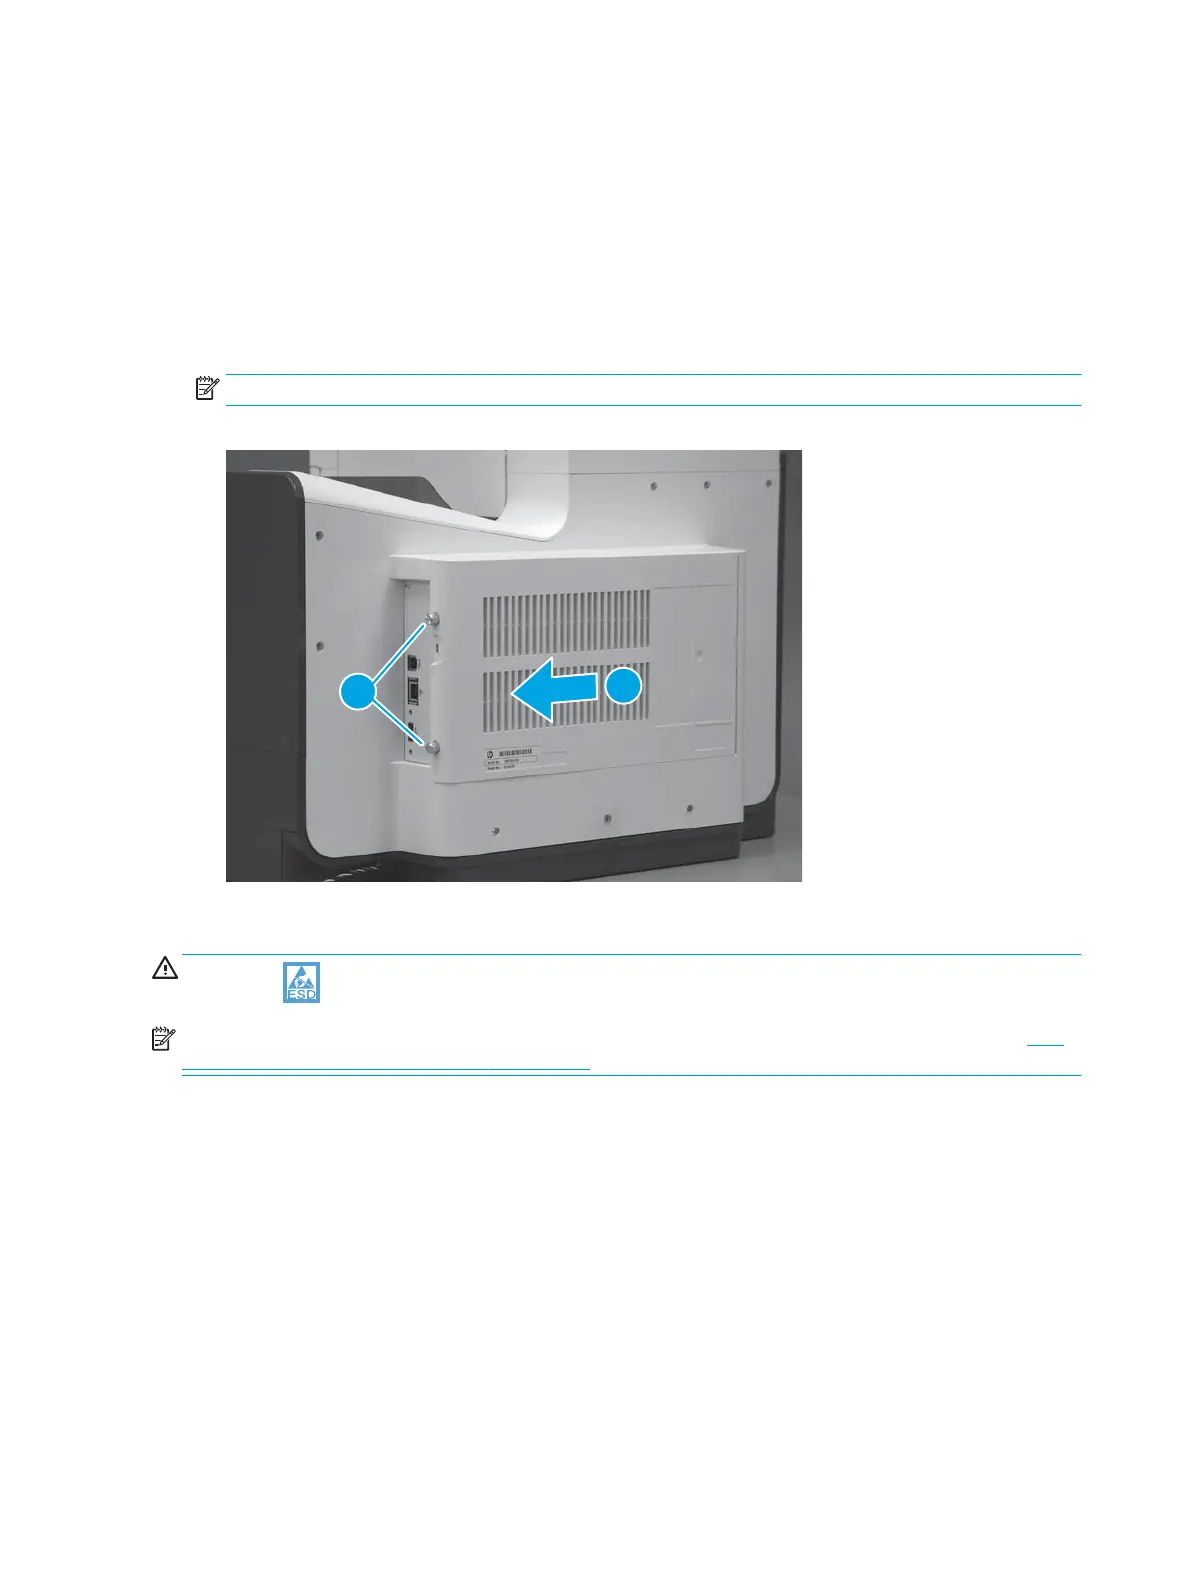
Step 1: Remove the formatter cover
▲
Remove two thumb screws (callout 1), and then slide the cover o of the printer to remove it (callout 2).
NOTE: The thumb screws are not captive and are easily lost.
Figure 1-980 Remove the formatter cover
Step 2: Remove the fax printed-circuit board (PCA)
CAUTION:
ESD-sensitive part.
NOTE: 586f/z printers only. If a fax accessory is being installed for the 586dn, skip this step and go to Step
3: Unpack the replacement assembly on page 593.
1. Locate the fax PCA (callout 1) on the formatter.
592 Chapter 1 Removal and replacement ENWW
 Loading...