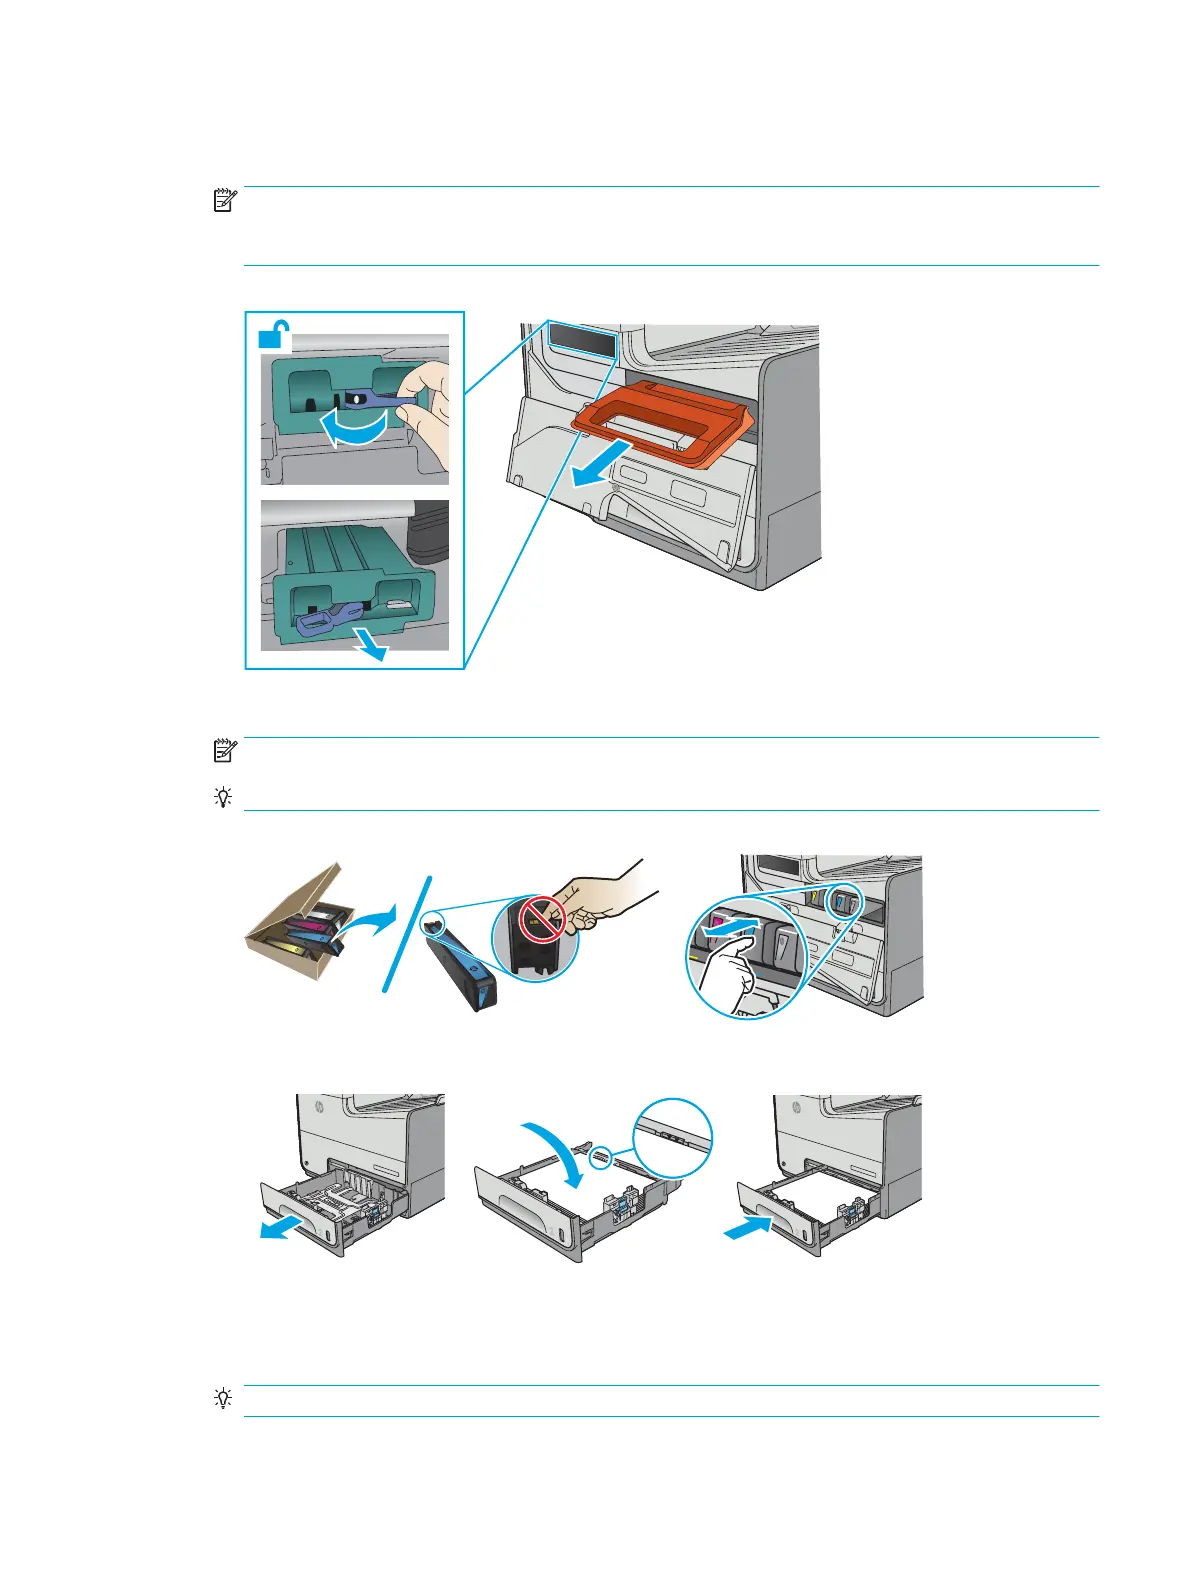
3. Remove the cartridge orange shipping restraint insert that is recessed in the cartridge cavity and the
blue print-head restraint.
NOTE: The restraint insert and print-head restraint are reusable. Use the shipping restraint and print-
head restraint from the replacement print mechanism (PM) to prepare the defective unit (DU) for
shipping.
Figure 1-785 Remove the shipping restraint and the print-head restraint
4. Install the startup cartridges included with the kit and load paper into Tray 2.
NOTE: Adjust the sliding paper guides to the correct paper size for this tray.
TIP: Leave the cartridge door open to make removing the right cover easier.
Figure 1-786 Install the startup cartridges
Step 2: Remove the right cover (outer) (PM)
1. Pull out on the top corners of the right cover to release the top edge of the cover.
TIP: Open the cartridge door to make removing the cover easier.
ENWW Removal and replacement procedures 479
 Loading...