Post service test
Make sure that the printer initializes to a Ready state.
Print a conguration page to make sure that the printer is functioning correctly.
Step 1: Remove the formatter cover
▲
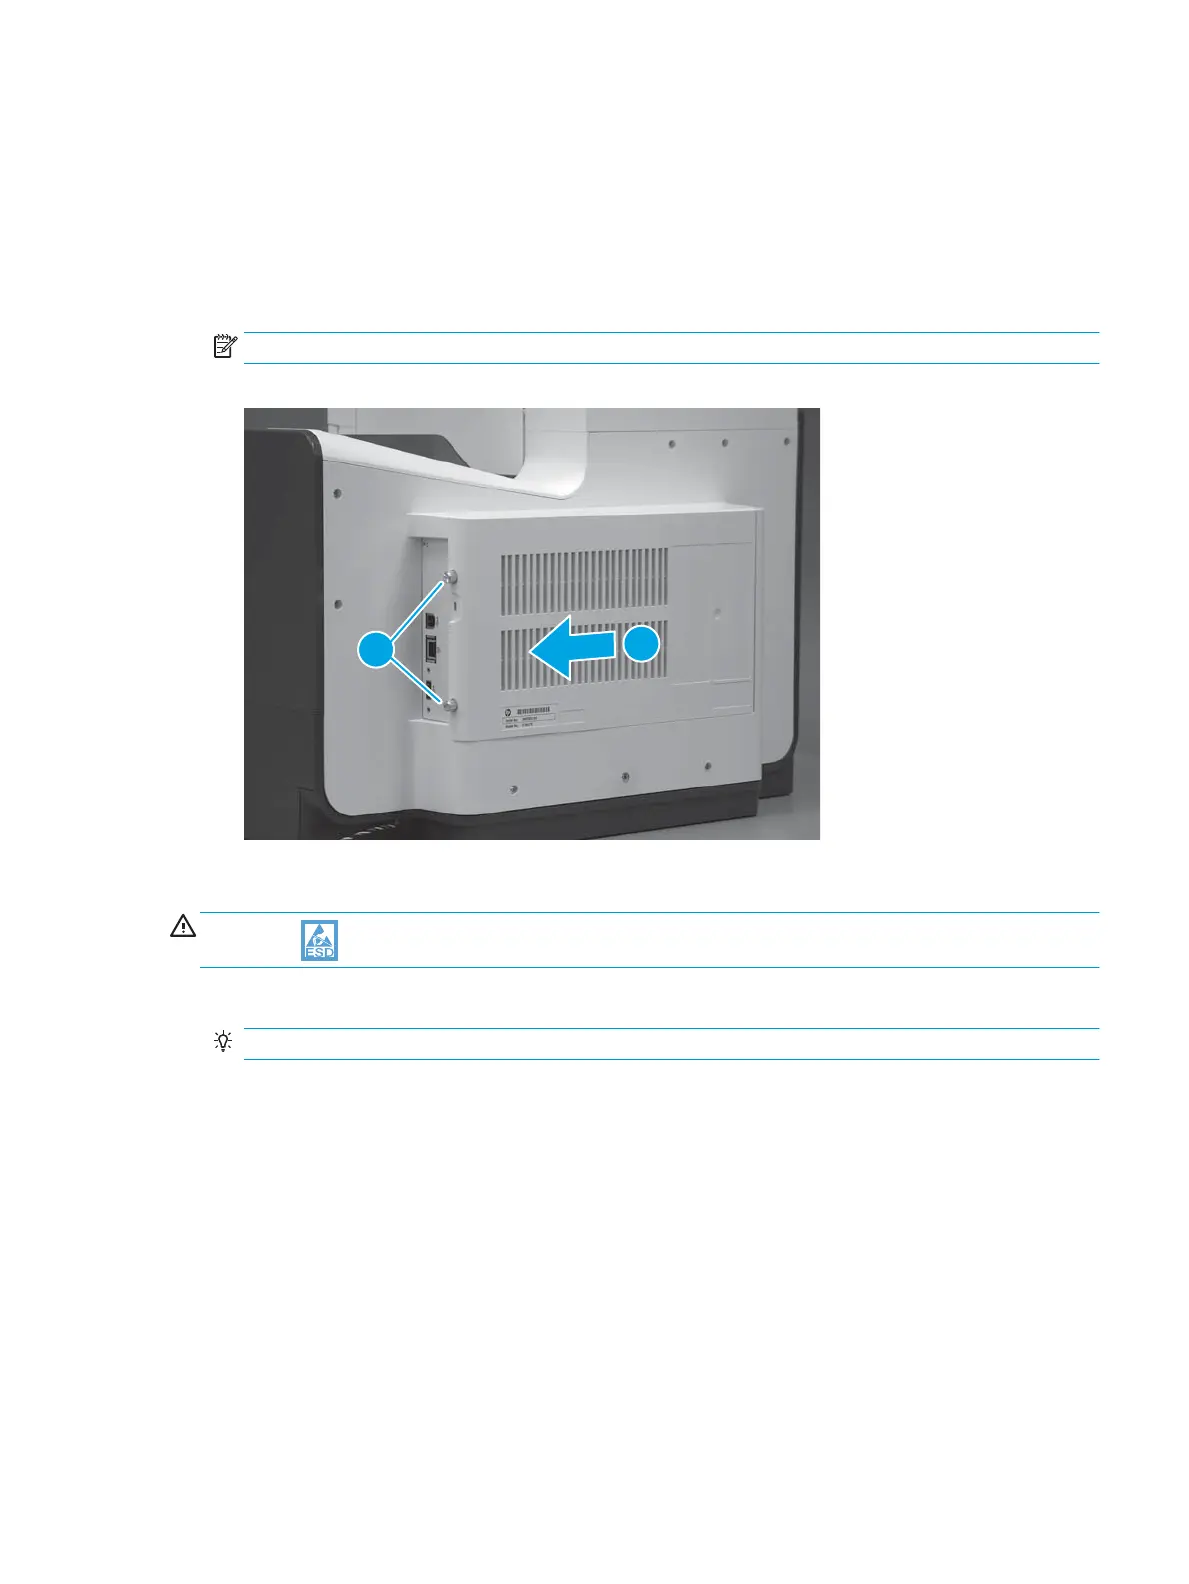
Remove two thumb screws (callout 1), and then slide the cover o of the printer to remove it (callout 2).
NOTE: The thumb screws are not captive and are easily lost.
Figure 1-67 Remove the formatter cover
Step 2: Remove the hard-disk drive (HDD)
CAUTION:
ESD-sensitive part.
1. Remove two thumbscrews (callout 1).
TIP: It might be easier to remove the lower thumbscrew if one connector (callout 2) is disconnected.
ENWW Removal and replacement procedures 61
 Loading...