2. Remove four screws (callout 1), and then remove two brackets (callout 2).
Figure 1-759 Remove the screws and brackets
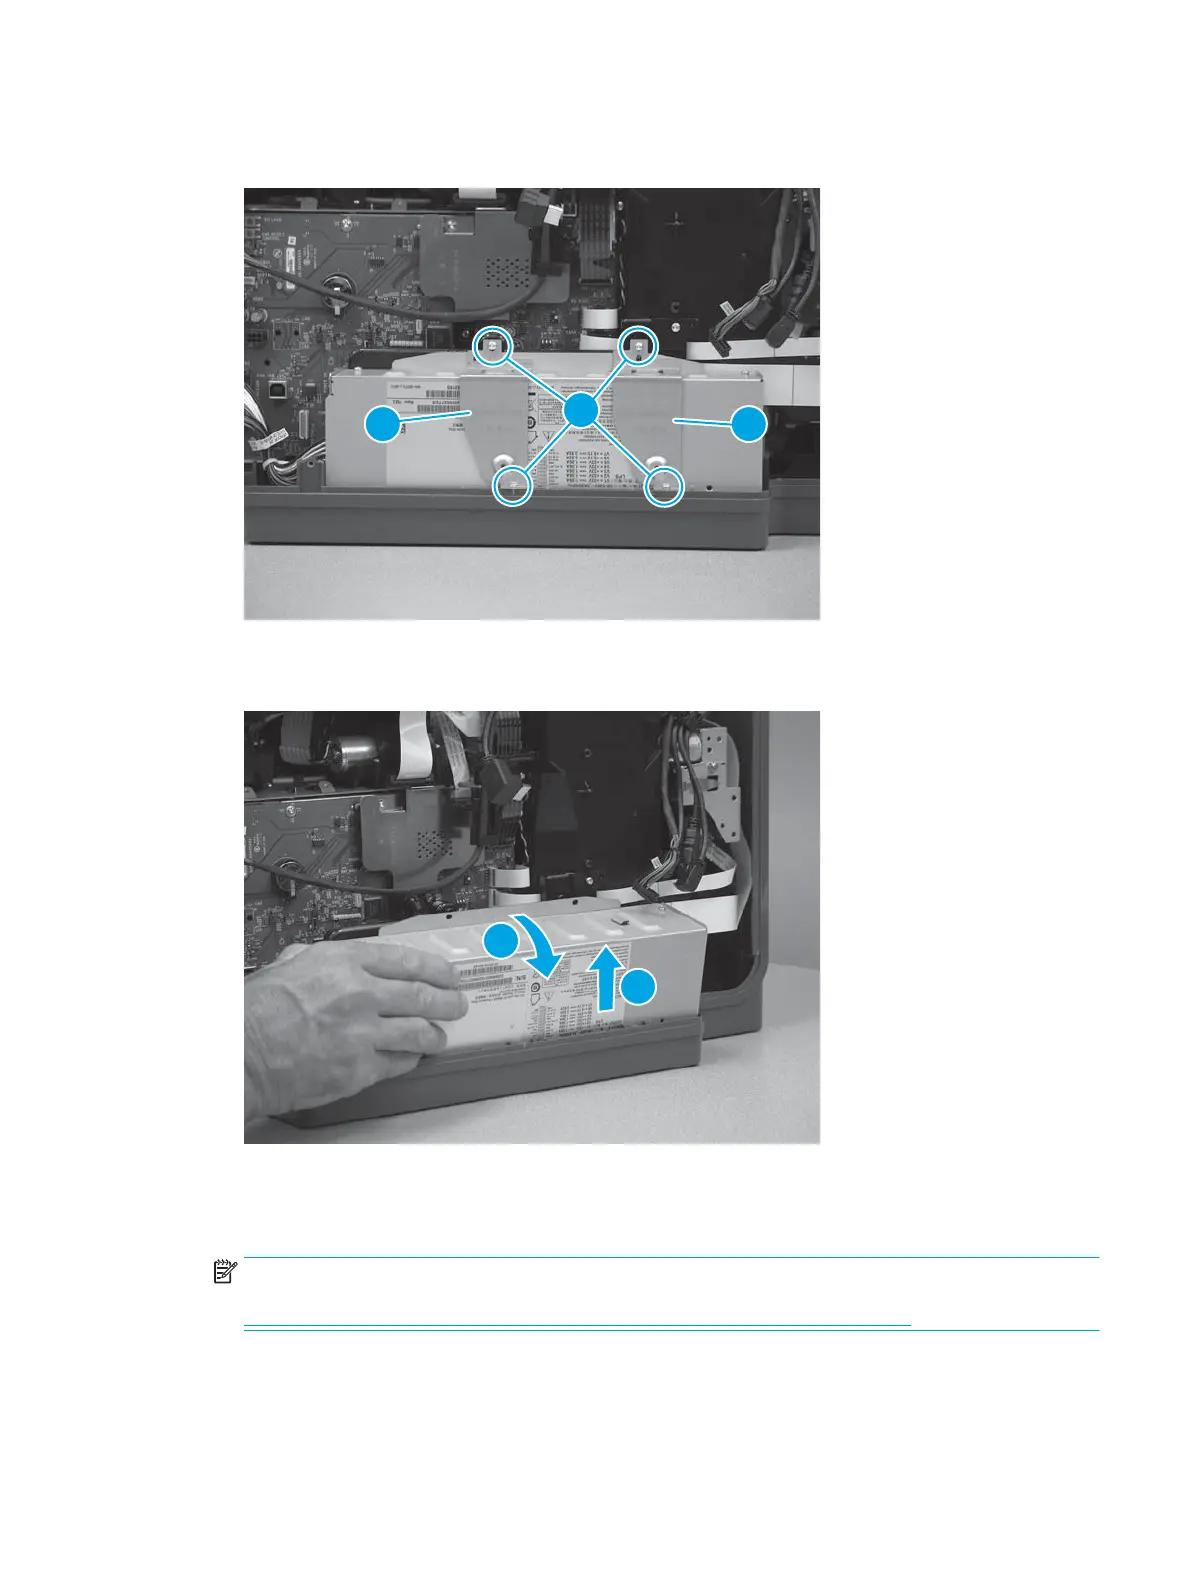
3. Slightly rotate the top of the power supply away from the printer, and then remove the assembly.
Figure 1-760 Remove the power supply
Step 7: Unpack the replacement assembly
1. Dispose of the defective part.
NOTE: HP recommends responsible disposal of the defective part.
http://www8.hp.com/us/en/hp-information/environment/product-recycling.html
ENWW Removal and replacement procedures 459
 Loading...