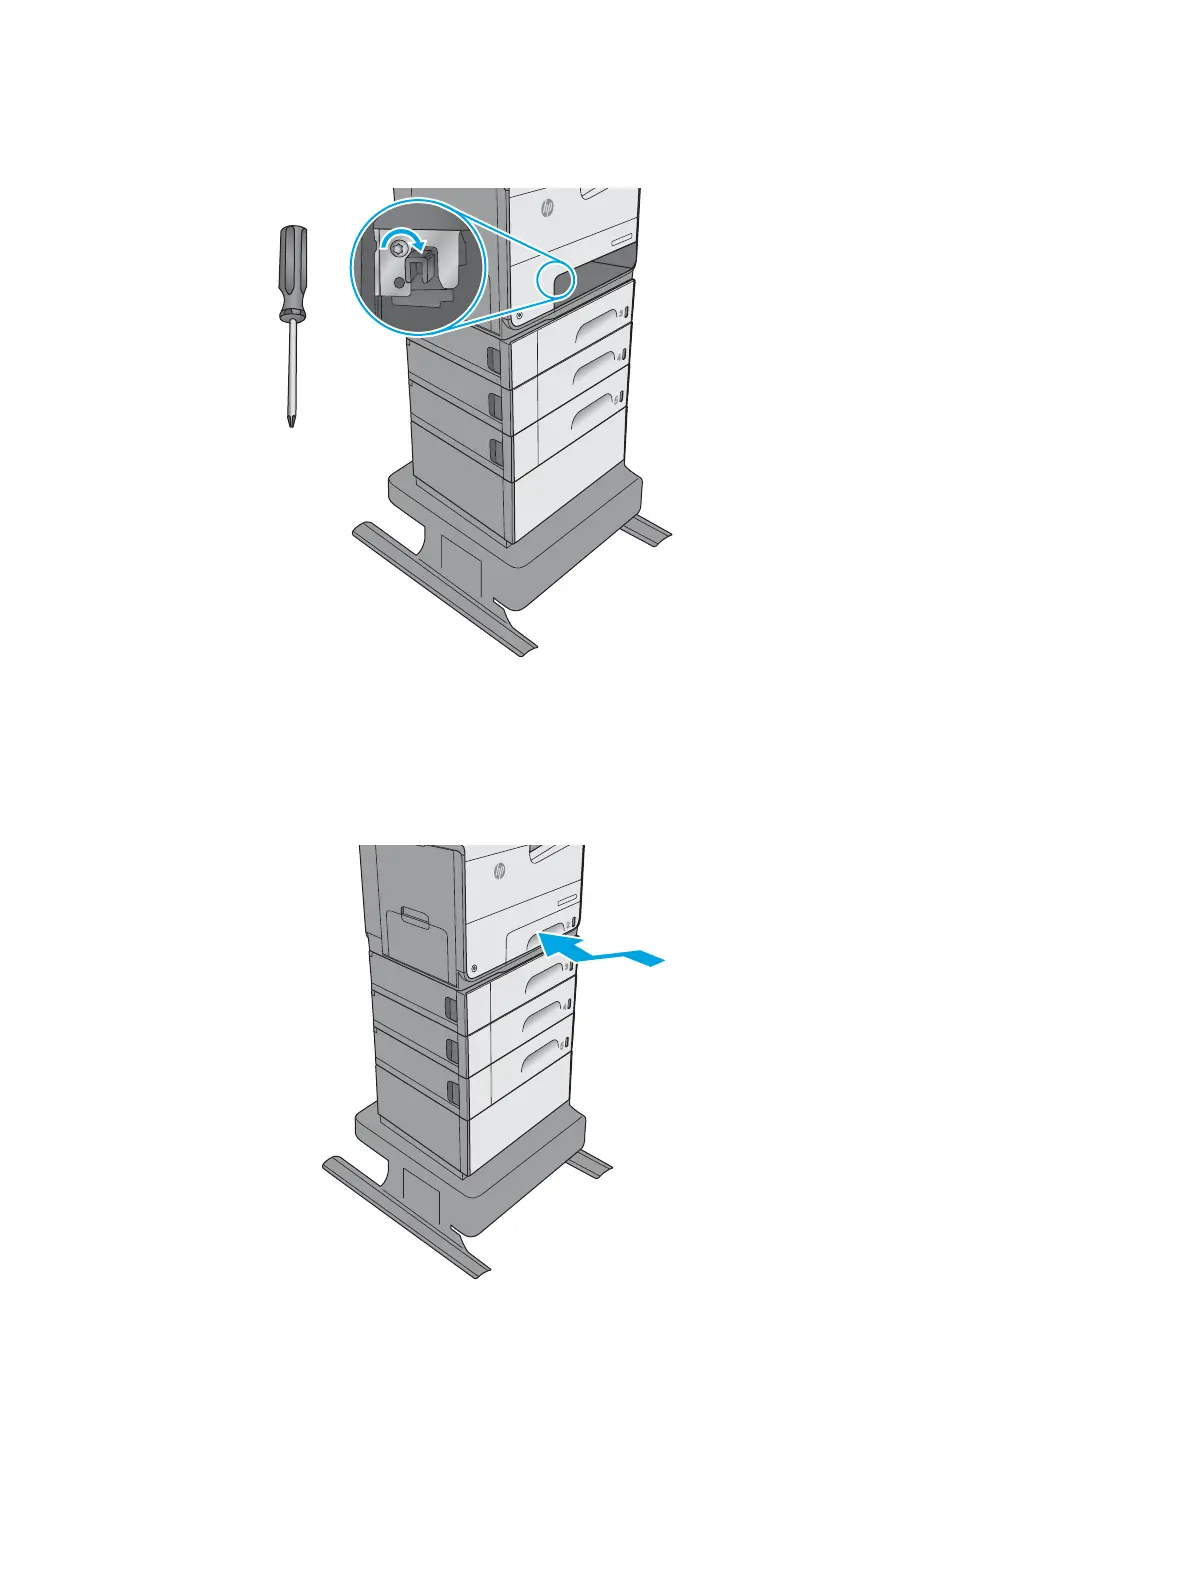
6. Install one screw.
Figure 1-574 Install one screw
Off
i
c
e
j
e
t
E
nt
erpri
s
e C
olo
r
X55
6
#T10 TORX
Step 5: Install the tray
▲
With the tray at a slight angle, align the sides of the tray with the rails in the accessory, and then slide
the tray straight into the printer to install it.
Figure 1-575 Align the tray
Offic
e
jet
E
nte
r
pr
i
s
e
C
ol
o
r
X
55
6
ENWW Removal and replacement procedures 353
 Loading...