5. Rotate the top of the assembly out and away from the printer, and then remove the assembly.
Figure 1-879 Remove the formatter and cage
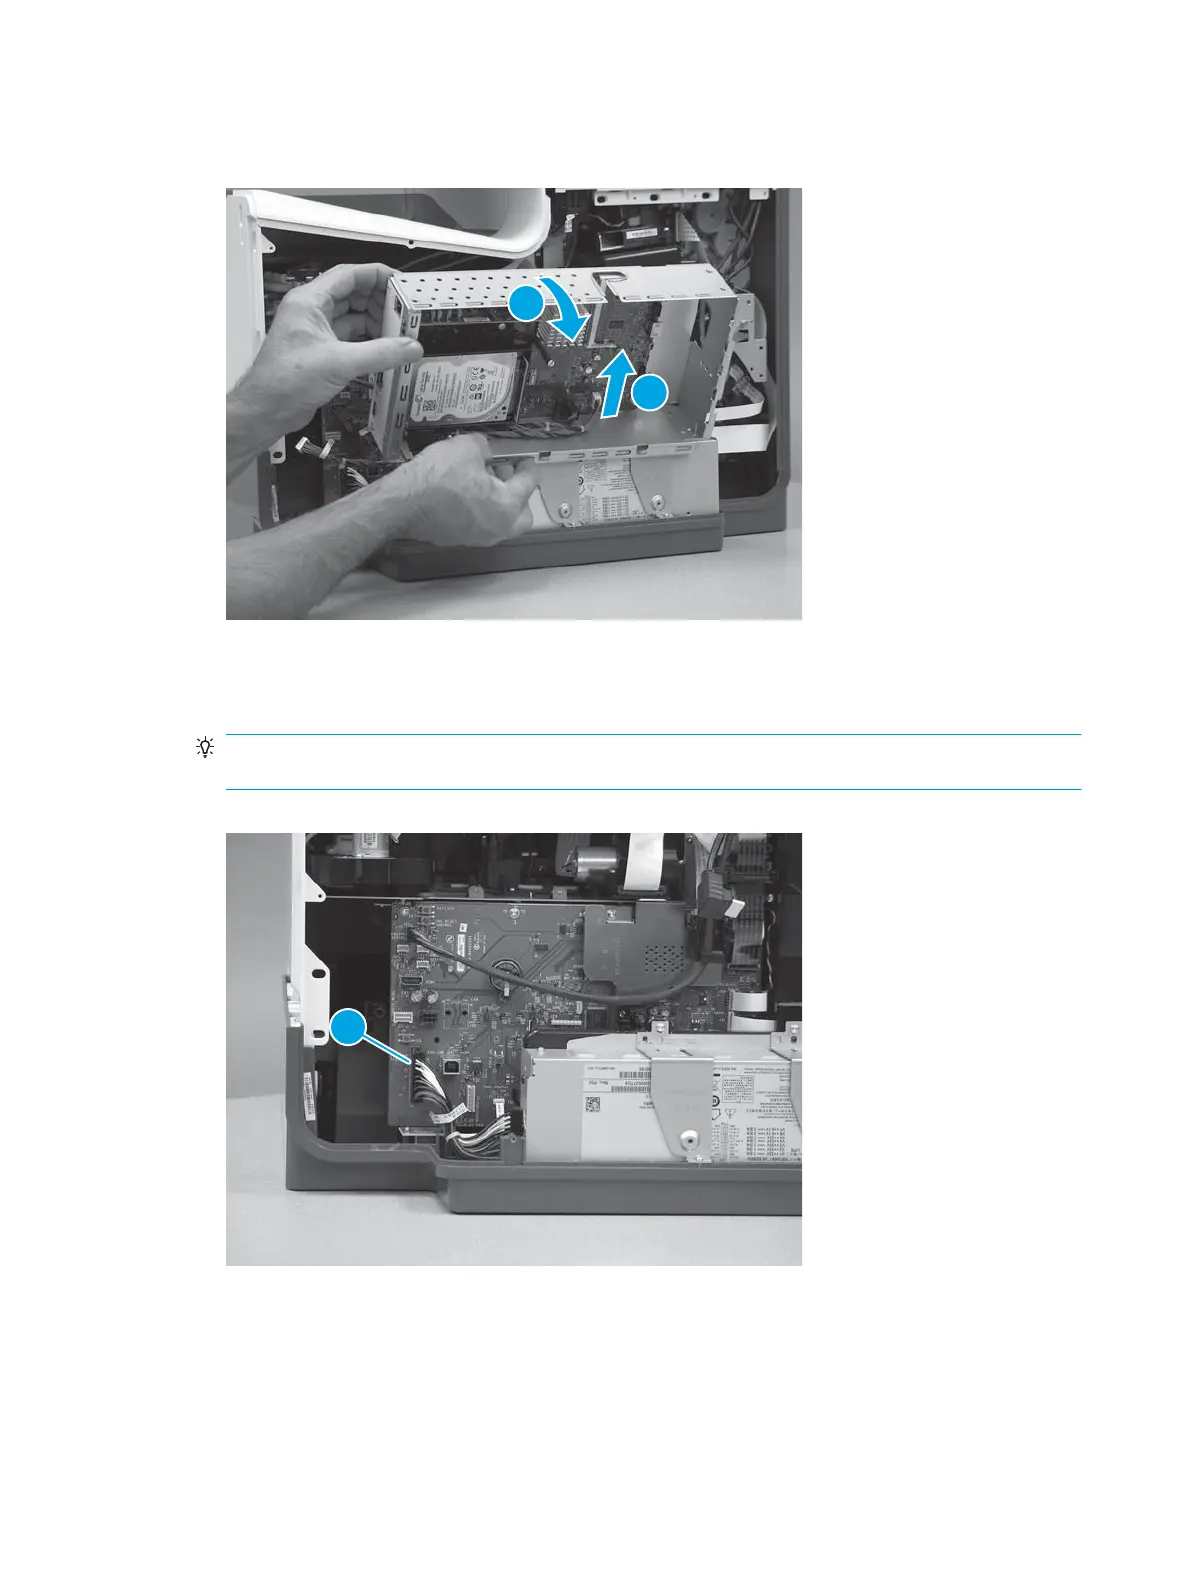
Step 10: Remove the power supply (DU)
1. Disconnect one connector (callout 1)
TIP: This connector might take more than normal force to disconnect connect. Release a small locking
tab while pulling the connector straight out to remove it.
Figure 1-880 Disconnect one connector
532 Chapter 1 Removal and replacement ENWW
 Loading...