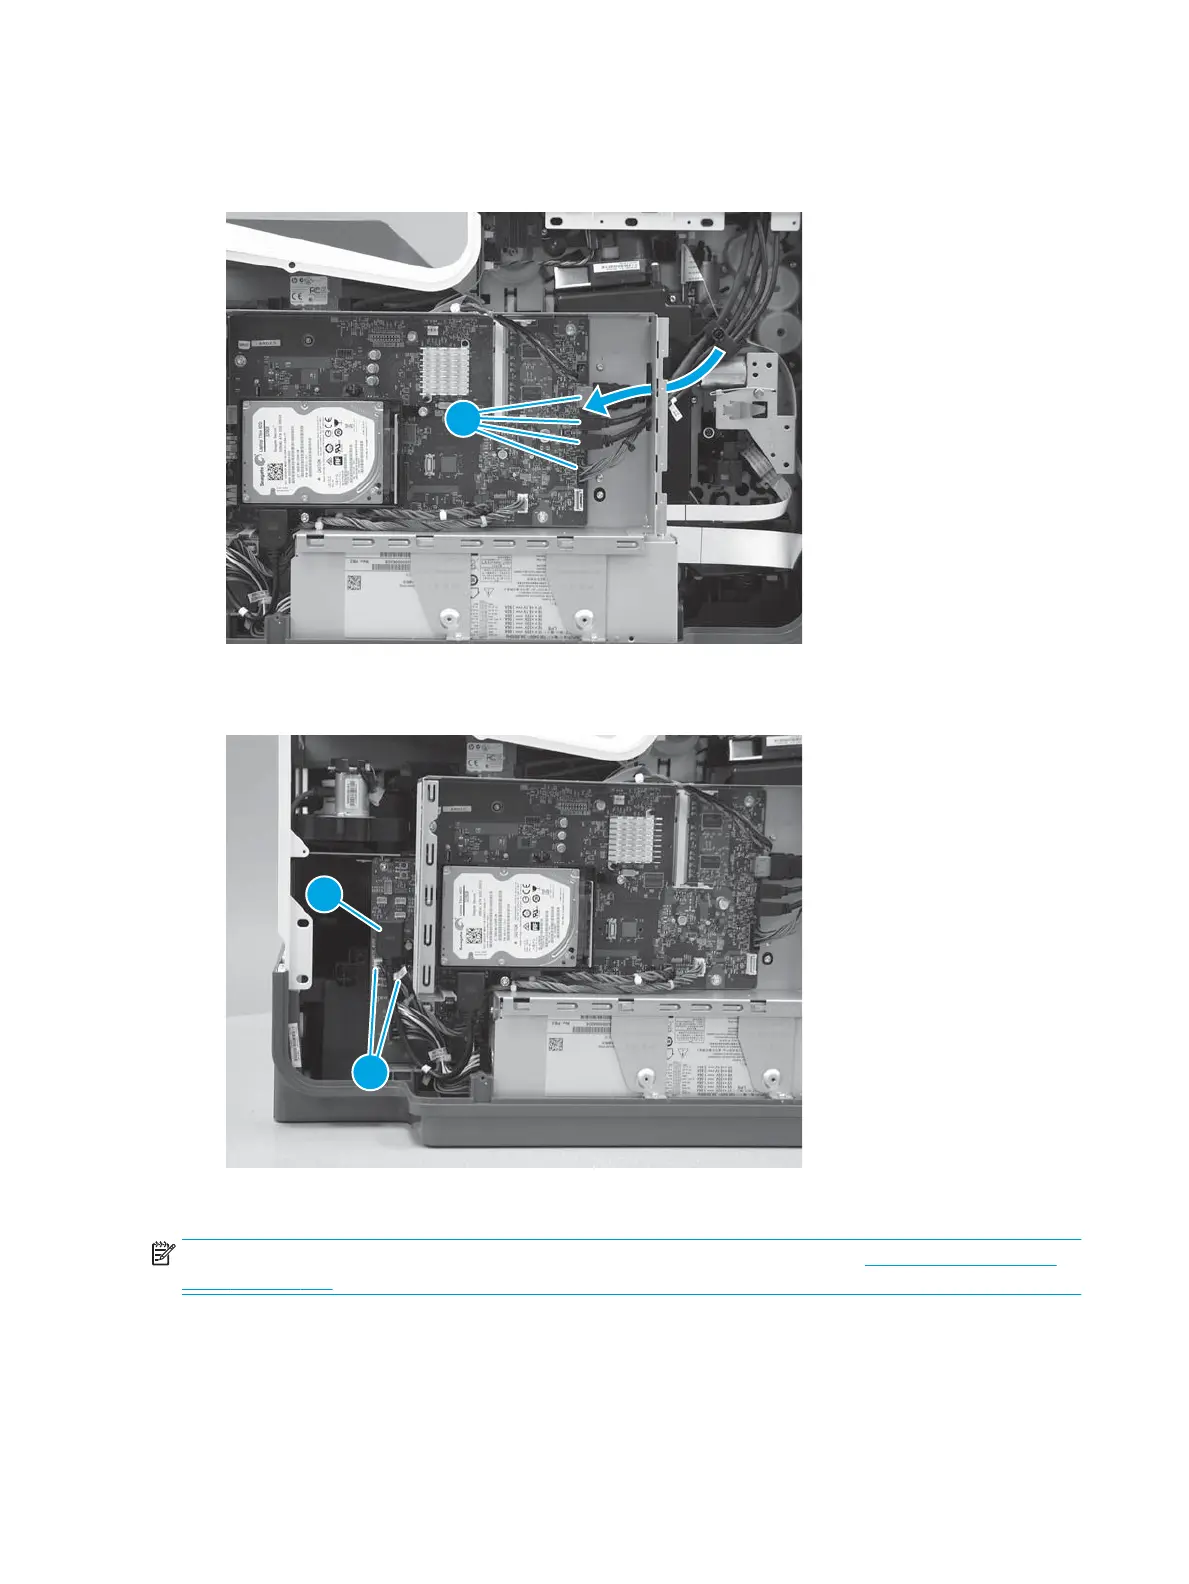
4. Pass the cables and wire harness through the opening in the formatter cage, and then connect four
connectors (callout 1).
Figure 1-767 Connect connectors
5. Connect one HDMI cable (callout 1), and then connect two connectors (callout 2).
Figure 1-768 Connect connectors
Step 10: Install the formatter and formatter cage (586)
NOTE: This step is for the 586 printer. For the 556 printer, skip this step and go to Step 11: Install the rear
cover on page 467.
1. Install the formatter and formatter cage in the printer.
464 Chapter 1 Removal and replacement ENWW
 Loading...