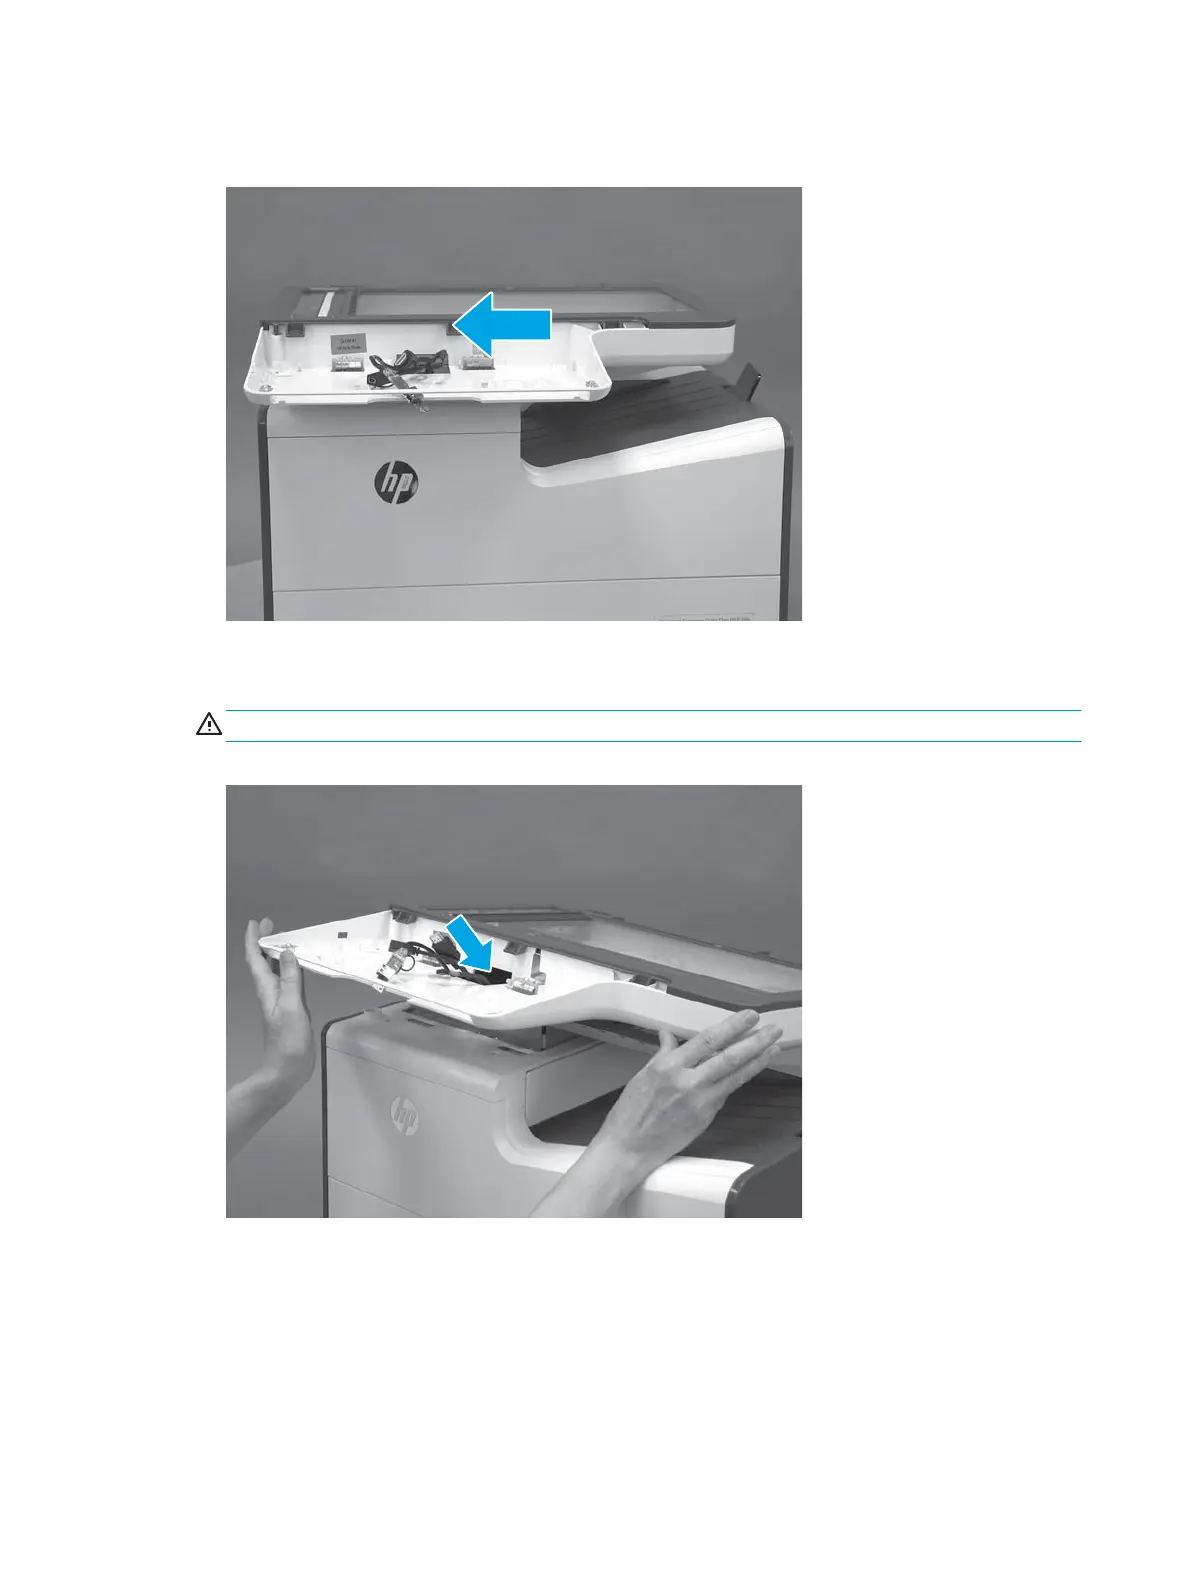
8. Slightly slide the SSA toward the left side of the printer to release it.
Figure 1-694 Slide the SSA left
9. Slightly lift the front of the SSA up, and then pass the wire harnesses and cables through the opening in
the SSA chassis.
CAUTION: The SSA is not captive on the printer base. Do not let it fall o of the printer base.
Figure 1-695 Pass the wire harnesses and cables through the opening
424 Chapter 1 Removal and replacement ENWW
 Loading...