CAUTION: Do not touch the gray spongy portion of the rollers. Skin oils can cause image-quality problems.
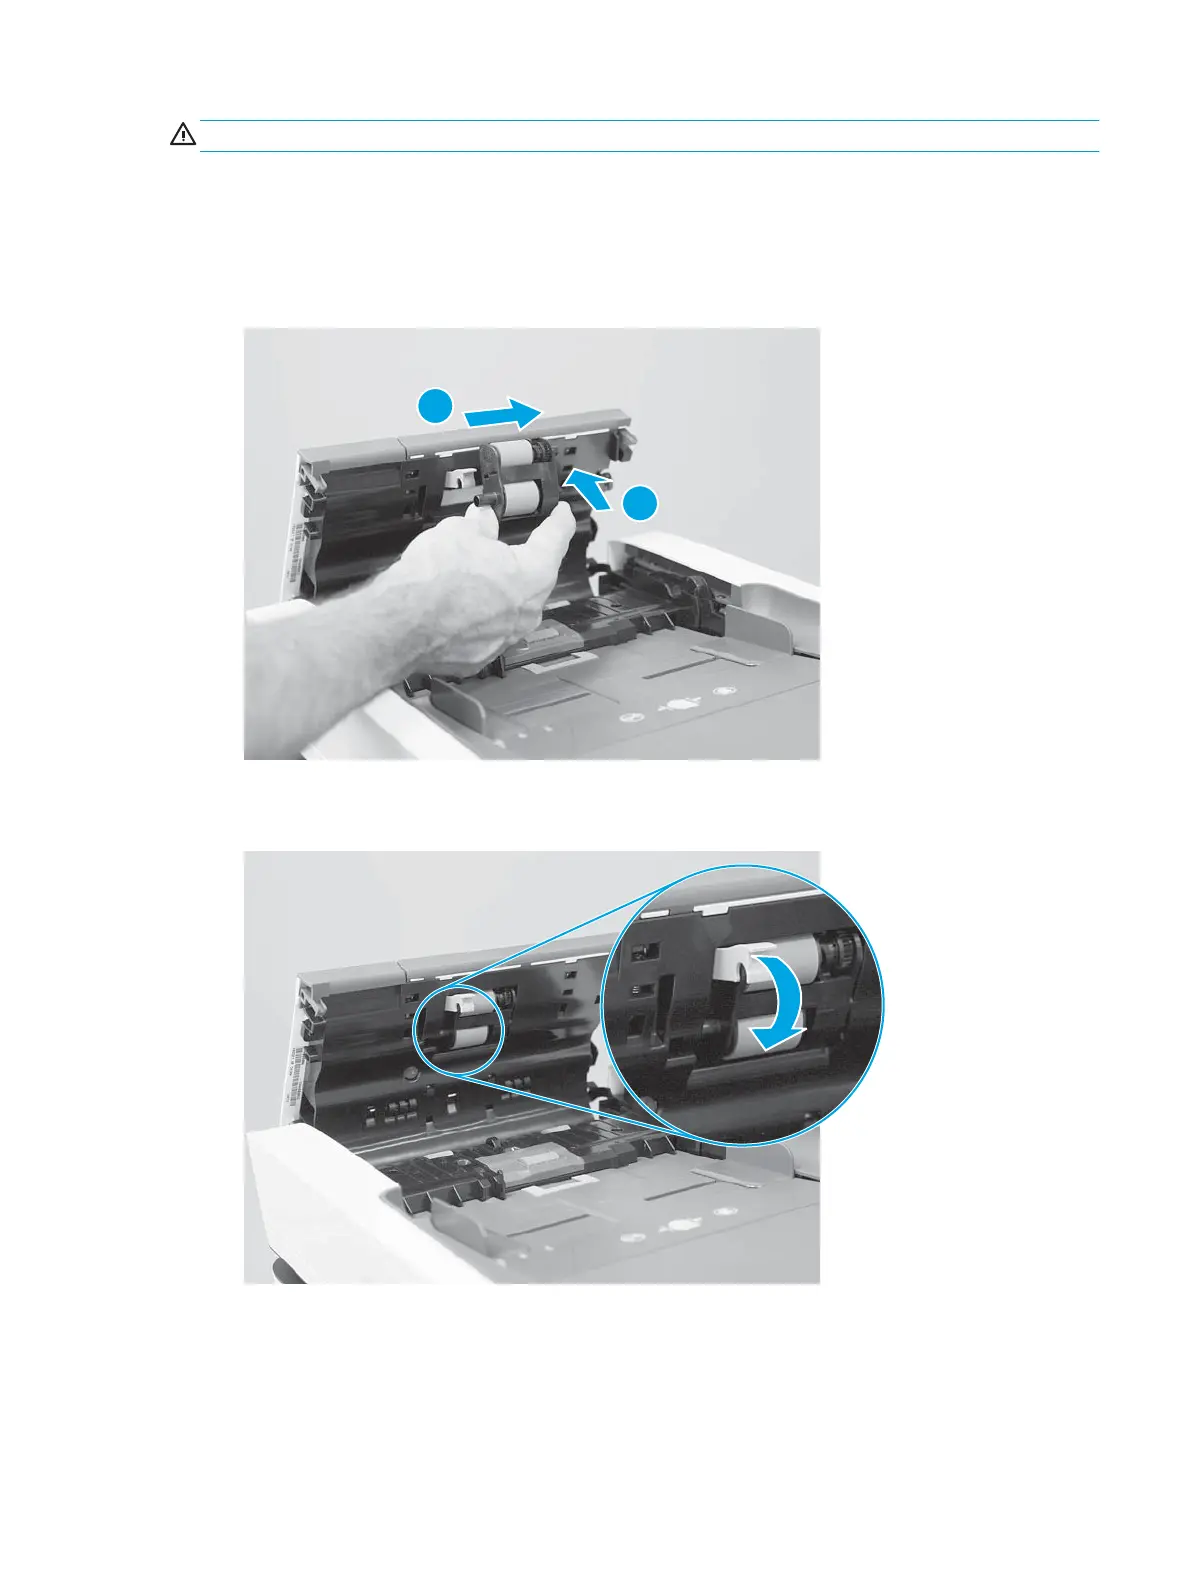
1. Position the roller assembly in the holder (callout 1) with the drive shaft end of the assembly facing
toward the rear of the printer.
Slide the assembly toward the rear of the printer to engage the two keyed drive shafts with the two
drive bushings (callout 2).
Figure 1-977 Install the roller assembly
2. Lower the blue lever until it snaps over the roller assembly solid shaft.
Figure 1-978 Close the blue lever
ENWW Removal and replacement procedures 589

 Loading...


