3. With the front of the ISA tilted up, pass the wire harnesses and cables through the opening in the ISA
chassis.
CAUTION: The ISA is not captive on the printer base. Do not let it fall o of the printer base.
Figure 1-529 Pass the wire harnesses and cables through the opening
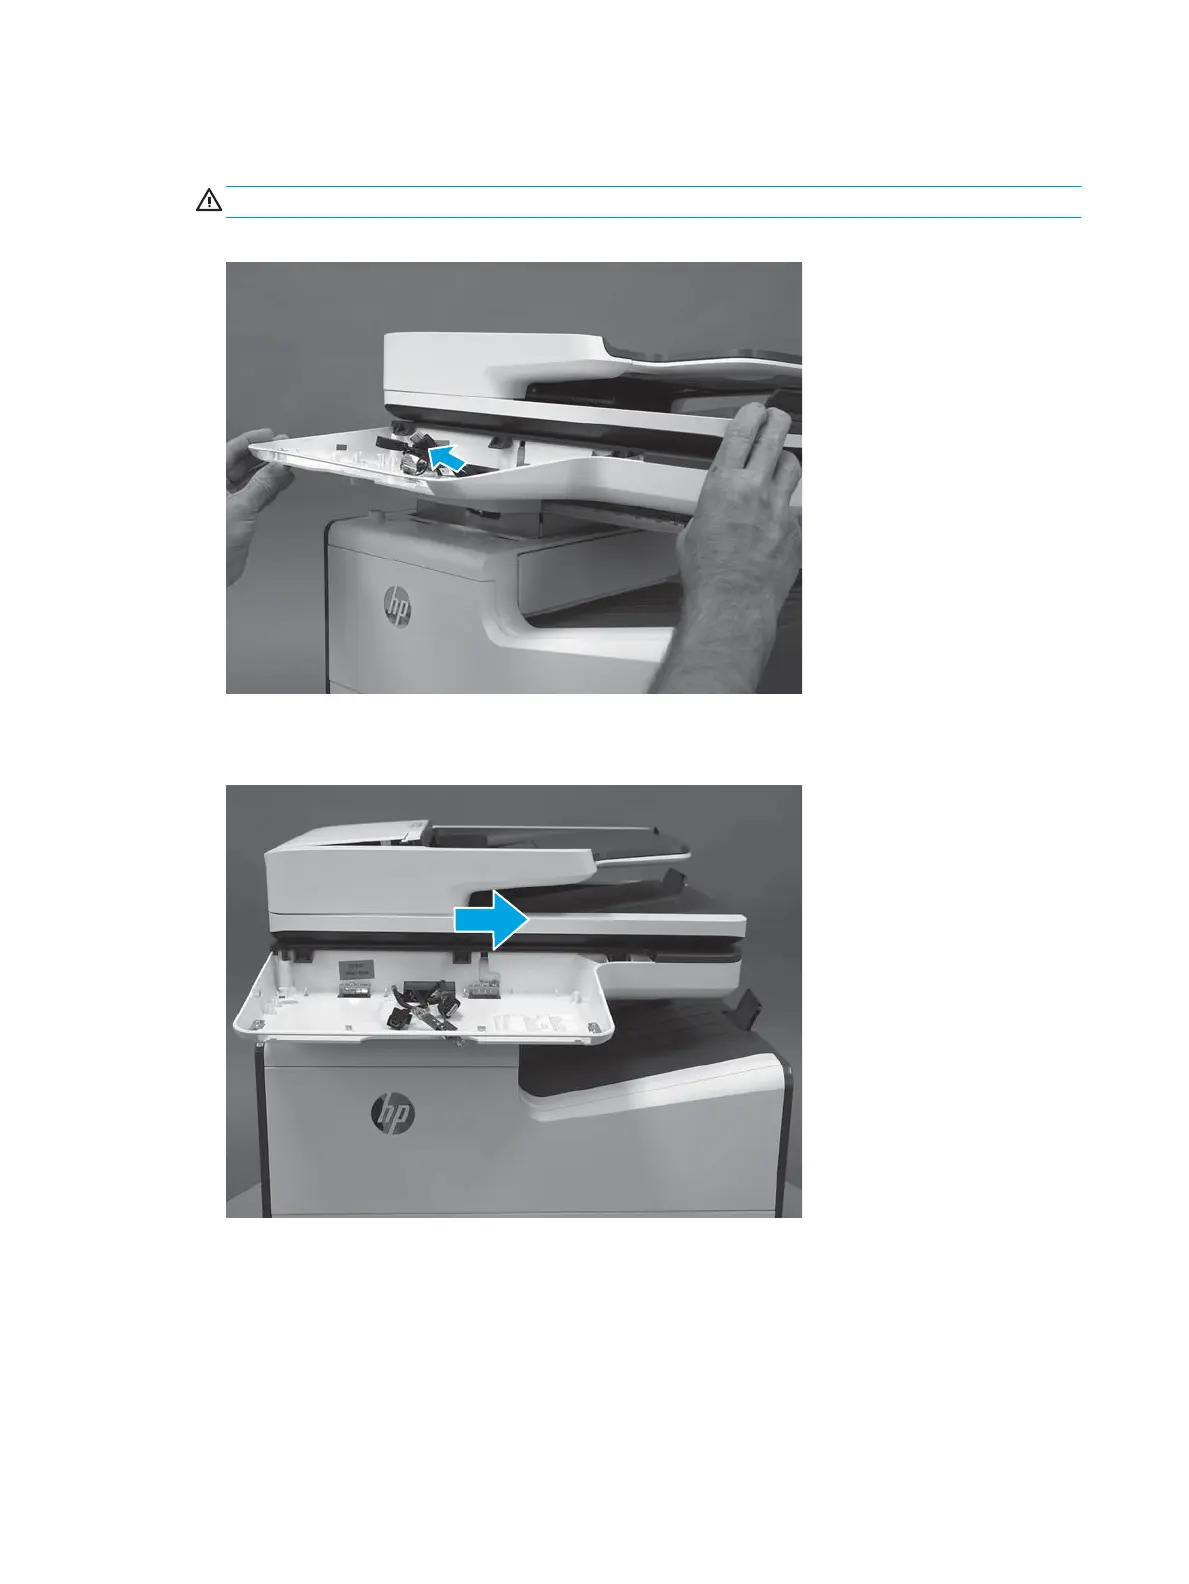
4. Lower the front of the ISA, and then slightly slide it toward the right side of the printer to engage it.
Figure 1-530 Slide the ISA right
328 Chapter 1 Removal and replacement ENWW
 Loading...