2-45
DS35-W00 May. 2007
CLUTCHCLUTCH
CLUTCHCLUTCH
CLUTCH
TRANSMISSIONTRANSMISSION
TRANSMISSIONTRANSMISSION
TRANSMISSION
ENGINEENGINE
ENGINEENGINE
ENGINE
FRONT AXLEFRONT AXLE
FRONT AXLEFRONT AXLE
FRONT AXLE
STEERINGSTEERING
STEERINGSTEERING
STEERING
BARKEBARKE
BARKEBARKE
BARKE
ELECTRICELECTRIC
ELECTRICELECTRIC
ELECTRIC
INDEXINDEX
INDEXINDEX
INDEX
HYDRAULICHYDRAULIC
HYDRAULICHYDRAULIC
HYDRAULIC
GENERALGENERAL
GENERALGENERAL
GENERAL
REAR AXLEREAR AXLE
REAR AXLEREAR AXLE
REAR AXLE
HSTHST
HSTHST
HST
CK22/CK22H
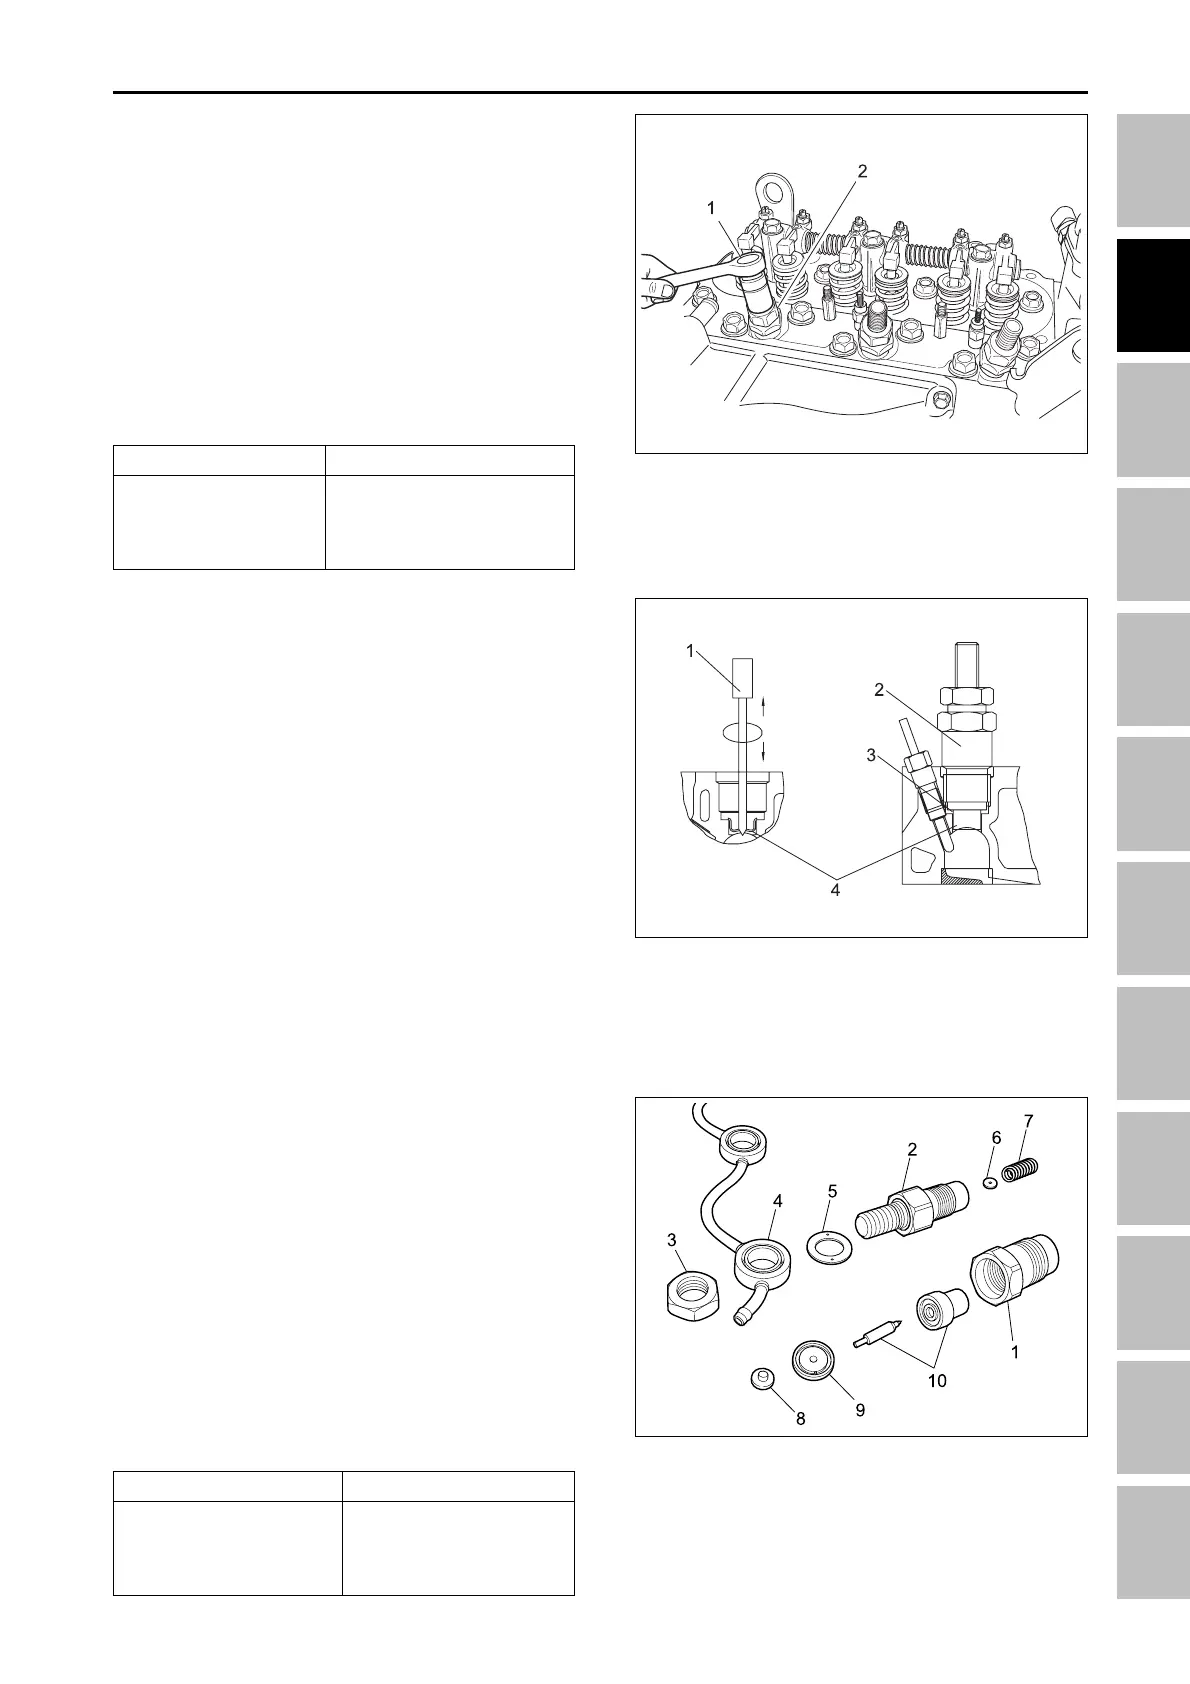
C. REMOVING NOZZLE HOLDER ASSEMBLIES
1. Remove the pipe clips holding the fuel overflow
pipes, and detach the pipes.
2. Detach the nozzle holders using a 27 mm (1.0630 in.)
nozzle holder socket wrench, after loosening the
lock nuts.
3. Detach the copper gaskets on the seats on which
the nozzles are to be installed.
(Note for reassembling)
• Return the nozzle holders after confirming that there
are no metallic particles or foreign matter on the
surface on which the nozzles are to be installed.
(1) Nozzle holder socket wrench
(2) Lock nut
196W257B
Item
Nozzle holder ass’y
Tightening torque
49.0 ~ 68.6 Nm
5.0 ~ 7.0 kgf-m
36.1 ~ 50.6 lb-ft
(1) Plus screw driver
(2) Nozzle
(3) Injection nozzle gasket
(4) Heat seal
196W258B
D. HEAT SEAL ROMOVAL PROCEDURE
1. Drive screw driver lightly into the heat seal hole.
2. Turn screw driver three or four times each way.
3. While turning the screw driver, slowly pull the heat
seal put together with the injection nozzle gasket. If
the heat seal drops, repeat the above procedure.
4. Heat seal and injection nozzle gasket must be
changed when the injection nozzle is removed for
cleaning or for service.
NOTE:
• Use a plus screw driver that has a diameter which is
bigger than the geat seal hole 1/4 in (approx. 6 mm)
196W268A
E. NOZZLE HOLDER
ff
ff
f DISASSEMBLING NOZZLE HOLDER
1. Secure the retaining nut with a vise.
2. Remove the nut, the over flow pipe Ass’y and the
plain washer.
3. Remove the nozzle holder body and take out parts inside.
(Note for reassembling)
• When disassembling and reassembling the nozzle
piece dip it in clean fuel.
• Install the push rod, noting its direction(upside down).
• Do not tighten it too much, or the needle valve will
not slide easily and the injection performance will
be decreased.
(1) Retaining nut (6) Adjusting washer
(2) Nozzle holder body (7) Nozzle spring
(3) Nut (8) Push rod
(4) Over flow pipe ass’y (9) Distance piece
(5) Gasket (10) Nozzle piece
Item
Retaining nut
Tightening torque
29.4 ~ 49.0 Nm
3 ~ 5 kgf-m
21.7 ~ 36.1 lb-ft
ENGINE - SERVICING