99
12-4. Chroma Key Setup
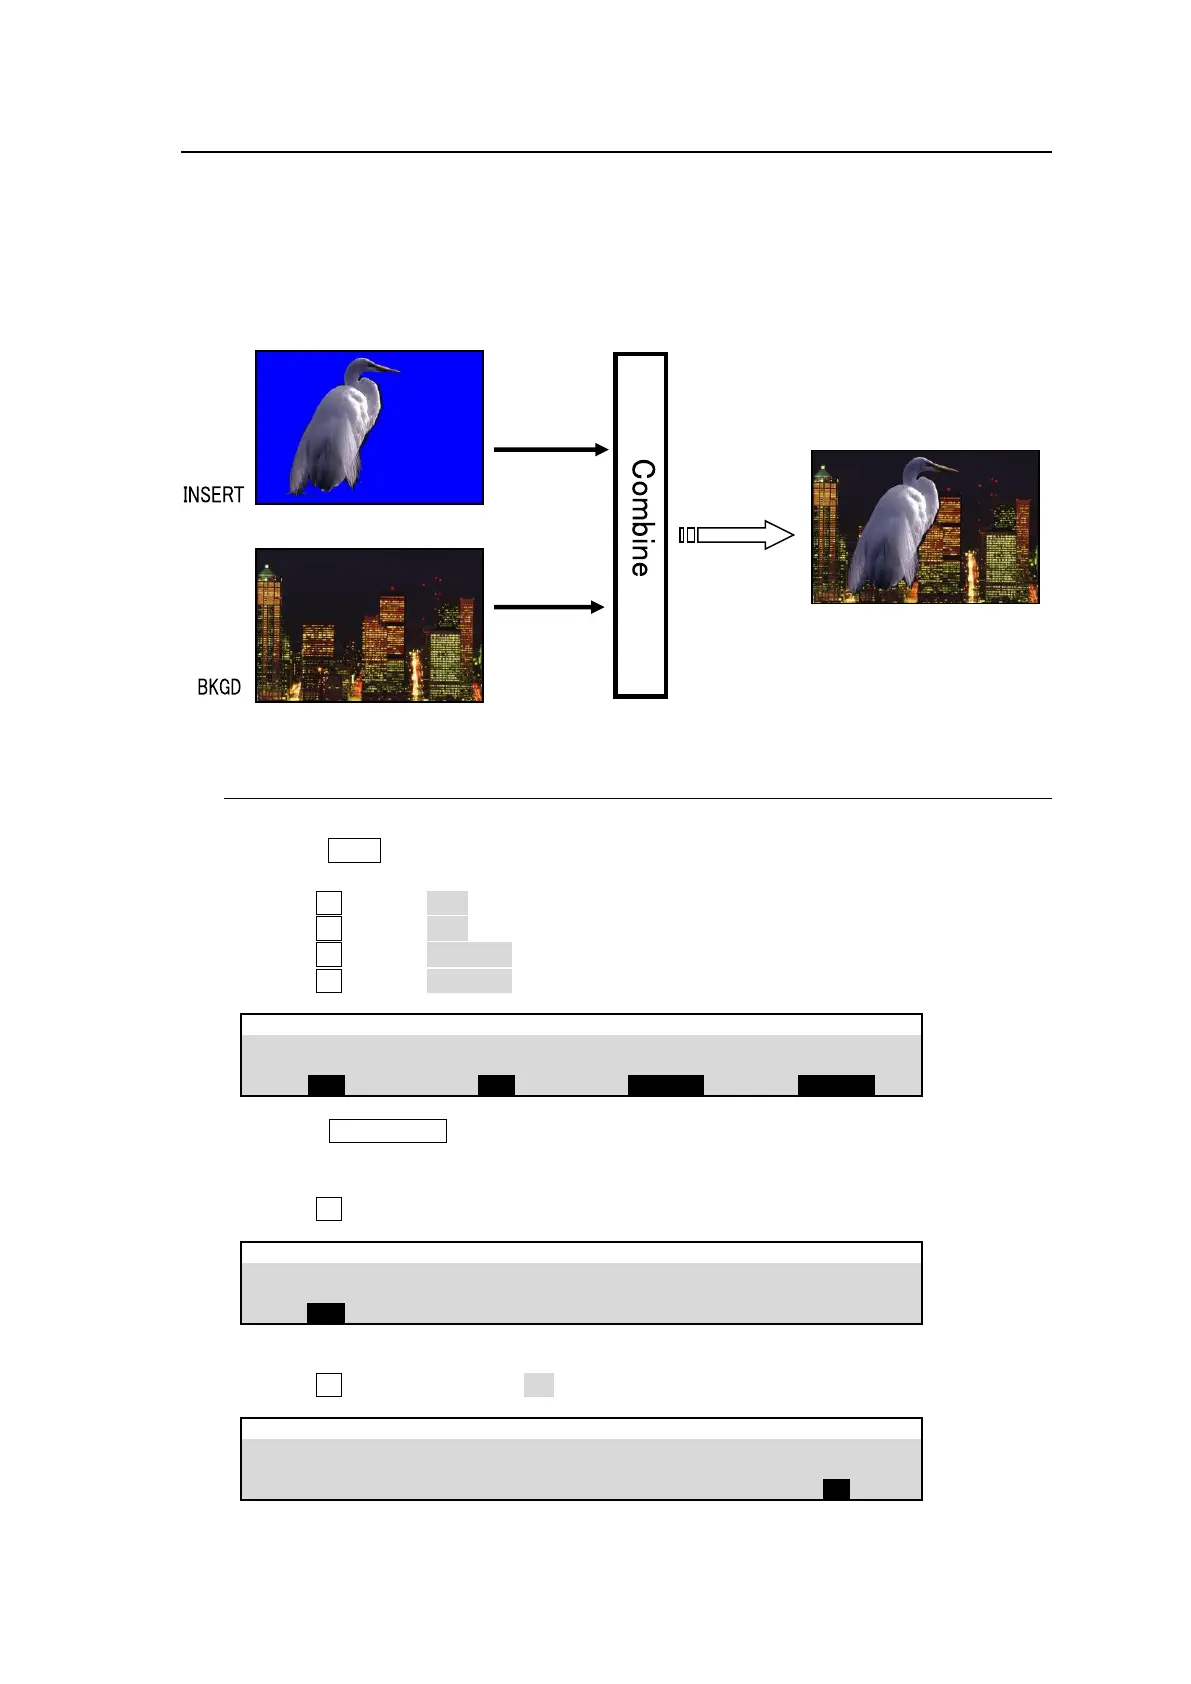
The built-in Chromakeyer has 4 channels in HD/SD mode and 3 channels in 1080/59.94p, 50p
mode. Chroma keying allows key signal creation using a chroma component instead of a luminance
component. This feature is mostly used to composite moving subjects such a person in a virtual
background. For example, to place a person onto a background graphic, first film the person
standing in front of a blue screen background. The blue colored area of the filmed image is detected
and will be used to create the key signal. This chapter explains how to set up chromakeys using
CK1 as an example.
12-4-1. Creating a Chroma Key
(1) Select a background signal in the M/E1 PGM bus.
(2) Press KEY1 twice quickly to display the [M/E FLEXaKEY > M/E1 > KEY1 > TRANS >
SRC/INS] menu.
(3) Turn F1 to select BUS.
(4) Turn F2 to select BUS.
(5) Turn F3 to select CK1 FILL.
(6) Turn F4 to select CK1 KEY.
M/E FLEXaKEY > M/E1 > KEY1 > TRANS > SRC/INS
(7) Press KEY1 AUTO in the M/E1 transition block to display the KEY1 image onto the
M/E1PGM screen.
(8) Open the [EFFECT/MELite > CK1 > AUTO CK > SIGNAL] menu.
(9) Turn F1 to select a video signal used for chromakey.
EFFECT/MELite > CK1 > AUTO CK > SIGNAL
(10) Go to PAGE 2.
(11) Turn F4 to turn CURSOR to ON to display the crosshair cursor.
EFFECT/MELite > CK1 > AUTO CK > POSITION