178
6.7 Functions of the viewer screen
6.7.3 Change of the eective
image area
Although this device automatically recognizes the ef-
fective image area and displays it within the image
area, the eective image area can be adjusted manu-
ally as necessary.
1
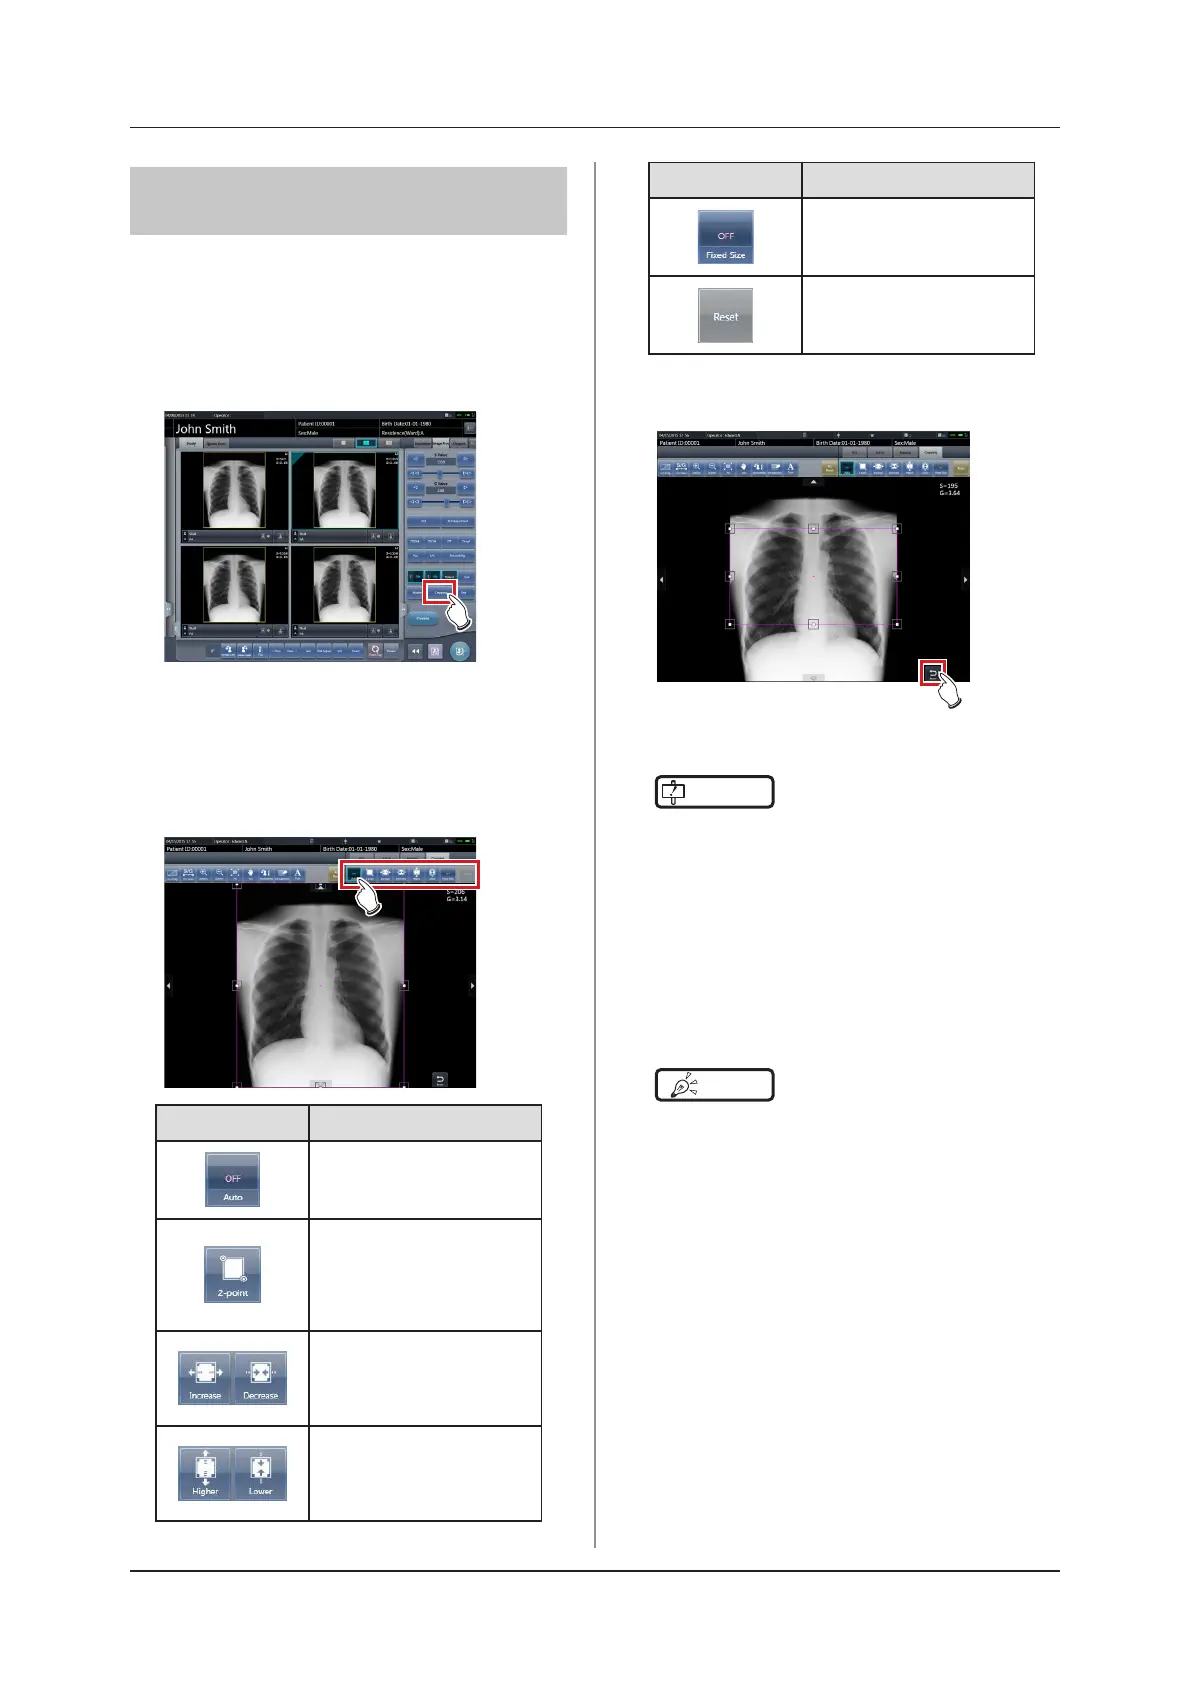
Press [Cropping].
• The viewer screen is displayed.
2
Change the eective image area.
• When an image is pressed in any location, the
effective image area moves with the pressed
part as the center.
Icon Functions
Switch between [ON] and [OFF]
of the image processing tempo-
rarily.
Press any 2 points to specify
the square with a diagonal line
that connects the 2 points as
the size of the eective image
area.
Adjust the width of the eective
image area. The width chang-
es every time you press these
buttons.
Adjust the height of the effec-
tive image area. The height
changes every time you press
these buttons.
Icon Functions
To use a fixed size effective
image area, set this option to
[ON].
Resets operations performed
in the tab.
3
Press [Return] after change.
• Returns to the exposure screen.
IMPORTANT
•••••••••••••••••••••••••••••••••••••
• If image recognition fails and an inappropriate eec-
tive image area is set during automatic reading, the
image may become white or black all over. When this
happens, temporarily set the image processing to
[OFF] and set the appropriate eective image area.
• Depending on the image information status, auto-
matic reading may not be carried out properly, and
part of the image may be missing. In this case, please
change the eective image area manually.
•••••••••••••••••••••••••••••••••••••••••••••••••••••
HINT
•••••••••••••••••••••••••••••••••••••
• Depending on the printer, the output may be smaller
than the eective image area. When this type of print-
er is used, specify the eective image area in advance
assuming a smaller output.
• The eective image area can be changed by directly
dragging the square mark on the frame border of the
eective image area or its perimeter.
•••••••••••••••••••••••••••••••••••••••••••••••••••••