247
7.5 Manual stitching exposure
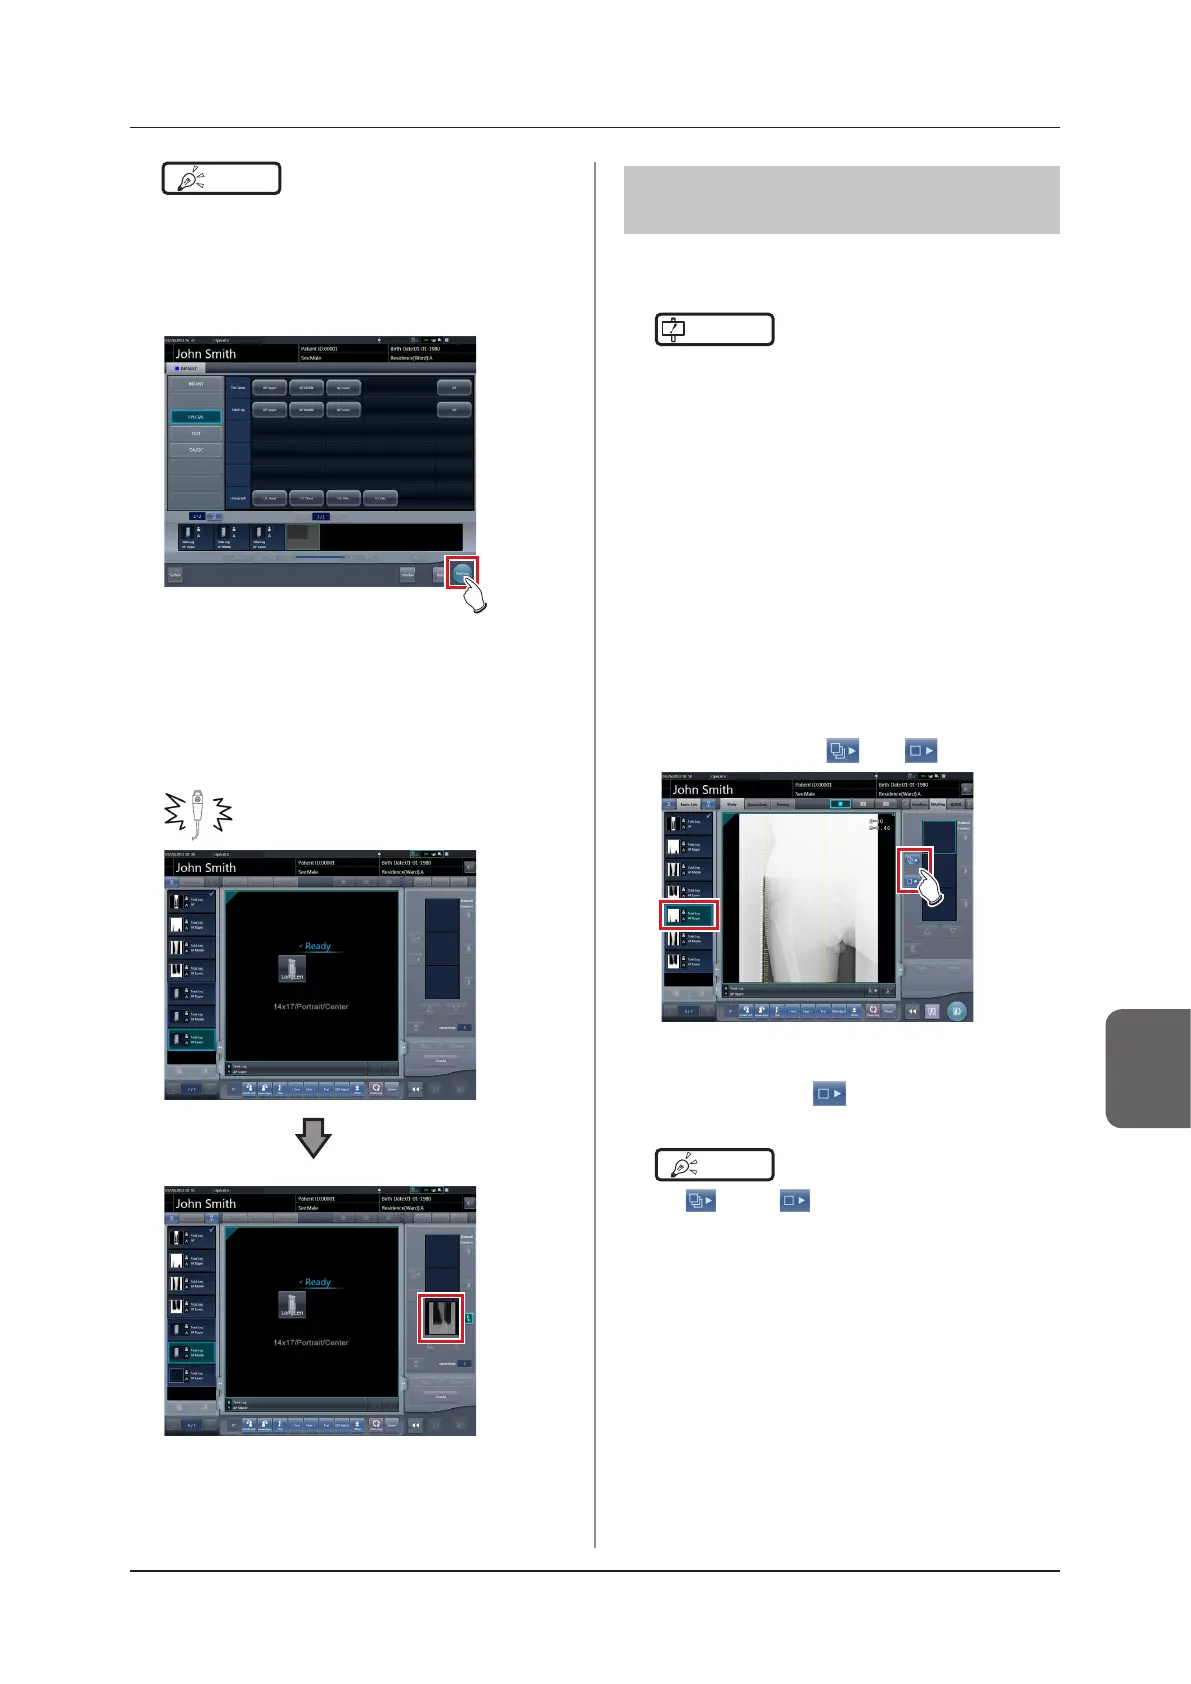
Chapter 7
7.5.3 Image combination
Combine the exposed images. The following proce-
dure describes an example of combining 3 images.
IMPORTANT
•••••••••••••••••••••••••••••••••••••
• Adjust the combination position by using the markers
as supplementary standards in addition to body parts
of the subject.
It is also recommended that you arrange the measure
in the combined image part during exposure to sim-
plify the conrmation of the combined parts.
• In stitching exposure, when plates overlap and are ar-
ranged so that there is no image loss in each plate's
boundaries, there might be a slight gap in the marker
position because of a minute dierence in magnica-
tion. After taking this into account, conrm the combi-
nation position through the marker.
•••••••••••••••••••••••••••••••••••••••••••••••••••••
1
Select the images to be combined.
• Select the images to be combined from the or-
der list and press [
] or [ ].
• The selected images are displayed in the com-
bined image display area.
• If you pressed [
], continuously select the
associated images (second and third).
HINT
•••••••••••••••••••••••••••••••••••••
• [
] and [
] can be pressed only when the
Exam. Tag for stitching exposure is selected.
•••••••••••••••••••••••••••••••••••••••••••••••••••••
HINT
•••••••••••••••••••••••••••••••••••••
• It is also possible to register multiple exposure body
parts in 1 Exam. Tag.
•••••••••••••••••••••••••••••••••••••••••••••••••••••
2
Press [Perform].
• The exposure screen is displayed.
3
Perform exposure.
• Configure the X-ray device settings and check
the exposure setting before making an expo-
sure.
Press the exposure switch
• Exposed image is displayed.
• Perform the subsequent exposures with same
procedure.