315
Chapter 7
IMPORTANT
•••••••••••••••••••••••••••••••••••••
• If you select [Filming] tab, the operation on the control
panel only applies to the image in the selected box.
• If you select the [Filming] tab, the [Zoom-] button on
the control panel (image adjustment) is replaced with
the [TRUE SIZE] button. In addition, functions of the
[Zoom+] button and the [Fit] button are changed.
(3)
(1)
(2)
Number Name Functions
(1) ZOOM button
Zooms in or out the image in
the selected image box by
dragging the mouse.
(2)
TRUE SIZE but-
ton
Displays the image in the
selected image box in life
size proportions.
(3) FIT button
Displays the entire image in
the selected image box.
• If you select [Filming] tab, the following buttons on the
control panel (overlay) will be disabled.
– Stamp Selection button
– Stamp Position button
– Preview button
• If you select [Filming] tab, the following tabs on the
control panel will be disabled.
– Acquisition
– AeroSync
– QUICK
– Exp.info
– Output
– Stitching
•••••••••••••••••••••••••••••••••••••••••••••••••••••
7.16 Print composer
Using the print composer, multiple exposed images
can be laid out as you like on a lm and output.
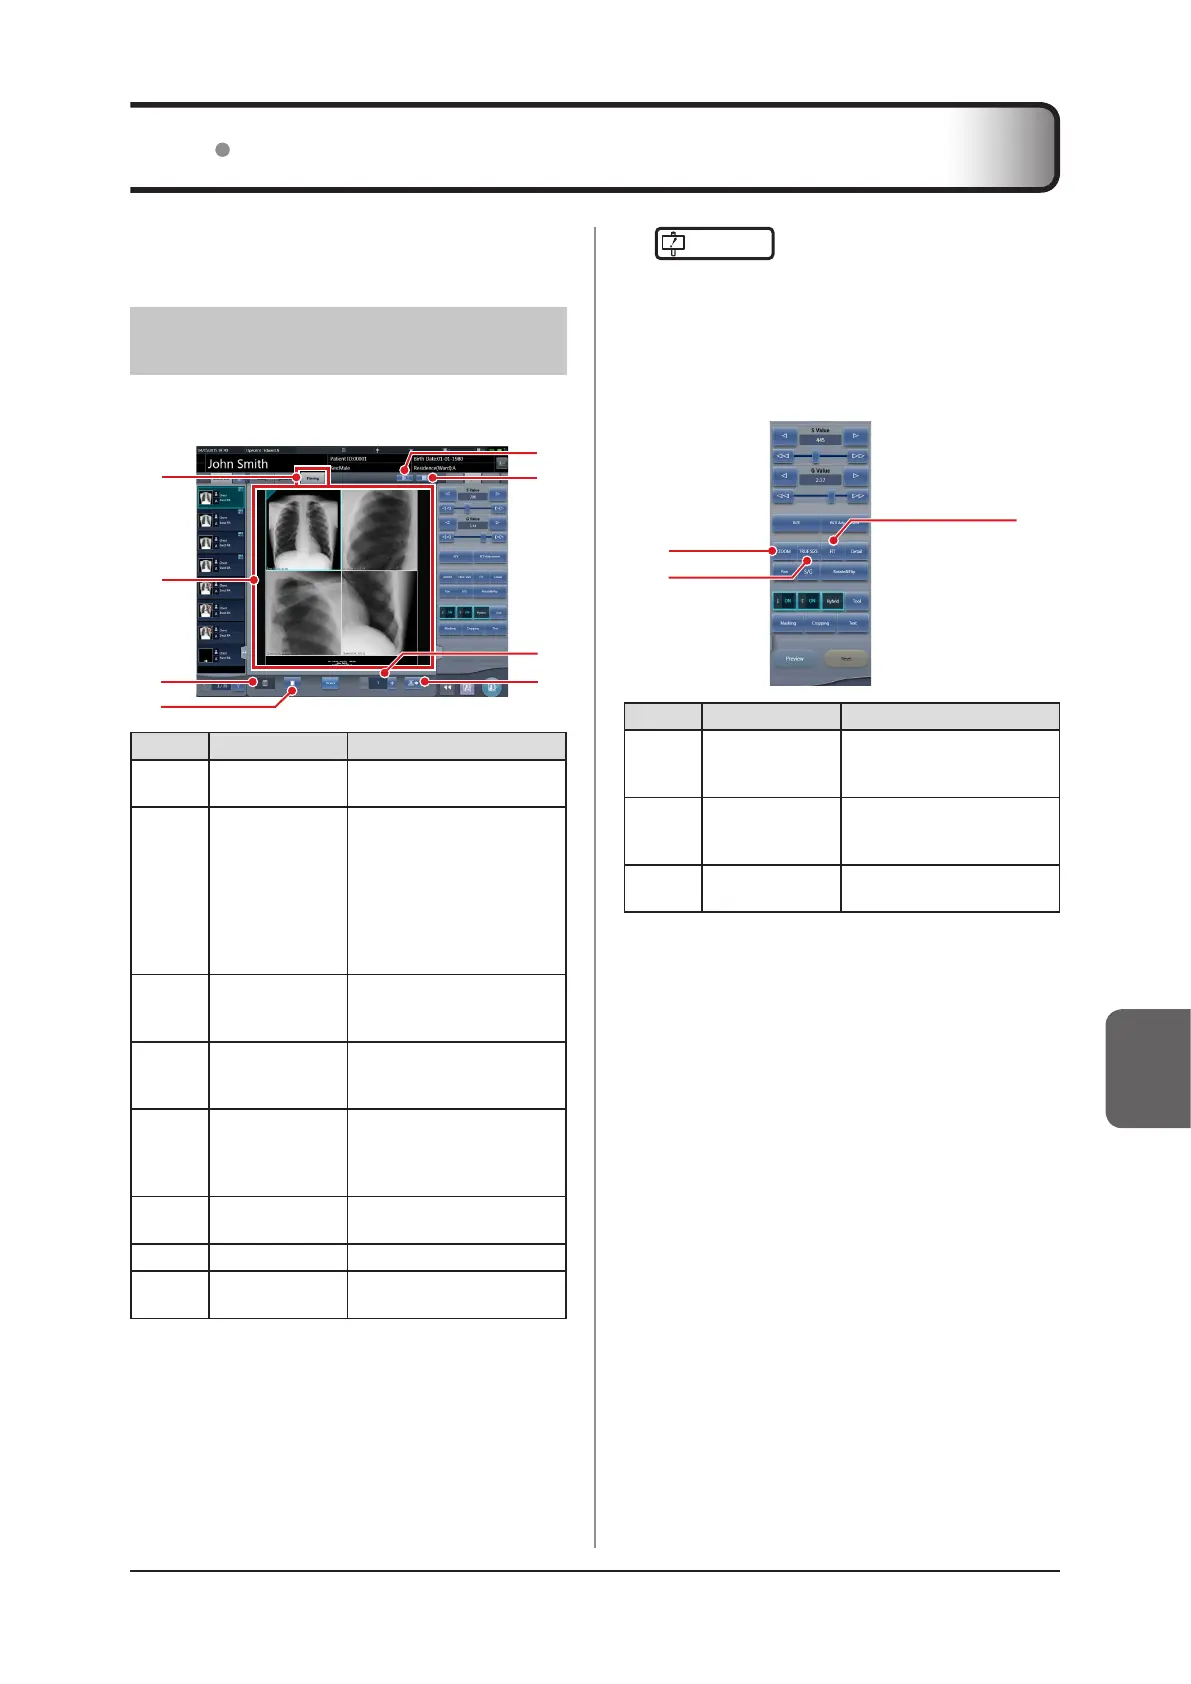
7.16.1 Screen structure
z
Exposure screen
(8)
(6)
(5)
(7)
(1)
(3)
(4)
(2)
Number Name Functions
(1) Filming tab
Selecting this tab can display
the lm editing area.
(2) Film editing area
Displays the output layout.
The display area of each
exposed image is called the
image box, and the border
between the image boxes is
the split line. You can change
the output layout by dragging
the image box and split line.
(3) Trash box
To delete an exposed image
assigned to the lm editing
area, drag it to this trash box.
(4) Film clear button
Deletes all exposed images
that have been assigned to
the lm editing area.
(5)
Automatic acqui-
sition button
Assigns exposed images in
the order list to each image
box beginning from the top
image.
(6)
Fixed format
selection button
Displays the xed format
selection area.
(7) Number of copies Set the number of copies.
(8) Output button
Outputs the exposed images
after they have been laid out.

 Loading...


