334
7.18 Checkup mode
z
Change of presets
1
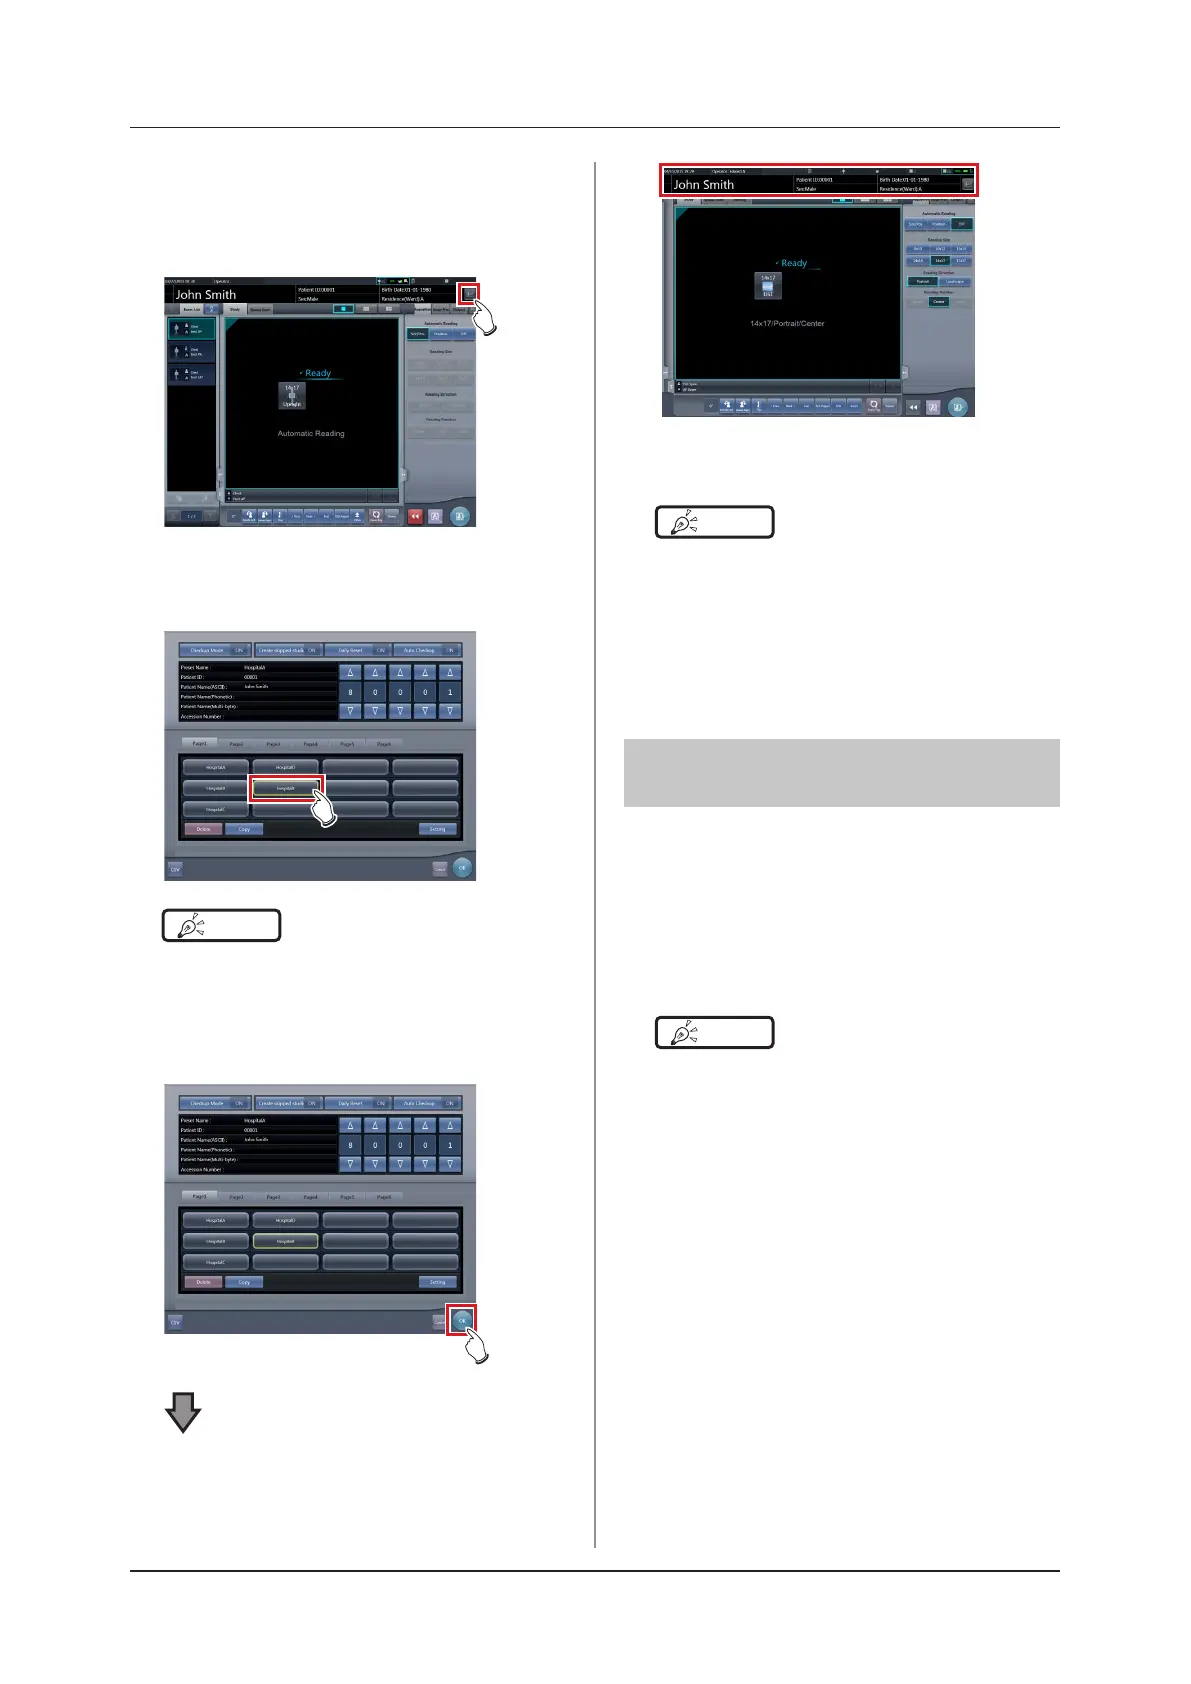
Press [Patient Info] on the exposure
screen.
• The checkup setting screen is displayed.
2
Select the preset to be changed.
HINT
•••••••••••••••••••••••••••••••••••••
• The serial number is held for each preset, so it is also
changed each time a preset is changed.
•••••••••••••••••••••••••••••••••••••••••••••••••••••
3
Press [OK].
• Patient information is updated according to the
preset.
HINT
•••••••••••••••••••••••••••••••••••••
• The examination continues subsequently for the same
preset.
• If you want to restart an examination from the preset
before a change, select the preset. The examina-
tion restarts from the accession number before the
change.
•••••••••••••••••••••••••••••••••••••••••••••••••••••
7.18.6 Auto Checkup using bar
code scan
If bar code scanning is carried out on the patient reg-
istration screen by the settings, an examination can be
started automatically using the scanned patient ID or
accession number.
This section describes how to set [Auto Checkup] to
[OFF] and automatically start an examination by the
bar code scanning function.
HINT
•••••••••••••••••••••••••••••••••••••
• For details on how to automatically start an examina-
tion by the bar code scanning function, contact Konica
Minolta technical representatives.
•••••••••••••••••••••••••••••••••••••••••••••••••••••
 Loading...
