257
7.6 Auto stitching exposure with AeroDR Detector
Chapter 7
3
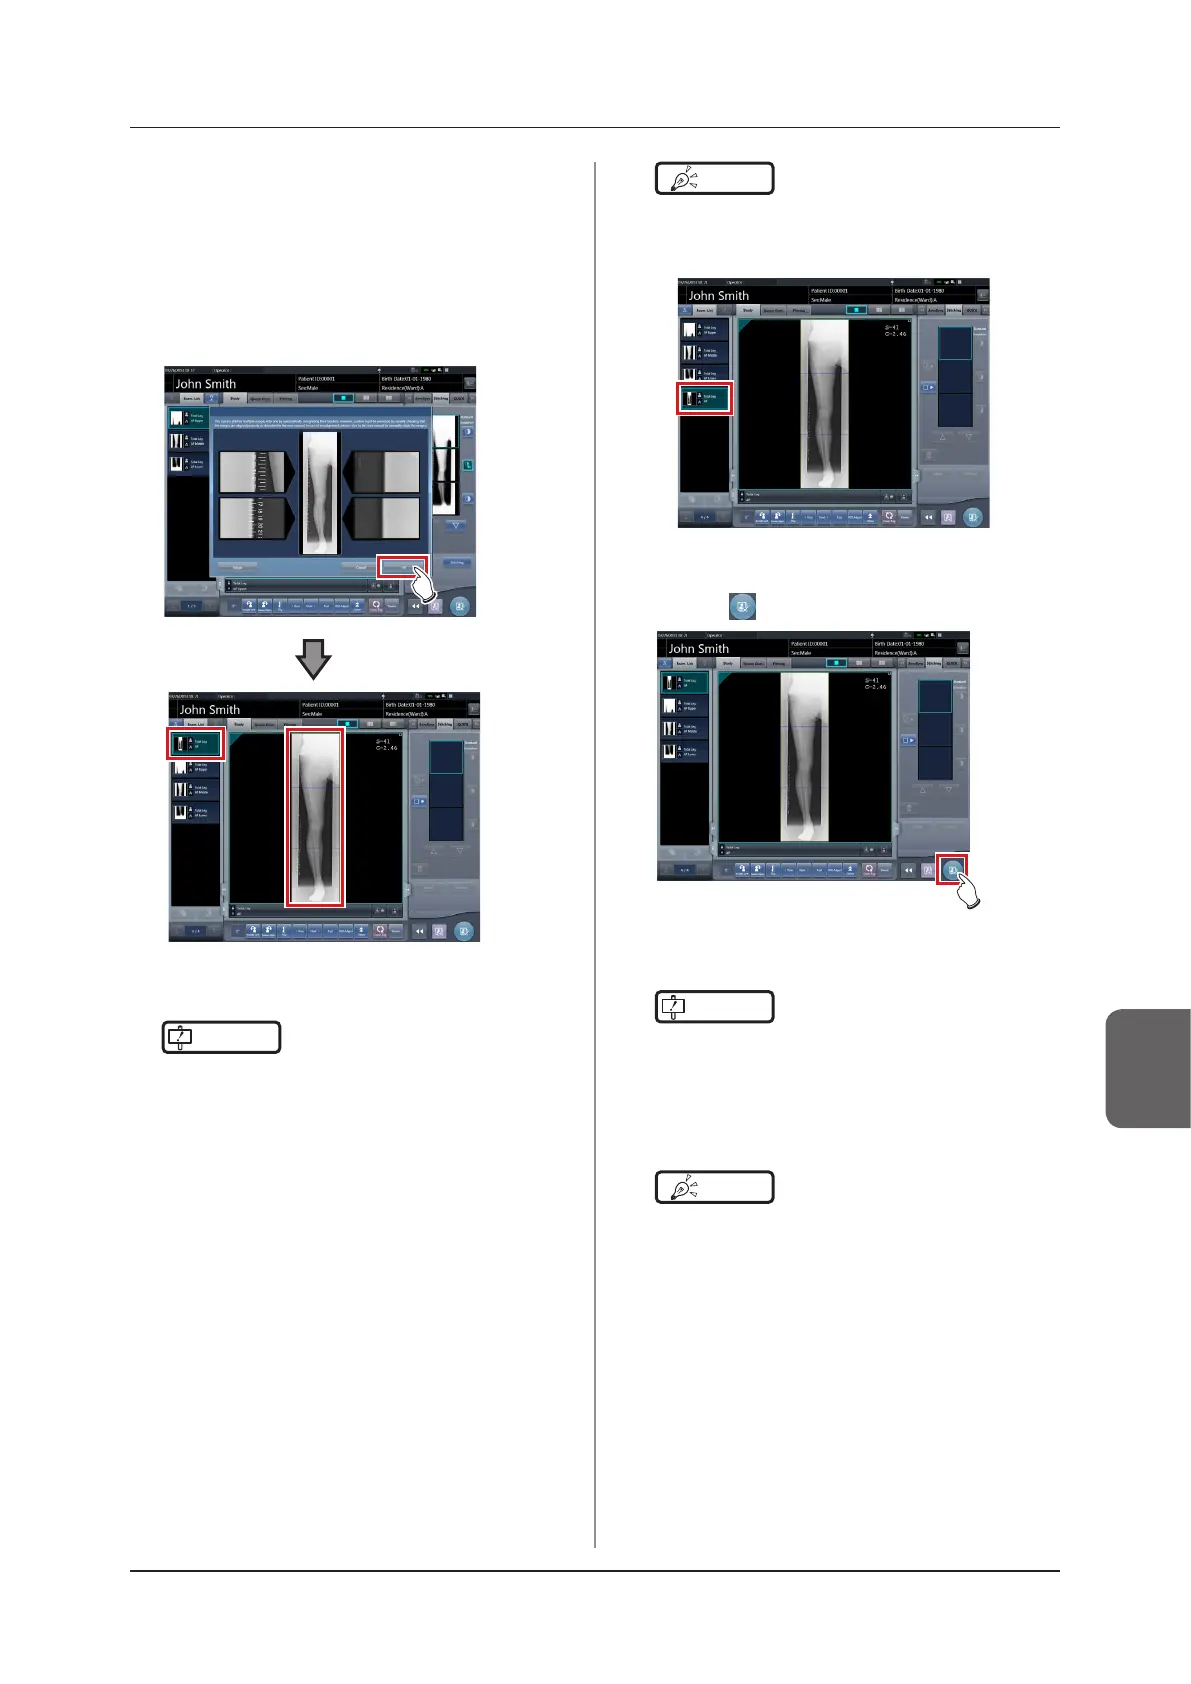
Press [OK].
• To adjust combination position manually, press
[Adjust] and display the viewer screen (for
stitching combination position adjustment). For
information concerning the method of manu-
ally adjusting the combination position, refer to
"7.6.1 Screen structure".
• Press [Cancel] to return to the previous screen.
• The combined image is displayed.
• The combined image is added to the order list.
IMPORTANT
•••••••••••••••••••••••••••••••••••••
• Press the [Adjust] button after rotating combined im-
ages on the exposure screen to reset the image rota-
tion.
•••••••••••••••••••••••••••••••••••••••••••••••••••••
HINT
•••••••••••••••••••••••••••••••••••••
• A merged image can also be displayed after the pre-
merged images in the order list. For more details, con-
tact Konica Minolta technical representatives.
•••••••••••••••••••••••••••••••••••••••••••••••••••••
4
Press [ ].
• The combined image is output, and the display
returns to the initial screen.
IMPORTANT
•••••••••••••••••••••••••••••••••••••
•
The stitching image is output first, then non-stitching
images are output.
•
If images are output before stitching, the stitching im-
age is output last.
•••••••••••••••••••••••••••••••••••••••••••••••••••••
HINT
•••••••••••••••••••••••••••••••••••••
• If outputting the combined image in sections, set the
number of sections by [Split].
• The order of combined image output can be changed.
For more details, contact Konica Minolta technical rep-
resentatives.
•••••••••••••••••••••••••••••••••••••••••••••••••••••

 Loading...


