HEADER ATTAC HMENT/D ETACH ME NT
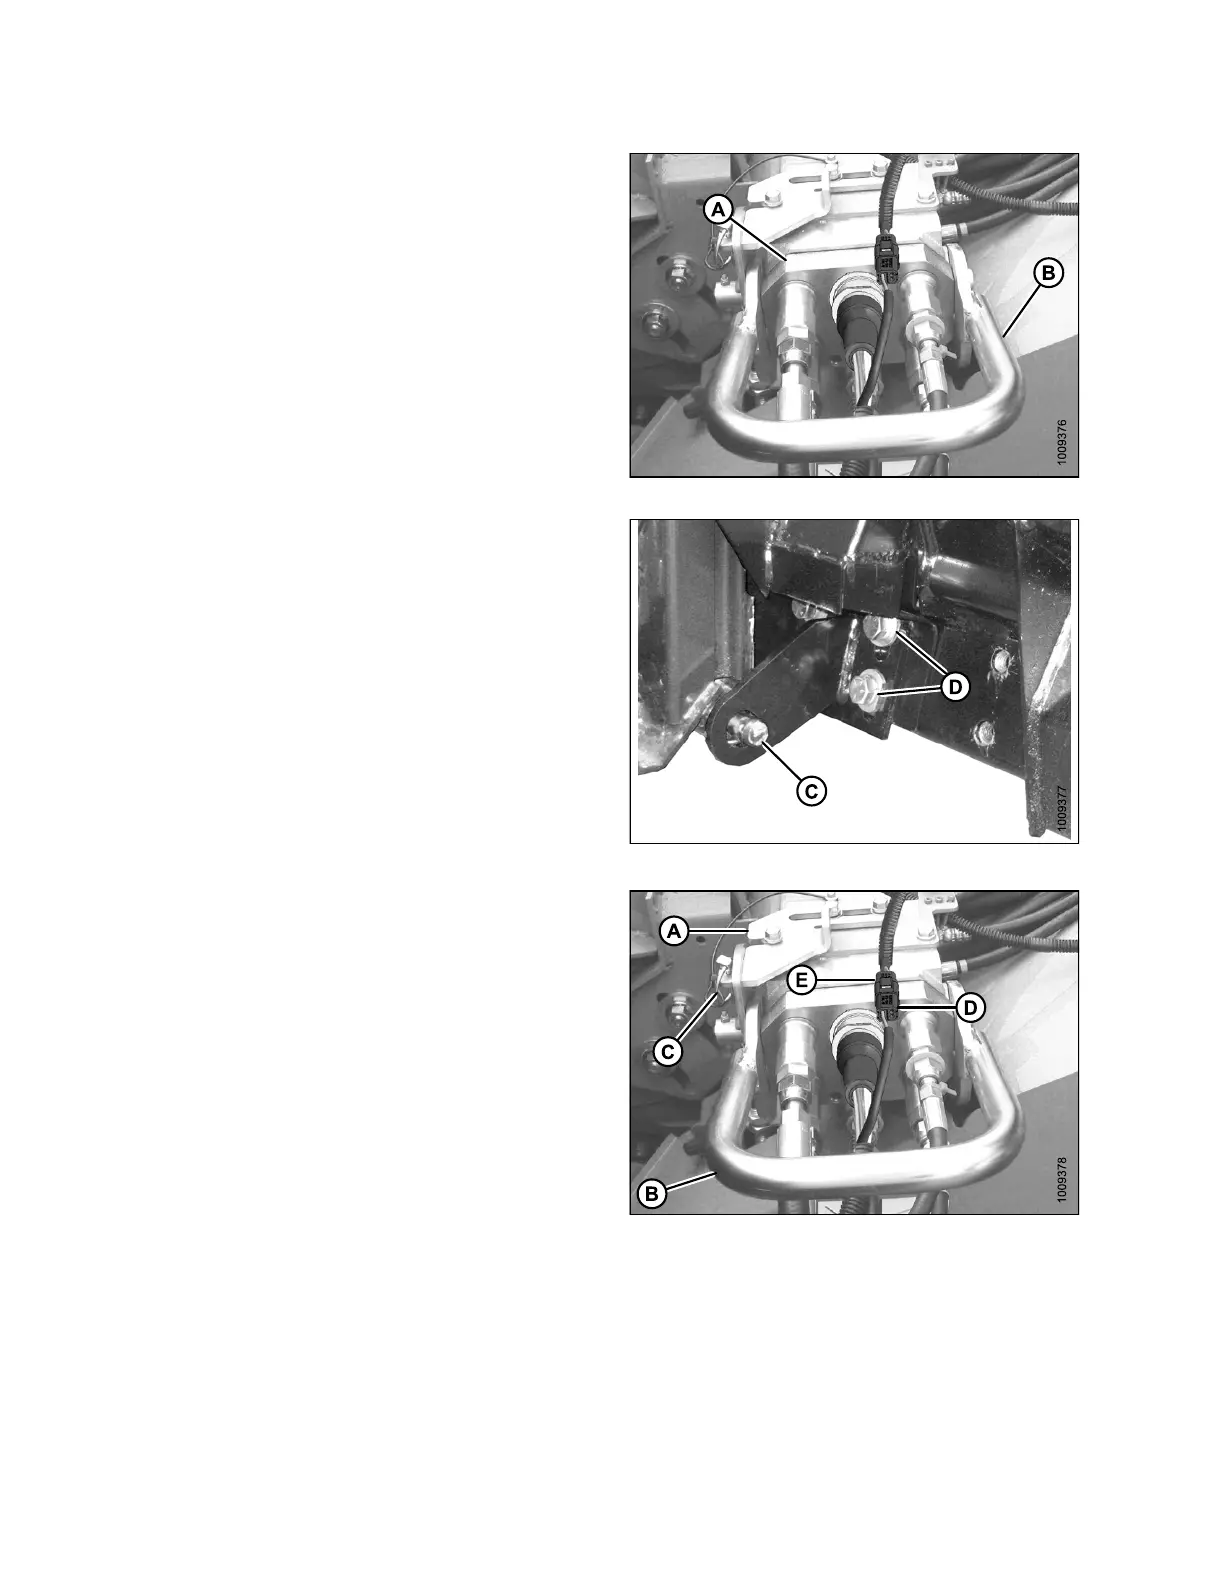
7. Position coupler (A) onto receptacle, and pull
handle (B) s o that lugs on coupler are engaged
into handle.
8. Pull handle (B) to full horizontal position and ensure
that coupler (A) is fully engaged into receptacle, and
that the two feeder house pins (C) are engaged into
adapter brackets.
9. Check that bolts (D) are tig ht .
NOTE:
If pins (C) do not fully engage adapter brackets,
loosen bolts (D) and adjust bracket as required.
Retighten bolts.
Figure 4.22: Coupler
Figure 4.23: Feeder House Pin
10. Slide l
atch (A) to lock handle (B) in position and secure
with ly
nch p in (C).
11. Connec
t harness (D) to combine connector (E)
(only
if adapter is equipped w ith reel fore-aft/header
tilt s
elector).
Figure 4.24: Coupler
147695 208 Revision A