MAINTENANCE AN D SERVICING
Installing Knife Drive Box Pulley
To install th e knife drive box pulley, follow these steps:
1. Ensure splines and bores in pulley or drive arm are free
of paint oil and solvents.
2. Apply Loctite
®
#243 adhesive (or equivalent) to spline.
Apply in two bands (A) around shaft as shown, with
one band at end of spline and one band approximately
mid-way.
3. Install pulley (B) until flush with end of shaft.
4. Secure pulley with 5/8 in. x 3 hex head bolt with
distorted thread NC lock nut and torque to 160 ft·lbf
(217 N·m).
Figure 5.1
11: Knife Drive Box
Installi
ng Knife Drive Box
This procedure can be used for single- and double-knife headers.
NOTE:
If the pulley was remo ved from the knife drive box, refer to Installing K nife D rive Box Pulley, page 315.Ifthe
pulley was not removed, then proceed to Step 1., page 315.
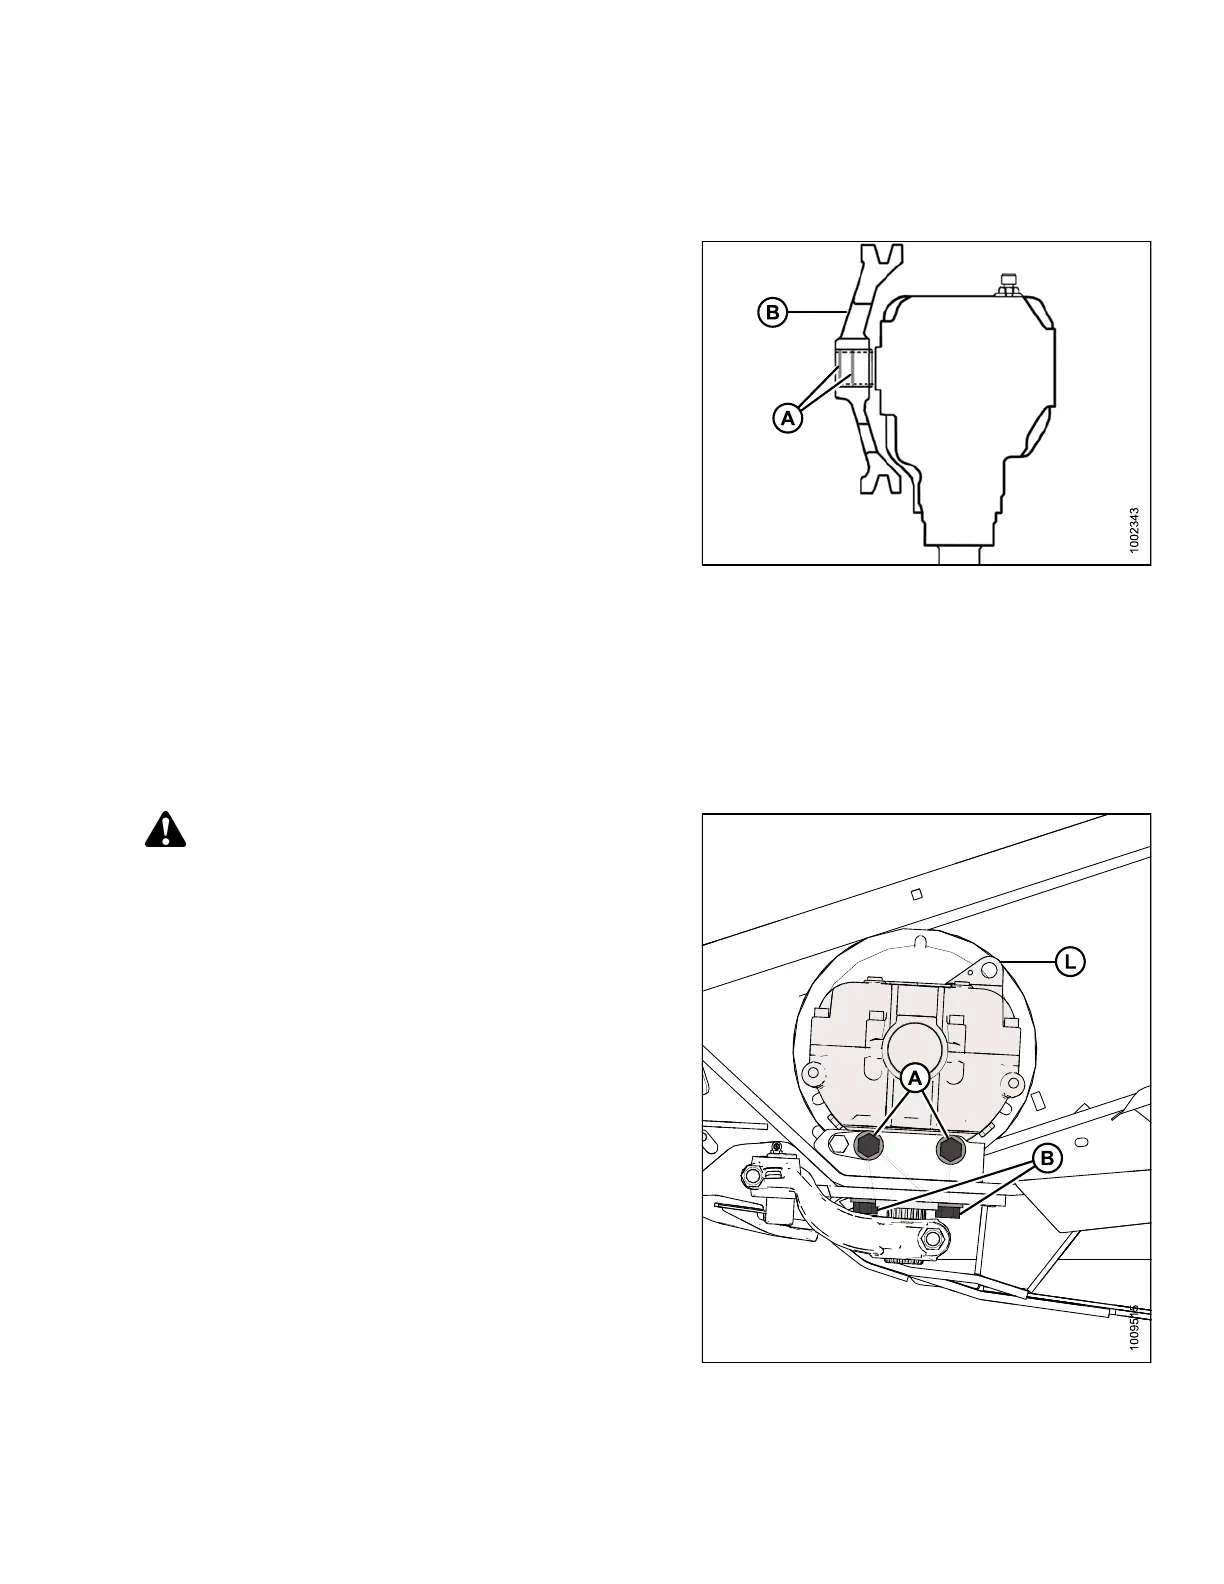
CAUTION
Knife drive box with pulley weighs over 65 lb (35 kg).
Use care when removing or installing. Lug (L) can be
used fo r lifting.
1. Place knife drive box into position on header mount and
locate belt on pulley.
2. Install two 5/8 in. x 1.75 grade 8 hex head bolts (A)
at the side and two 5/8 in. x 2.25 grade 8 hex head
bolts (B) underneath to mount knife drive box to frame.
3. Slightly tighten knife drive box side bolts (A) first, then
the bottom bolts (B), to ensure proper contact with
vertical and horizontal mounting surfaces. Do NOT
torque bolts at this time.
Fig
ure 5.112: Knife Drive Box
147695 315 Revision A