MAINTENANCE AND SERVICING
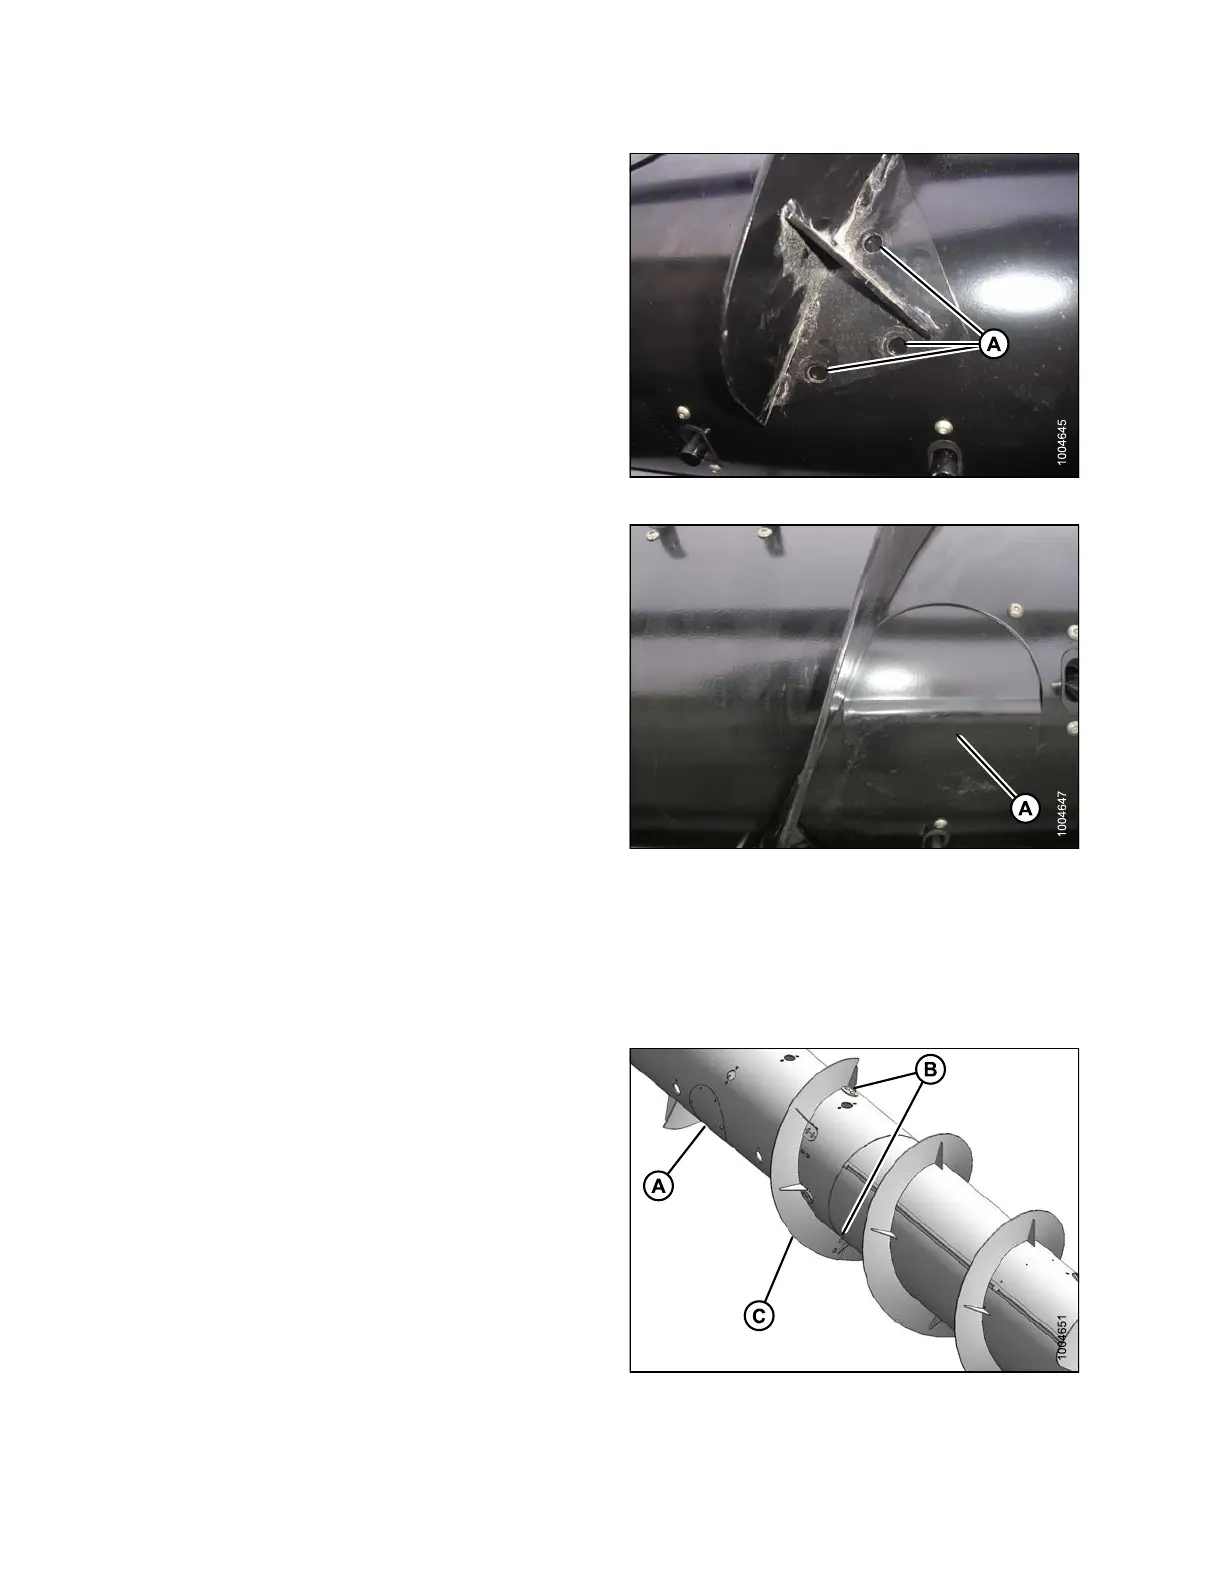
3. With flighting in desired place, mark holes (A) (three
per extension), and drill 3/8 in. (76 mm) holes in
auger tube.
Figure 5.79: Flighting Extension
4. Install bolts. Remove nearest access cover (A)
to access inside of drum to install nuts. Tighten
all hardware.
5. Replace access cover, and add Loc tite
®
#272 to cover
hardware to prevent it from coming loose.
NOTE:
Ideally the fligh ting extensions will fit tight to the
auger tube. However, it is not unusual for the
right-hand flighting extension to overlap thee cover
panel causing a gap to the auger tube. Even with
no interfe rence with the cover, it is not uncommon
to have a gap. Crop material may hairpin in this
gap, but generally this will not affect performance. If
desired, silicone se alant ma y be us ed to fill these
gaps, preventing material from catching in gap.
Figure 5.80: Auger Access Cover
Removing Flighting Extensions
To remove fligh
ting extensions from the adapter auger, follow these steps:
1. Remove acces
s cover (A ).
2. Remove five bo
lts (B), washers, and nuts that secure
flighting ext
ension (C) to the auger.
3. Remove exte
nsion (C).
4. Repeat for o
ther flighting extension.
5. Reinstall a
ccess cover (A).
Figure 5.81: Auger Flighting Extensions
147695 298 Revision A