Virtual PrivateNetworks(VPN) Generic Routing Encapsulation (GRE)
IX20 User Guide
603
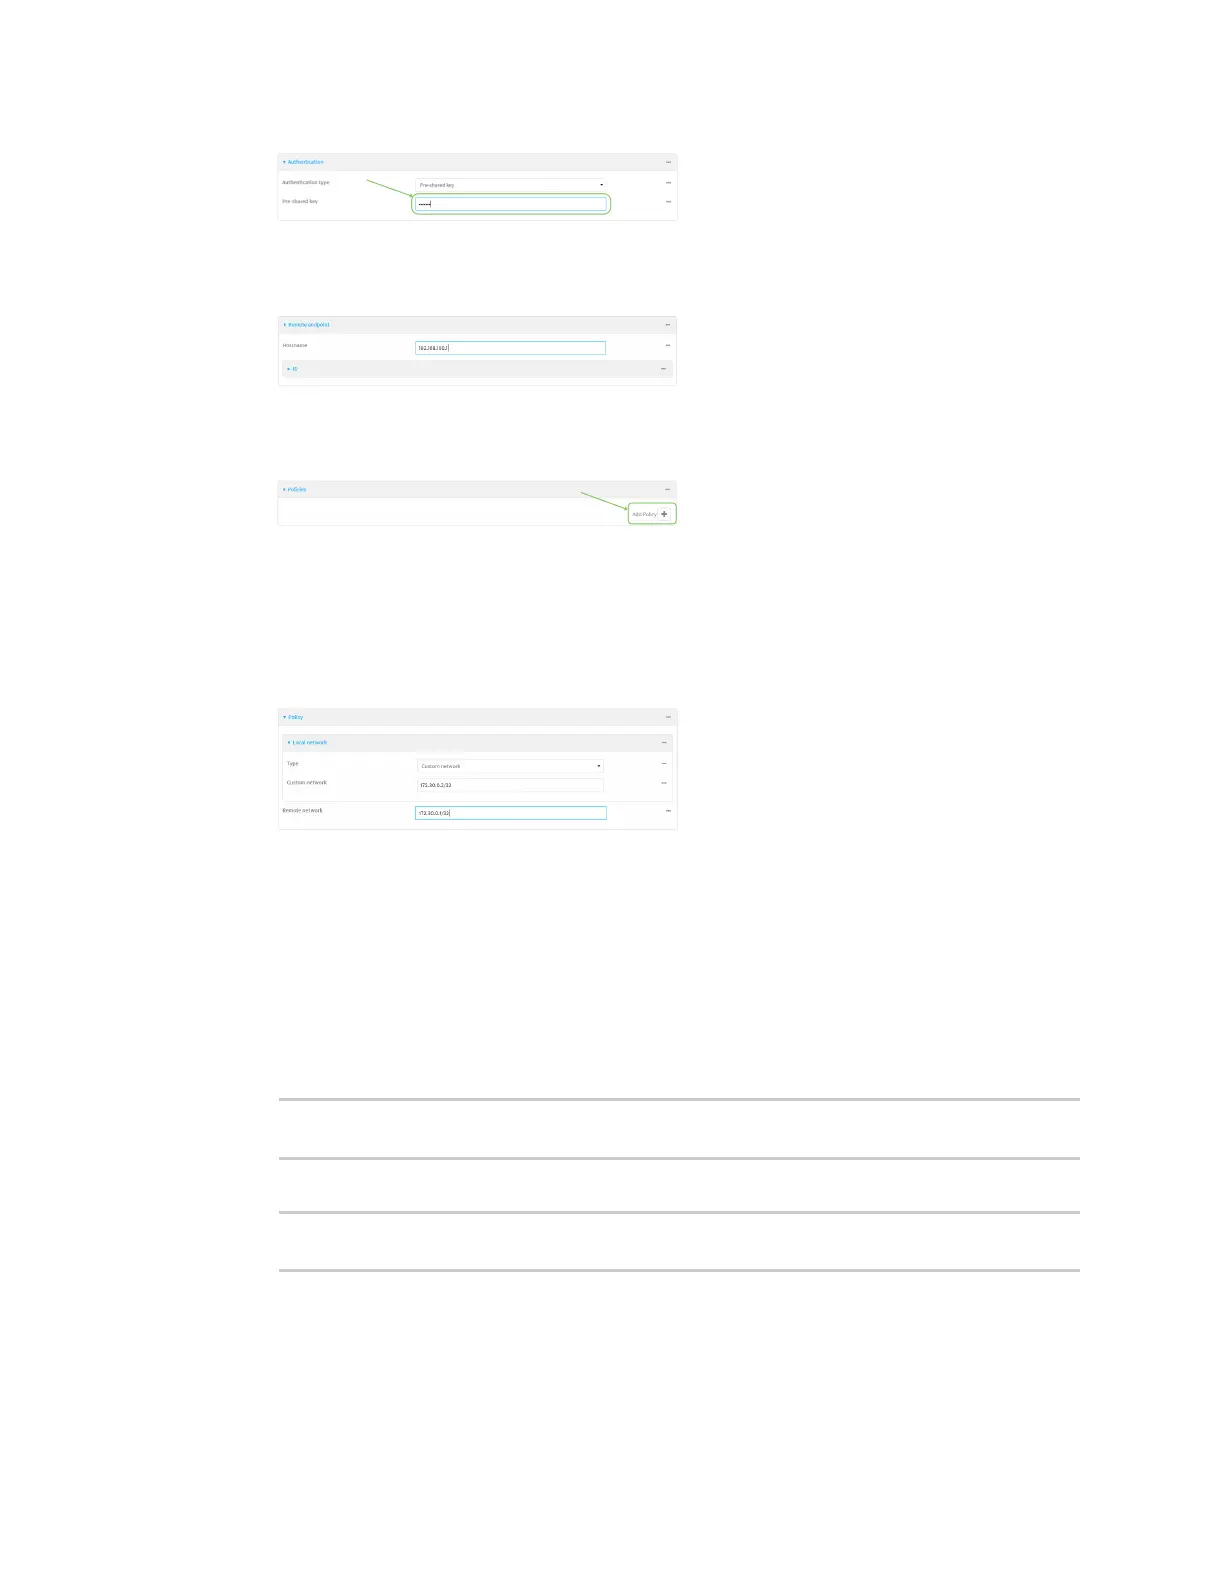
7. Click to expand Remote endpoint.
8. For Hostname, typepublic IPaddressof the IX20-1device.
9. Click to expand Policies.
10. For Add Policy, click to add a new policy.
11. Click to expand Local network.
12. For Type, select Custom network.
13. For Address, typethe IPaddress and subnet of the local GREtunnel, 172.30.0.2/32.
14. For Remote network, type the IPaddressand subnet of the remote GREtunnel,
172.30.0.1/32.
15. Click Apply to save the configuration and apply the change.
Command line
1. Select the device in Remote Manager and click Actions> Open Console, or log into the IX20
local command line as a user with full Admin access rights.
Depending on your device configuration, you may be presented with an Access selection
menu. Type admin to accessthe Admin CLI.
2. At the command line, type config to enter configuration mode:
> config
(config)>
3. Add an IPsec tunnel named ipsec_gre2:
(config)> add vpn ipsec tunnel ipsec_gre2
(config vpn ipsec tunnel ipsec_gre2)>
4. Set the pre-shared key to the same pre-shared key that was configured for the IX20-1
(testkey):