Interfaces Local Area Networks(LANs)
IX20 User Guide
190
b. Repeat for each additional MAC address.
11. Save the configuration and apply the change
(config network interface my_lan)> save
Configuration saved.
>
12. Typeexit to exit the Admin CLI.
Depending on your device configuration, you may be presented with an Access selection
menu. Type quit to disconnect from the device.
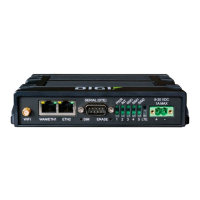
Configure the WAN/ETH1 port asa LAN or in a bridge
By default, the WAN/ETH1 Ethernet port on your IX20 is configured to function as a WAN port, which
meansthat it:
n
Uses the External firewall zone.
n
Receives itsIPv4addressfrom an upstream DHCPserver.
n
HasSureLink enabled to test the quality of its internet connection.
Alternatively, you can configure the WAN/ETH1 port to function as a LAN port, or you can include the
WAN/ETH1 port in the default LAN bridge or create a bridge that includes the WAN/ETH1 port with and
ETH2 portsand/or Wi-Fi access points.
Configure the WAN/ETH1 Ethernet port asa LAN
This procedure reconfiguresthe WAN/ETH1 port to serve as port for a LAN, which will result in the
device having two separate LANs: the default ETH2 LAN, and the LAN created in thisprocedure. To
utilize both LANs, you will need to havea device connected to the WAN/ETH1 port, and a separate
device connected to the ETH2 port to the default ETH2, and these deviceswill be on separate LANs.
If instead, you want the WAN/ETH1 port to bebridged with the ETH2 portincluded in the default ETH2,
see Create a bridge that includesthe WAN/ETH1 port, or if you want to create a new bridge that
includes the WAN/ETH1 port an other devices, see Create a bridge that includes the WAN/ETH1 port.
To configure the WAN/ETH1 Ethernet port as a LAN:
Web
1. Log into Digi Remote Manager, or log into the local Web UI asa user with full Admin access
rights.
2. Access the device configuration:
Remote Manager:
a. Locate your device as described in Use Digi Remote Manager to view and manage your
device.
b. Click the Device ID.
c. Click Settings.
d. Click to expand Config.