91
Chapter 5
5.2 Exposure procedure with DR Detector (Basic connection)
• In the event of a communication error and depending
on the timing at which the error has occurred, images
may not be displayed and the DR Detector may not
contain any images that have not been transferred
(the same status as that observed when no exposures
have been carried out). If this is the case, suspend the
study and display the exposure screen from the list
screen. This operation may successfully recover the
images.
•••••••••••••••••••••••••••••••••••••••••••••••••••••
1
Remove the DR Detector from the AeroDR
Battery Charger.
(1)
(3)
(2)
•
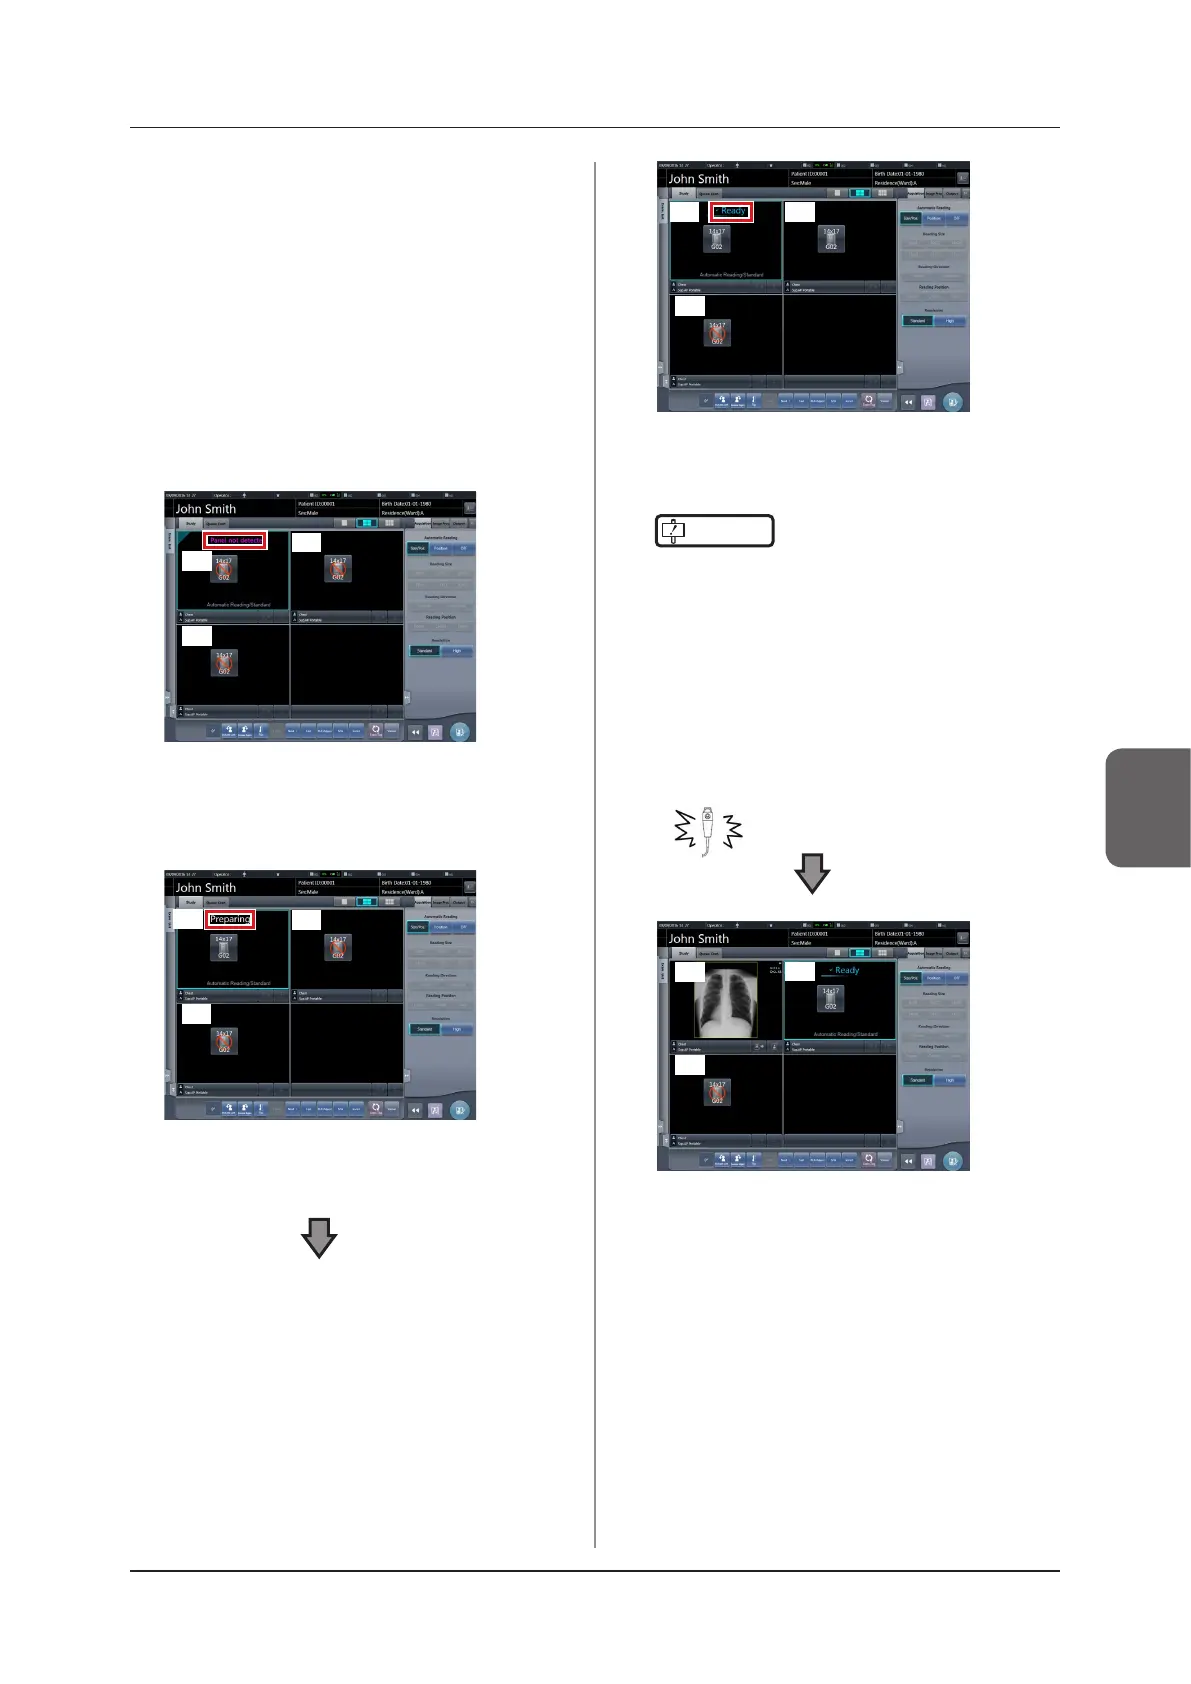
In (1), "Panel not detected" is displayed until the
DR Detector is inserted into the wall stand.
2
Insert the DR Detector into the wall stand.
(1)
(3)
(2)
• Until the DR Detector is inserted into the wall
stand and exposure becomes ready, "Preparing"
is displayed in image display area (1).
(1)
(3)
(2)
• When the DR Detector inserted into the wall
stand is ready to start exposure, "Ready" is dis-
played.
IMPORTANT
•••••••••••••••••••••••••••••••••••••
• When using the AeroDR 3 1417HD, click the modal-
ity icon before making an exposure and select the
AeroDR 3 1417HD. Selecting the AeroDR 3 1417HD
icon allows the exposure time to be selected.
•••••••••••••••••••••••••••••••••••••••••••••••••••••
3
Take the 1st image.
• Configure the X-ray device settings and check
the exposure setting before making an expo-
sure.
Press the exposure switch
(1)
(3)
(2)
• The exposed image is displayed in image dis-
play area (1), and the focus moves to (2).