Phaser 4500/4510 Service Manual 8-31
FRU Disassembly
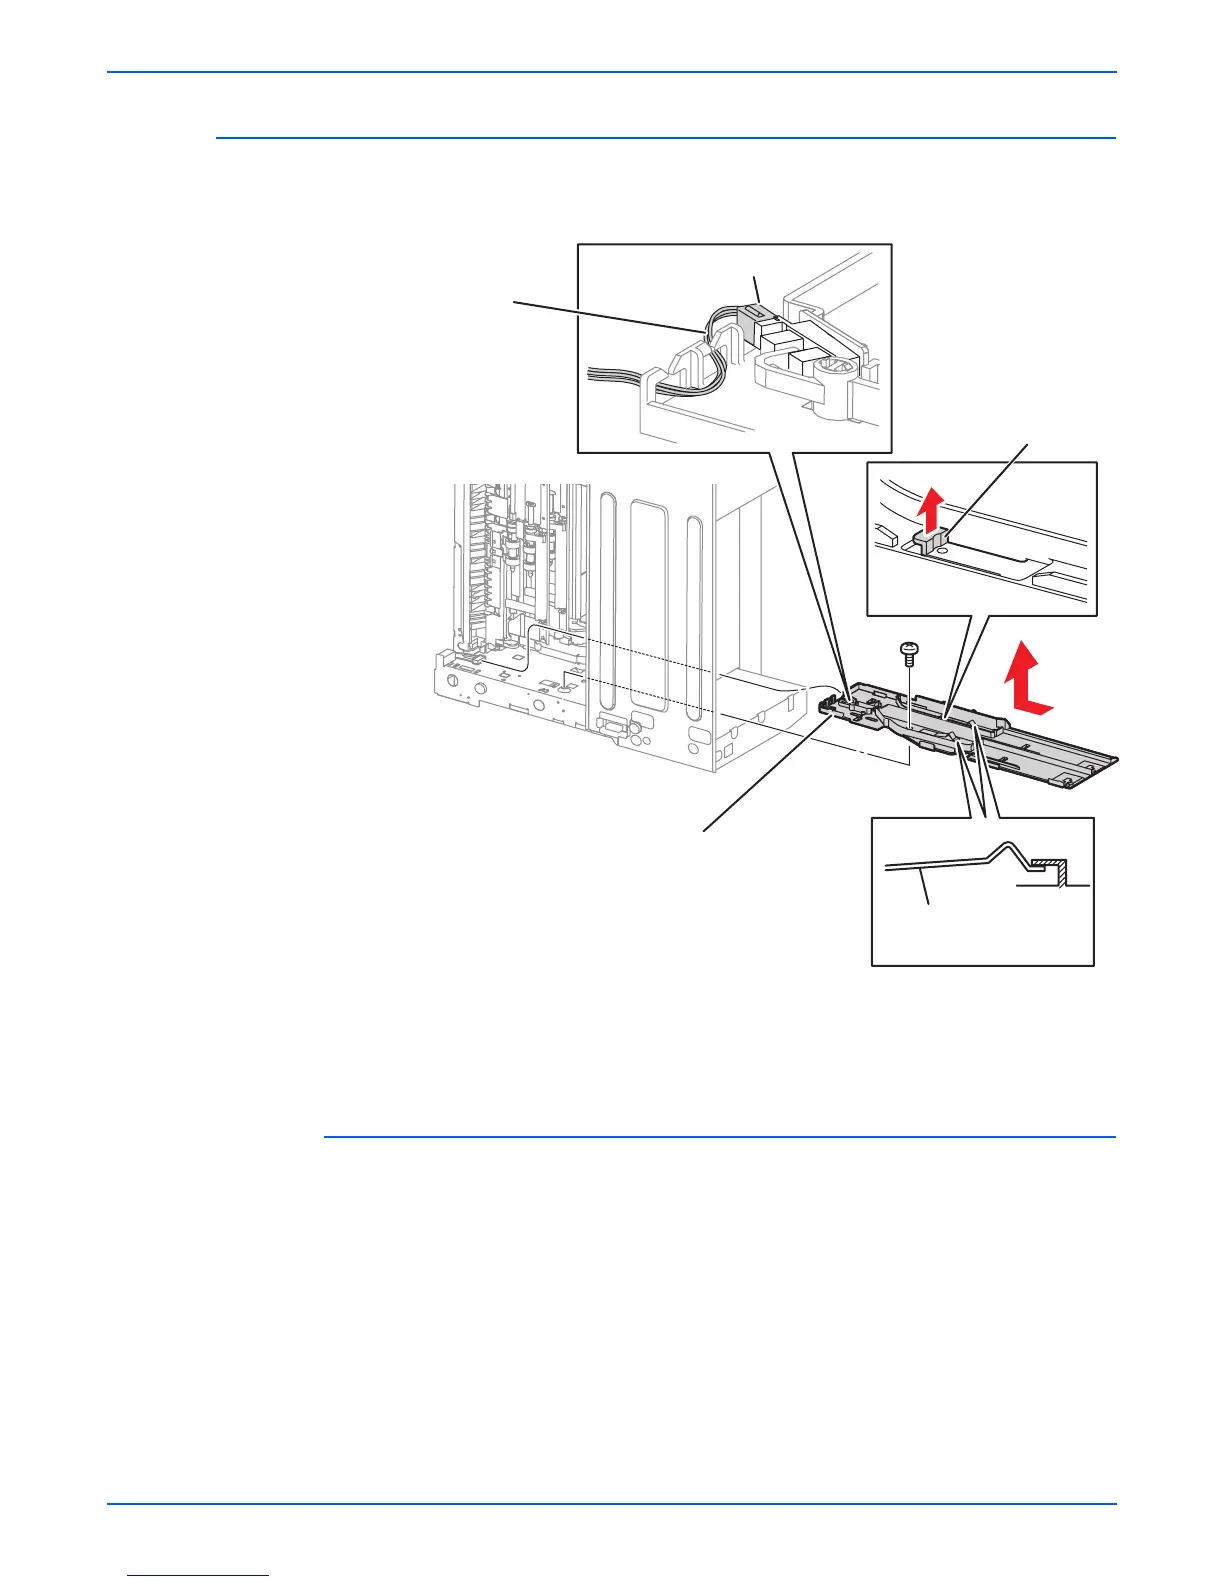
Right Tray Guide
(PL7.1.3)
Procedure:
1. Remove the print cartridge and paper cassettes.
2. Remove any optional 550-sheet feeder(s) (page 8-78).
3. Lay the printer on its right side.
4. Remove the 6 mm screw that attaches the right tray guide to the frame.
5. Lift the latch and shift the right tray guide back and up as indicated by the
arrow in the figure. Separate the right tray guide from the frame.
6. Release the wire harness from the rear of the right tray guide.
7. Unplug the connector (P/J260) of the low-paper sensor harness from the
right tray guide.
1.Low paper sensor harness 3. Latch
2.Right tray guide 4.Cassette lock plate
s4500-108
1
P/J260
3
2
4

 Loading...


