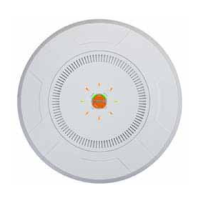
Wireless Access Point
Configuring the Wireless AP 313
You may also access this window by clicking on the AP image at the lower left of
the WMI window — click the Xirrus logo in the center of the AP. See “User
Interface” on page 89.
Procedure for Auto Configuring IAPs
You can auto-configure channel and cell size of radios by clicking on the Auto
Configure buttons on the appropriate WMI page as shown below (auto
configuration only applies to enabled radios):
For all radios, go to “Advanced RF Settings” on page 357.
For all 802.11a settings, go to “Global Settings .11an” on page 334.
For all 802.11bg settings, go to “Global Settings .11bgn” on page 340.
For all 802.11n settings, go to “Global Settings .11n” on page 346.
For all 802.11ac settings, go to “Global Settings .11ac” on page 349.
Procedure for Manually Configuring IAPs
1. The row for each IAP summarizes its settings. Click to expand it and
display the settings. Click again to collapse the entry.
2. In the Enable field select enabled, or select disabled if you want to turn
off the IAP. The state of the channel is displayed with a green dot if
enabled, and a red dot if disabled.
3. In the Band field, select the wireless band for this IAP from the choices
available in the pull-down menu, either 2.4GHz or 5 GHz. Choosing the
5GHz band will automatically select an adjacent channel for bonding. If
the band displayed is auto, the Band is about to be changed based on a
new Channel selection that you made that requires the change.
For XR-520 Series APs only:
—iap1 may be set to either band or to monitor (also see the Timeshare
option in “RF Monitor” on page 358).
—iap2 is permanently set to 5 GHz.

 Loading...