92 Calyx Software
Loan file overview
2 In the forms list, select the Forms tab and select the forms to be sent.
3 Click Send.
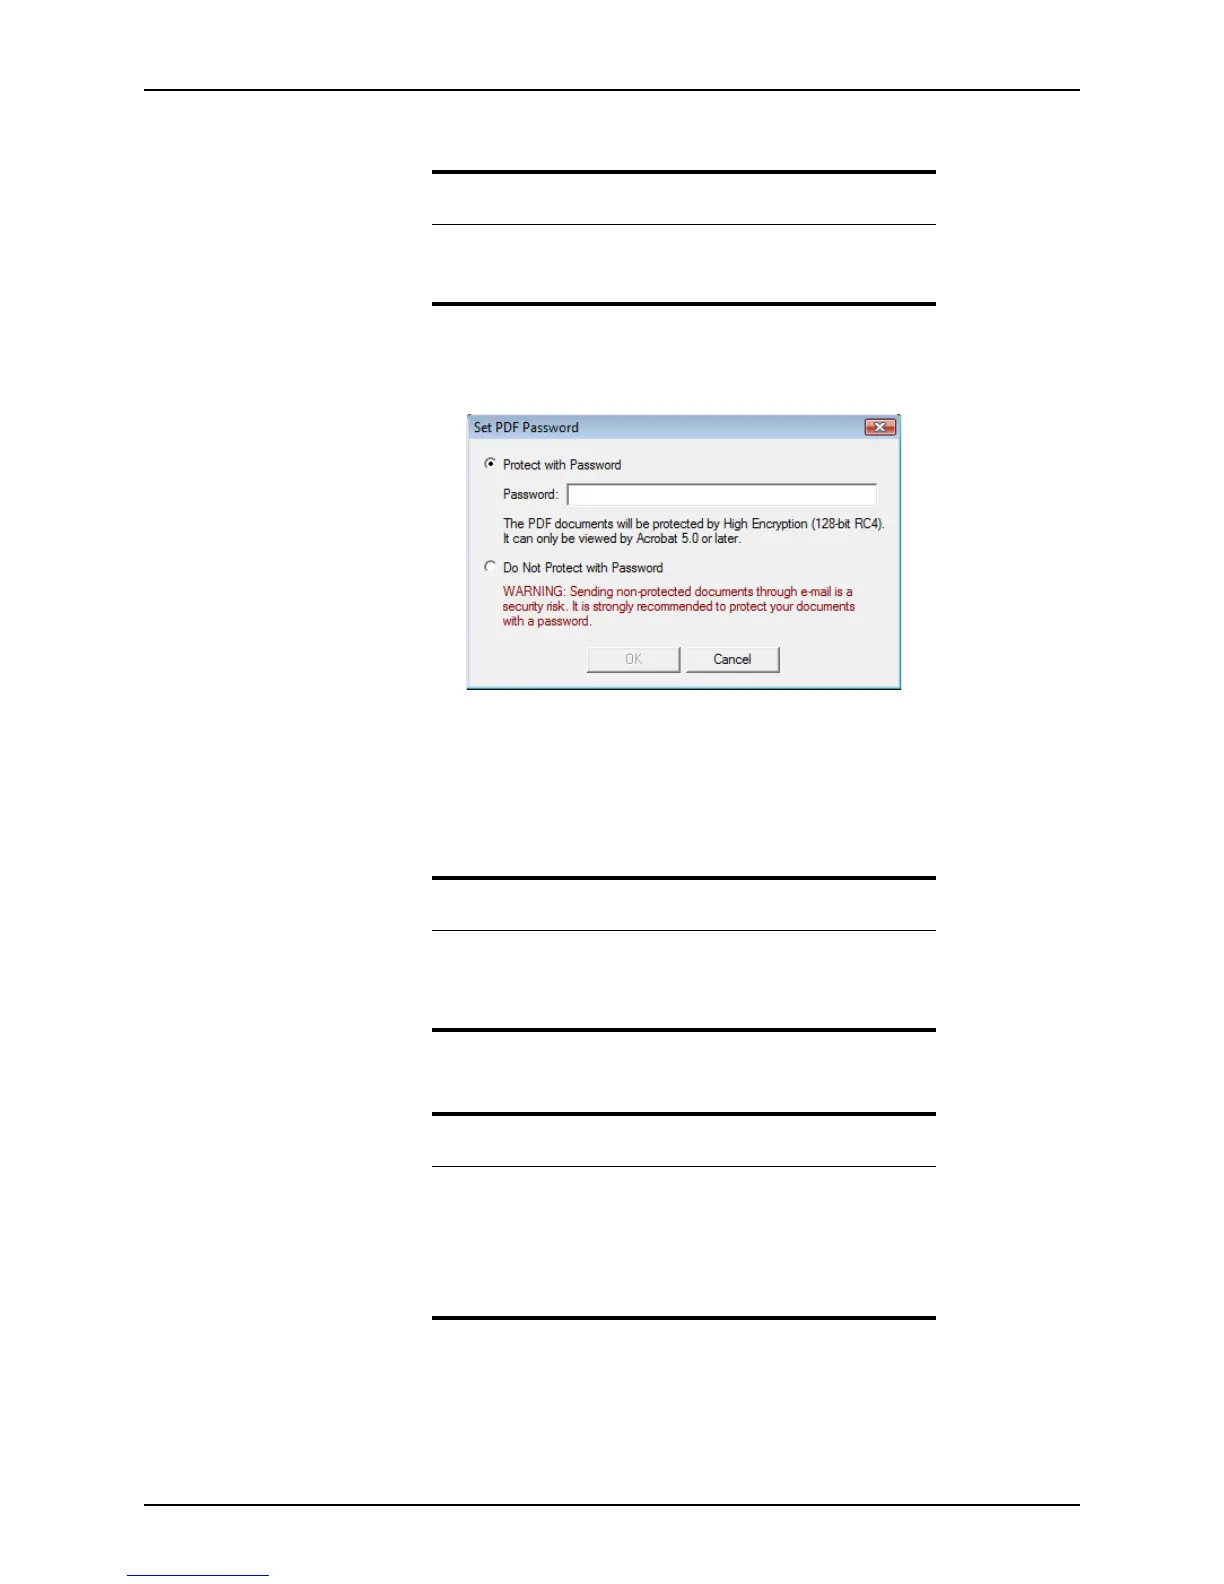
The
Set PDF Password dialog box is displayed.
4 Select either
Protect with Password or Do Not Protect with Password.
• If you select Protect with Password, enter the password and click OK.
• If you select Do Not Protect with Password, click the OK button.
An e-mail window from your default e-mail application opens with the forms attached
as a single PDF document.
5 Complete your e-mail and send it as you normally would.
Caution
Select forms for only one recipient at a time. When the Send button is
clicked, a single PDF file is generated that contains all of the selected
forms.
Tip
In addition to the methods that are included in this topic, you can also e-
mail Point forms and files from the
Borrower Information screen:
right-click the borrower’s e-mail address, select Send E-mail, Send Forms,
or Send Point Data File and follow the prompts.
Related information
• For information about e-mailing from the document repository, refer
to E-mailing files from the document repository, on page210.
• For more information about e-mailing files and forms, see
Knowledge Base articles:
– #0081 How to e-mail a form from Point
– #0101 E-mailing files or forms outside of Point