90 Calyx Software
Loan file overview
5 Enter a name for the print group in the PrintGroupName field.
6 To share the group with other users, select the
Share this print group check box.
7 Select the forms to include in your group. Use the tabs to access the different form
types.
The selected forms are listed in the
Forms in Print Group section.
8 Click OK to save your group.
9 To print the group, select it from the Print Groups tab in the
Borrower Forms dialog
box.
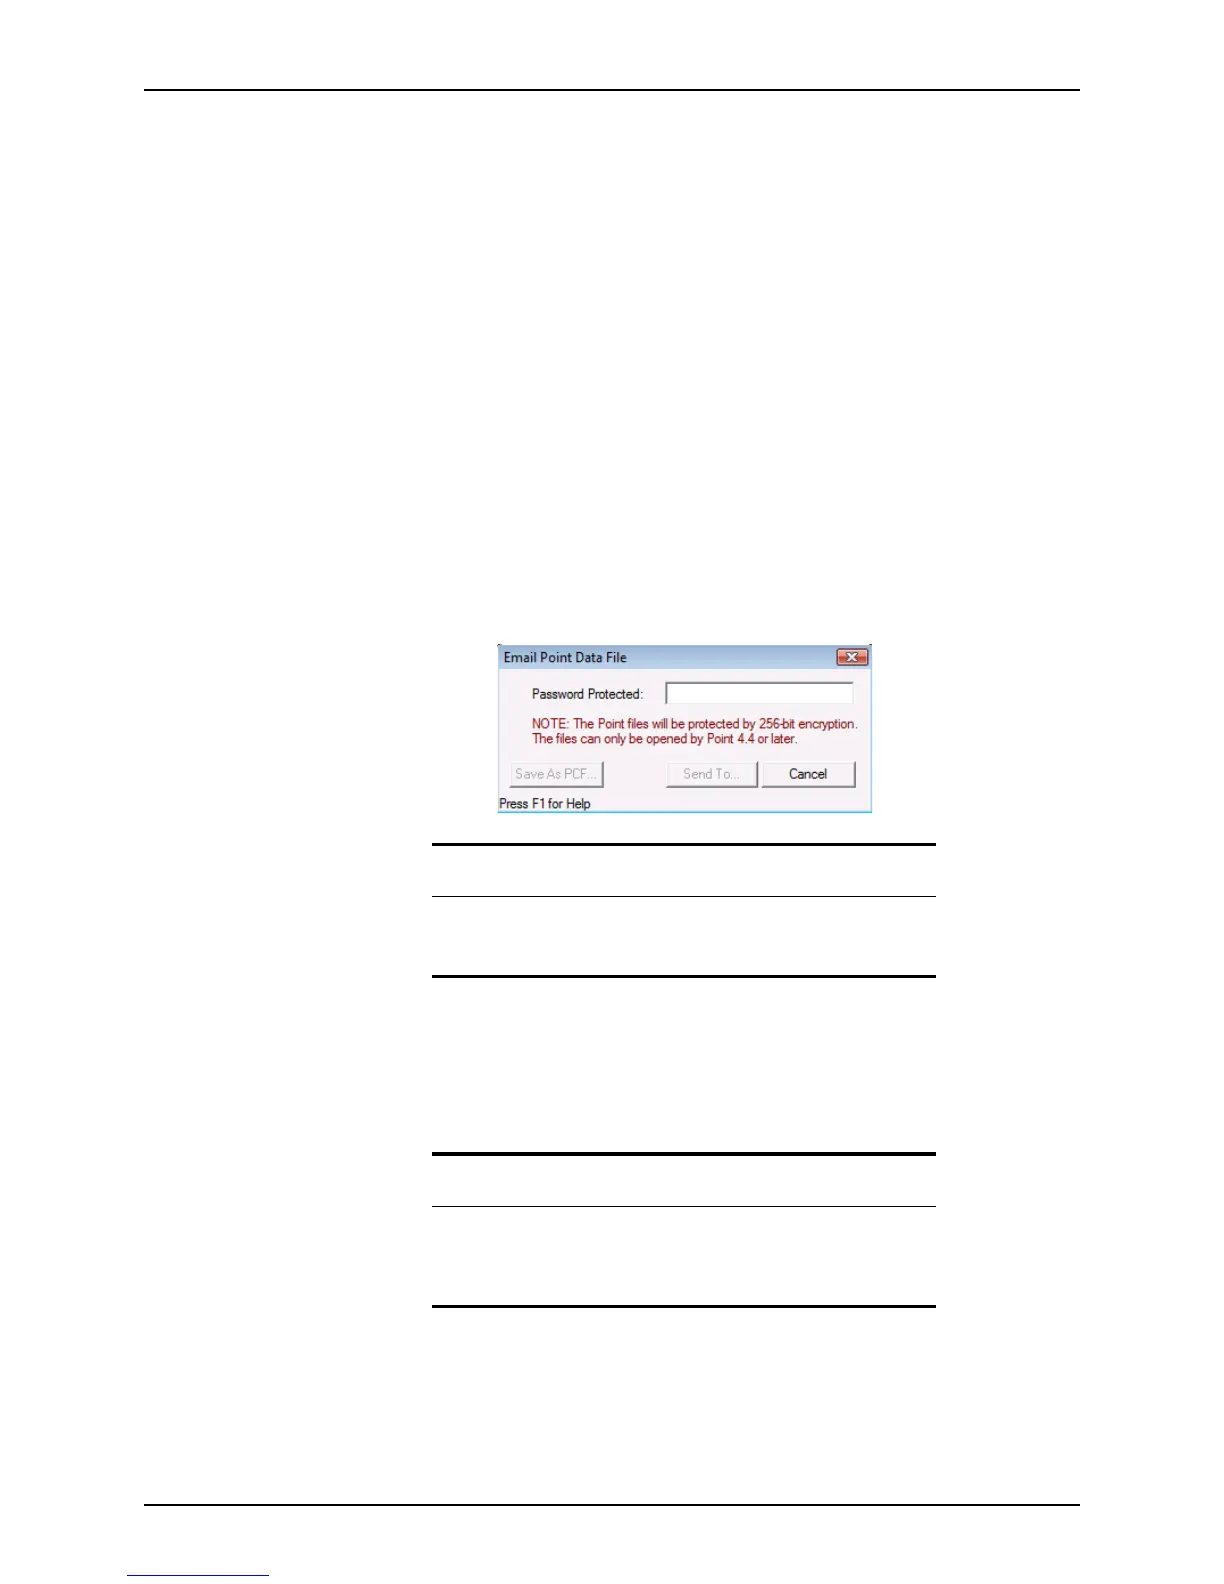
E-mailing data files
Use the Point Data File option to e-mail entire loan files to other Point users as e-mail
attachments.
To e-mail data files:
1 Select File > E-Mail > Point Data File or click the e-mail icon and select E-Mail Point
Data File.
The
E-Mail Point Data File dialog box is displayed.
2 In the
PasswordProtected field, enter a password, and click Send To.
To save the
.pcf
file and send it later as an e-mail attachment, click Save As PCF.
An e-mail window from your default e-mail application opens with the file attached as
a Point compressed file (
.pcf
).
Tip
Use the last four digits of the borrower’s SSN as the password. In the e-
mail text, inform the recipient that the file is password-protected with the
last four digits of their SSN.
Tip
In addition to the methods that are included in this topic, you can also e-
mail Point forms and files from the
Borrower Information screen:
right-click the borrower’s e-mail address, select Send E-mail, Send Forms,
or Send Point Data File and follow the prompts.