Hotspot
IX20 User Guide
412
Depending on your device configuration, you may be presented with an Access selection
menu. Type admin to accessthe Admin CLI.
2. Download the file to your local machine. For example:
> scp host 192.168.4.1 user admin remote /home/admin/temp/ local
/etc/config/hotspot/login.html to remote
admin@192.168.4.1's password: adminpwd
login.html
>
Note The filesin the hotspot directory are only available after hotspot hasbeen enabled for
the first time.
3. On your local machine, edit the file as needed.
4. Upload the edited file from your local machine the the IX20 device. For example:
> scp host 192.168.4.1 user admin remote /home/admin/temp/ local
/etc/config/hotspot/login.html to local
admin@192.168.4.1's password: adminpwd
login.html
>
Upload custom hotspot HTMLpages
Rather than editing the sample HTML pages, you can upload a custom login page with a different
filename.
The new page should include ChilliLibrary.jsand call the same JavaScript functionsthat the sample
HTML pages do. Additional pages and assets can be uploaded to the hotspot folder, and additional
subfolders can be created asneeded. Supported file extensionsinclude: .html, .gif, .js, .jpg, .mp4, .ogv,
.png, .swf, .json, and .dat.
You can configure the IX20 device to use your custom HTML page using either the WebUI or the
command line:
Web
1. Upload your custom HTML file to the IX20 device's filesystem:
Log into the IX20 WebUI asa user with full Admin accessrights.
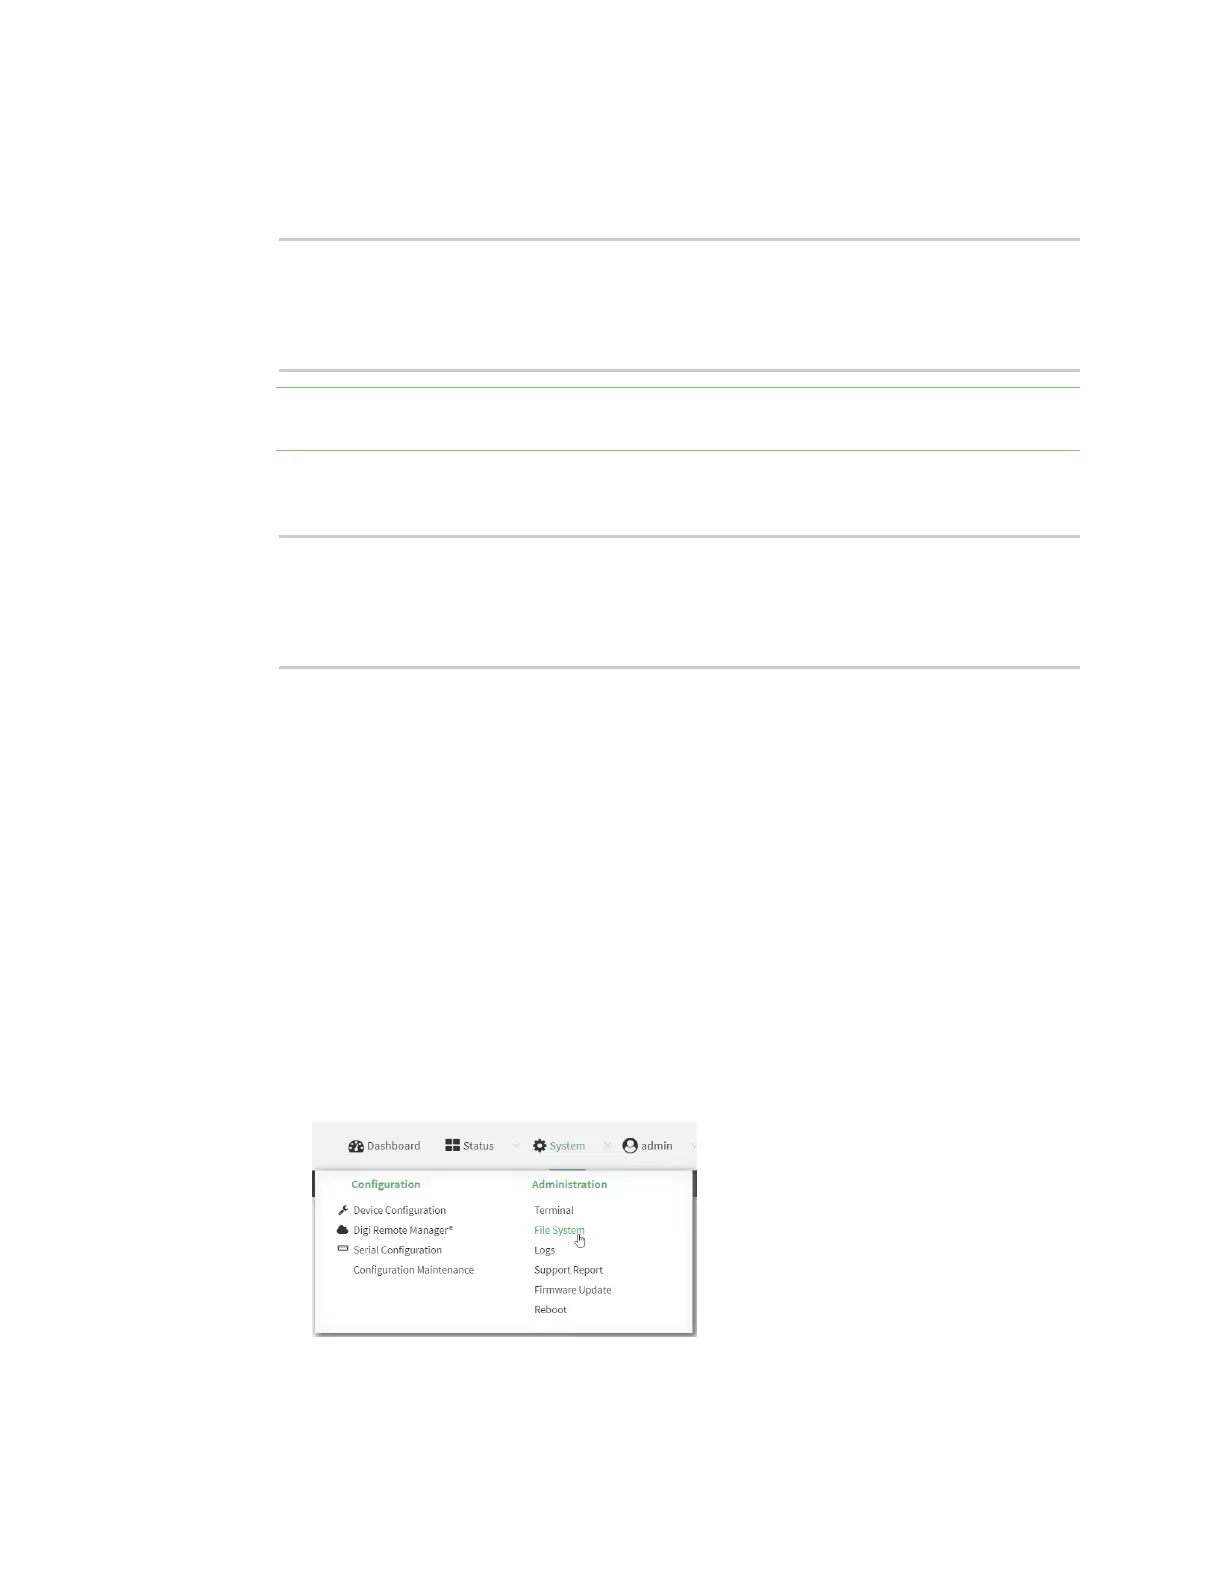
a. On the menu, click System. Under Administration, click File System.
The File System page appears.