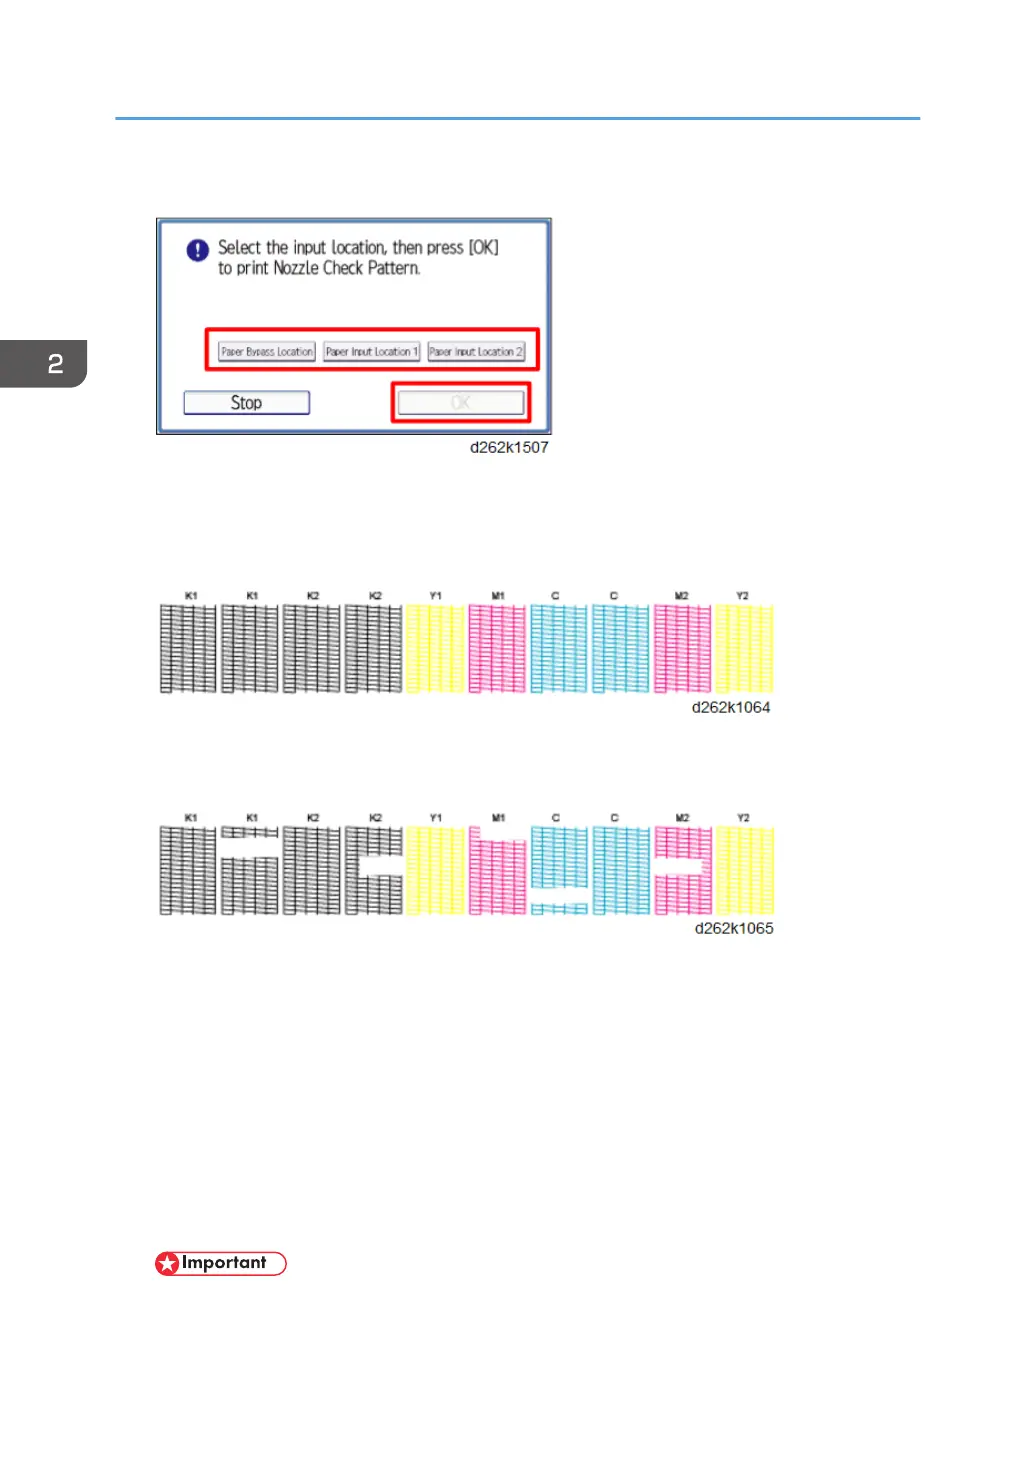
6. Select the paper feed location and touch [OK].
7. Follow the prompts to start printing the pattern.
8. Use a loupe or magnifying glass to check the condition of the pattern.
• If the pattern shows no broken lines, the machine is ready for operation.
• If any of the lines are broken, identify the patterns where the broken lines exist, and then clean
the print heads. (See below.)
9. Touch [Clean Print-heads]
10. Select the print head(s) to clean then touch [Start], and then follow the prompts to
complete the cleaning.
11. Print another Nozzle Check Pattern, and then check the results.
• If the patterns have no broken lines, the procedure is completed.
• If there are still broken lines in one or more of the patterns, clean the print heads again, and
then print another Nozzle Check Pattern.
• If lines still exist after the third cleaning and Nozzle Check Pattern printing, touch [Exit], and
then flush the print heads.
• Flushing the print heads consumes a large amount of ink.
2. Installation
138