Step 10: Printer: Cut Length
1-921 Cut Length Adjustment - Cutting Position Adjustment
This SP adjusts the distance between the DRESS sensor (image registration sensor) and
the first cut position. This setting is no longer used after the 2nd cut during continuous
printing. Cuts once to test the new setting, then once to do the actual cut.
[-10 to 10/0/0.1 mm]
Example
• To set a length of 297 mm, with the machine cutting at 300 mm, you need to
move the cutting position 3 mm upstream with a value of -3 mm.
• To set a length of 295 mm, with the machine cutting at 297 mm, you need to
move the cutting position downstream with a value of +2 mm
• The cut length adjustment is done for all paper sizes after these settings are done.
• After these settings are done you may still need to do fine adjustments for each paper size.
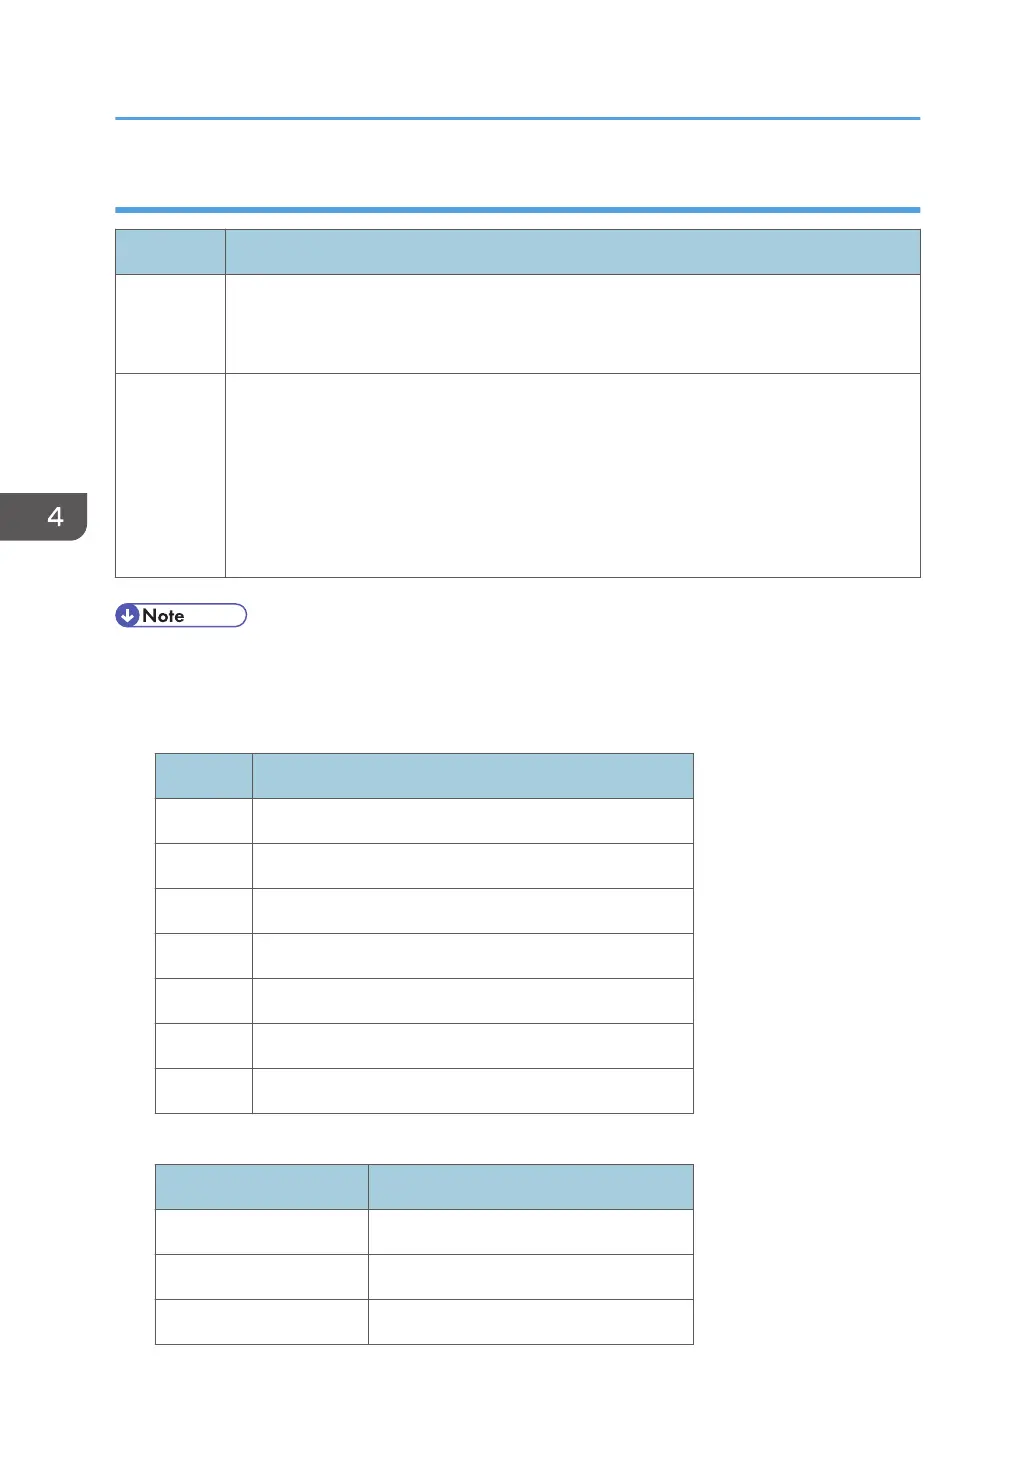
1. Use the Preset Cut feature to make standard cuts of plain paper for these sizes:
Size Orientation
A3 Sideways
A1 Lengthways
A0 Lengthways
A Sideways (Eng. 11”)
B Sideways (Eng. 17”)
D Lengthways (Eng. 34”)
E Lengthways (Eng. 44”)
2. Measure the cuts and check them against the standards of this table.
Cut Length (mm) Cut Tolerance (mm)
Less than 297 ±3
420 to 1219 ±5
to 2000 ±6
4. Replacement and Adjustment
584