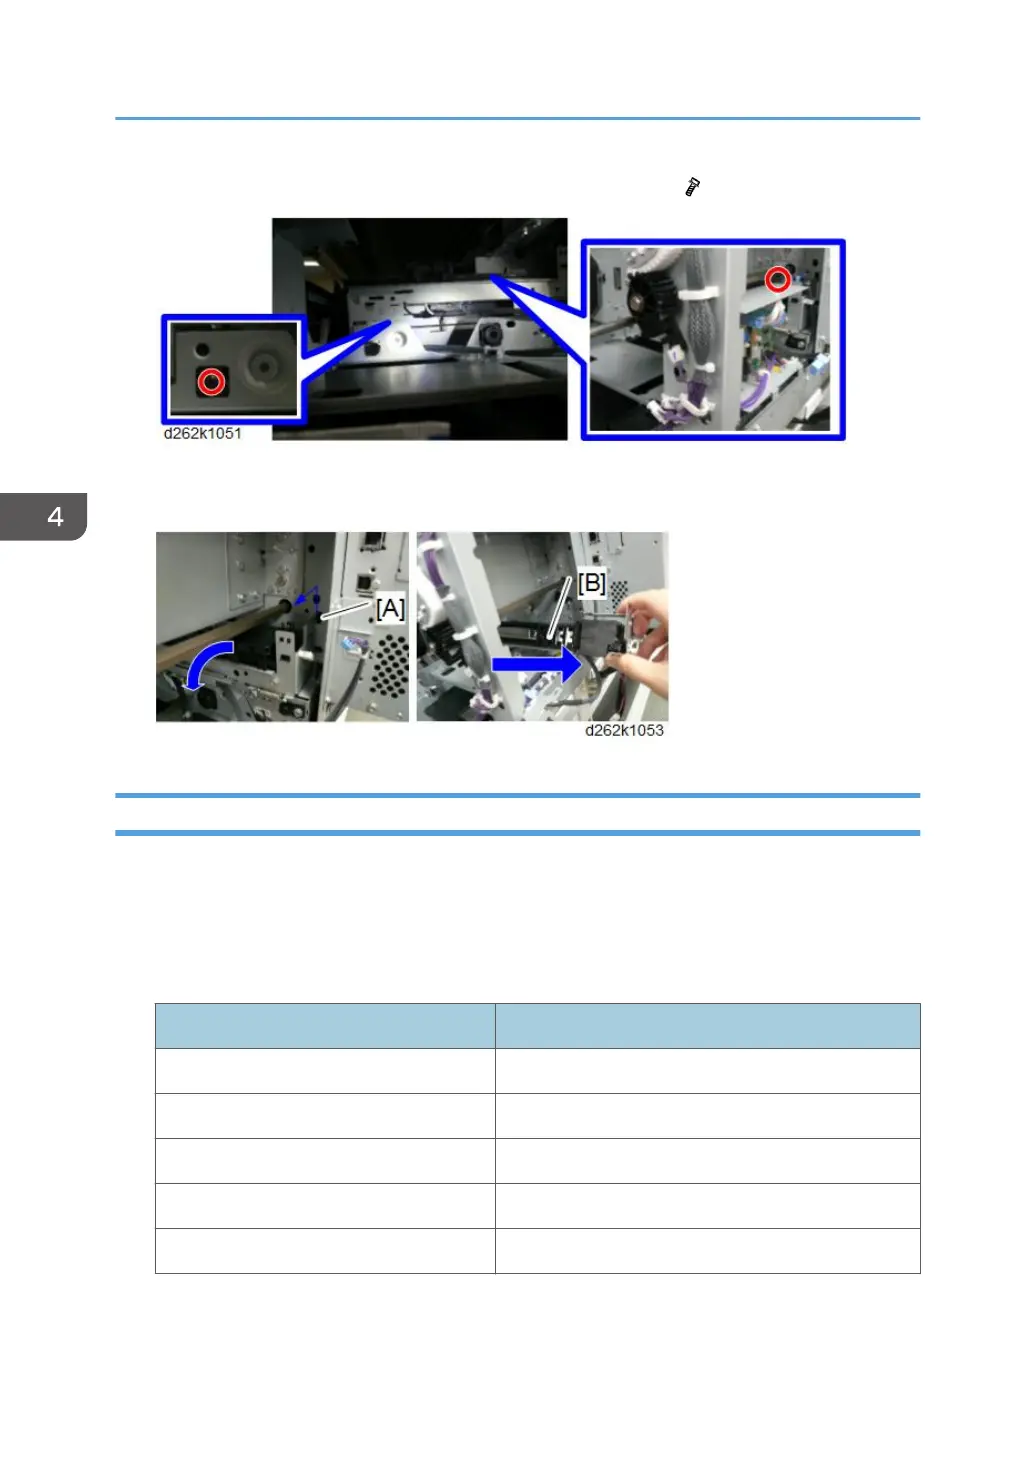
9. Remove the two screws fixing the auto-nozzle check bracket ( x2).
10. Turn the auto-nozzle check unit [B] forward while releasing the hook [A] of the auto-
nozzle check bracket, and pull it out from the opening of the right back of the main unit.
After Replacement
After changing the auto-nozzle check upper unit or auto-nozzle check unit, perform the procedures
below.
1. Perform SP2-024-004 to reset the counters.
The counters shown below will be reset.
SP Contents
SP7-761-011 to 019 Auto-nozzle checking time
SP7-767-011 to 020 Accumulated value of no-purging
SP7-768-011 to 020 Accumulated value of no-purging lines
SP7-761-020 Electrode-plate wiping time
SP2-021-011 Flag for operating life of the auto-nozzle check
4. Replacement and Adjustment
542