4. Insert a blank SD card in SD slot #2, and then turn ON the main power.
5. Upload the NVRAM data from the BiCU using SP5-824-001.
6. Turn OFF the main power and disconnect the power plug.
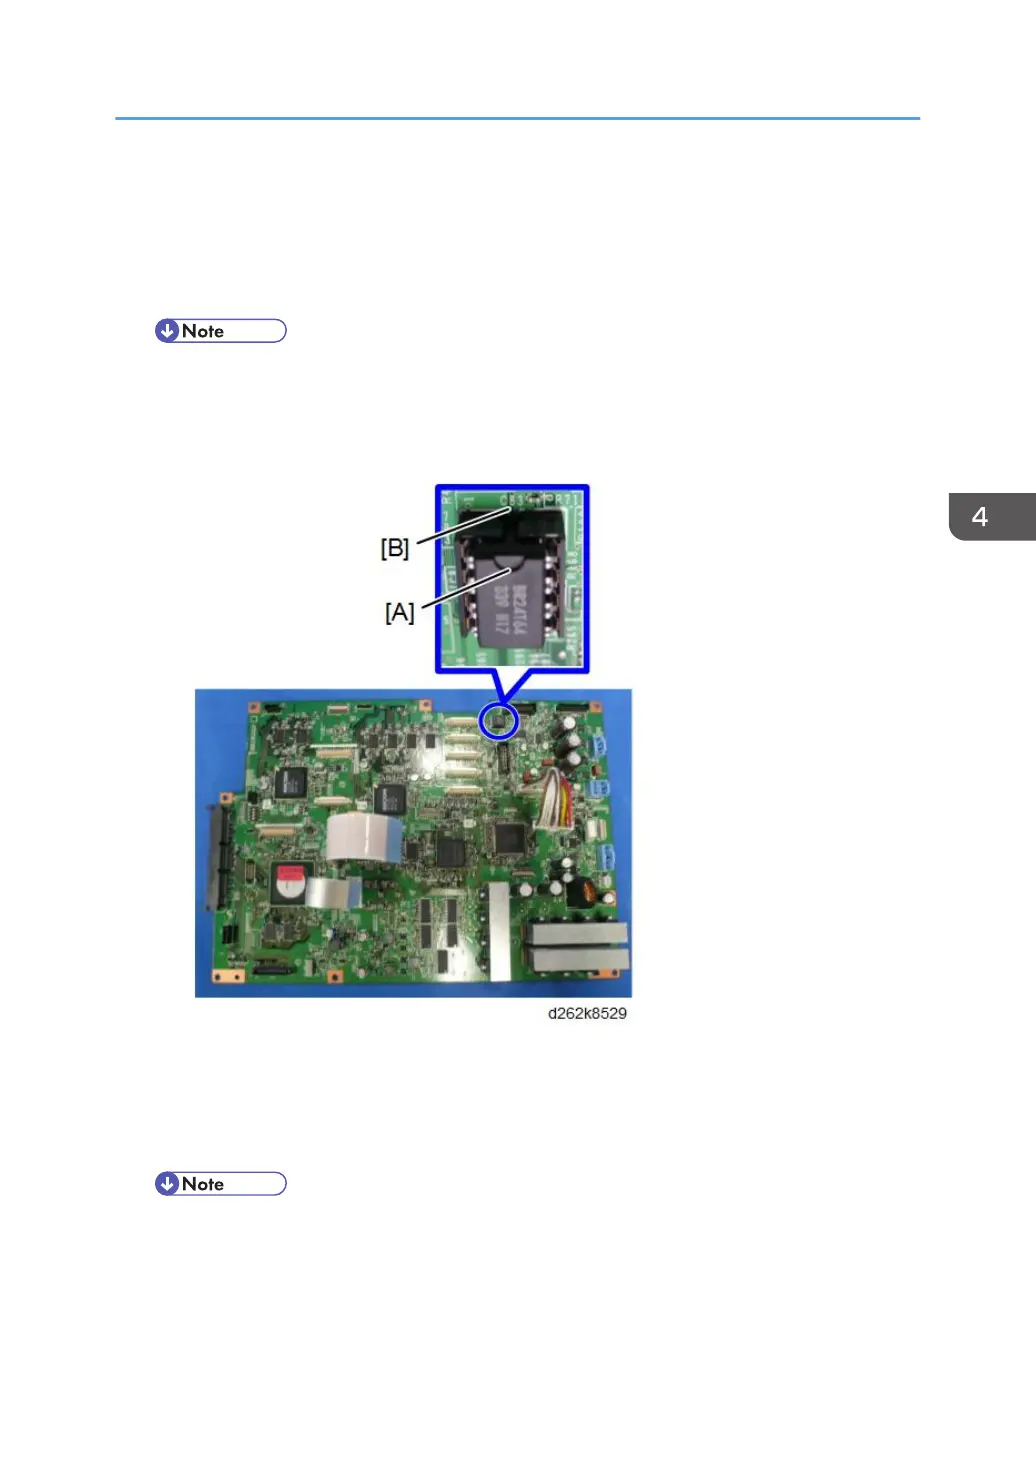
7. Replace the NVRAM on the BiCU with a new one.
• Make sure the NVRAM [A] is installed at the correct mounting location and orientation. Install
the NVRAM so that the indentation on the NVRAM corresponds with the mark [B] on the
BiCU.
• Incorrect installation of the NVRAM will damage both the BiCU and the NVRAM
8. Connect the power plug and turn ON the main power.
9. Set SP5-811-001 ([Machine Serial Number]-[Set]), SP5-807-001 ([Area/Model Selection
DFU - JPN: 1, NA: 2, EU/AA: 3, CHN: 6]) and SP5-907-001 ([Plug & Play Maker/Model
Name]).
• For information on how to configure the machine serial number and area selection, contact
the supervisor in your branch.
• SC995 will appear until the machine serial number and area selection are programed
correctly.
Electrical Components
569