Point User Guide 205
Electronic document storage
5 Select the forms to store in the repository.
The forms are listed in the
Forms Selected section as they are selected.
6 Use the Print Option dropdown list to specify whether you want to store the forms
blank, blank with company information, or with data.
7 If you selected multiple forms and you want to save them in a single PDF file, select
the
Store as one file check box.
If the check box is not selected, a separate PDF file is generated for each form.
8 Click Store.
If the
Store as one file check box is selected when you click Store, the Document
Name
dialog box is displayed which prompts you to name the file. Enter a file name
and click OK.
The forms are converted to a single PDF document and the pages are displayed
individually in the
Document Information Preview dialog box. If the Store as one
file
check box was not selected, each PDF file is displayed individually in the
Document Information Preview dialog box.
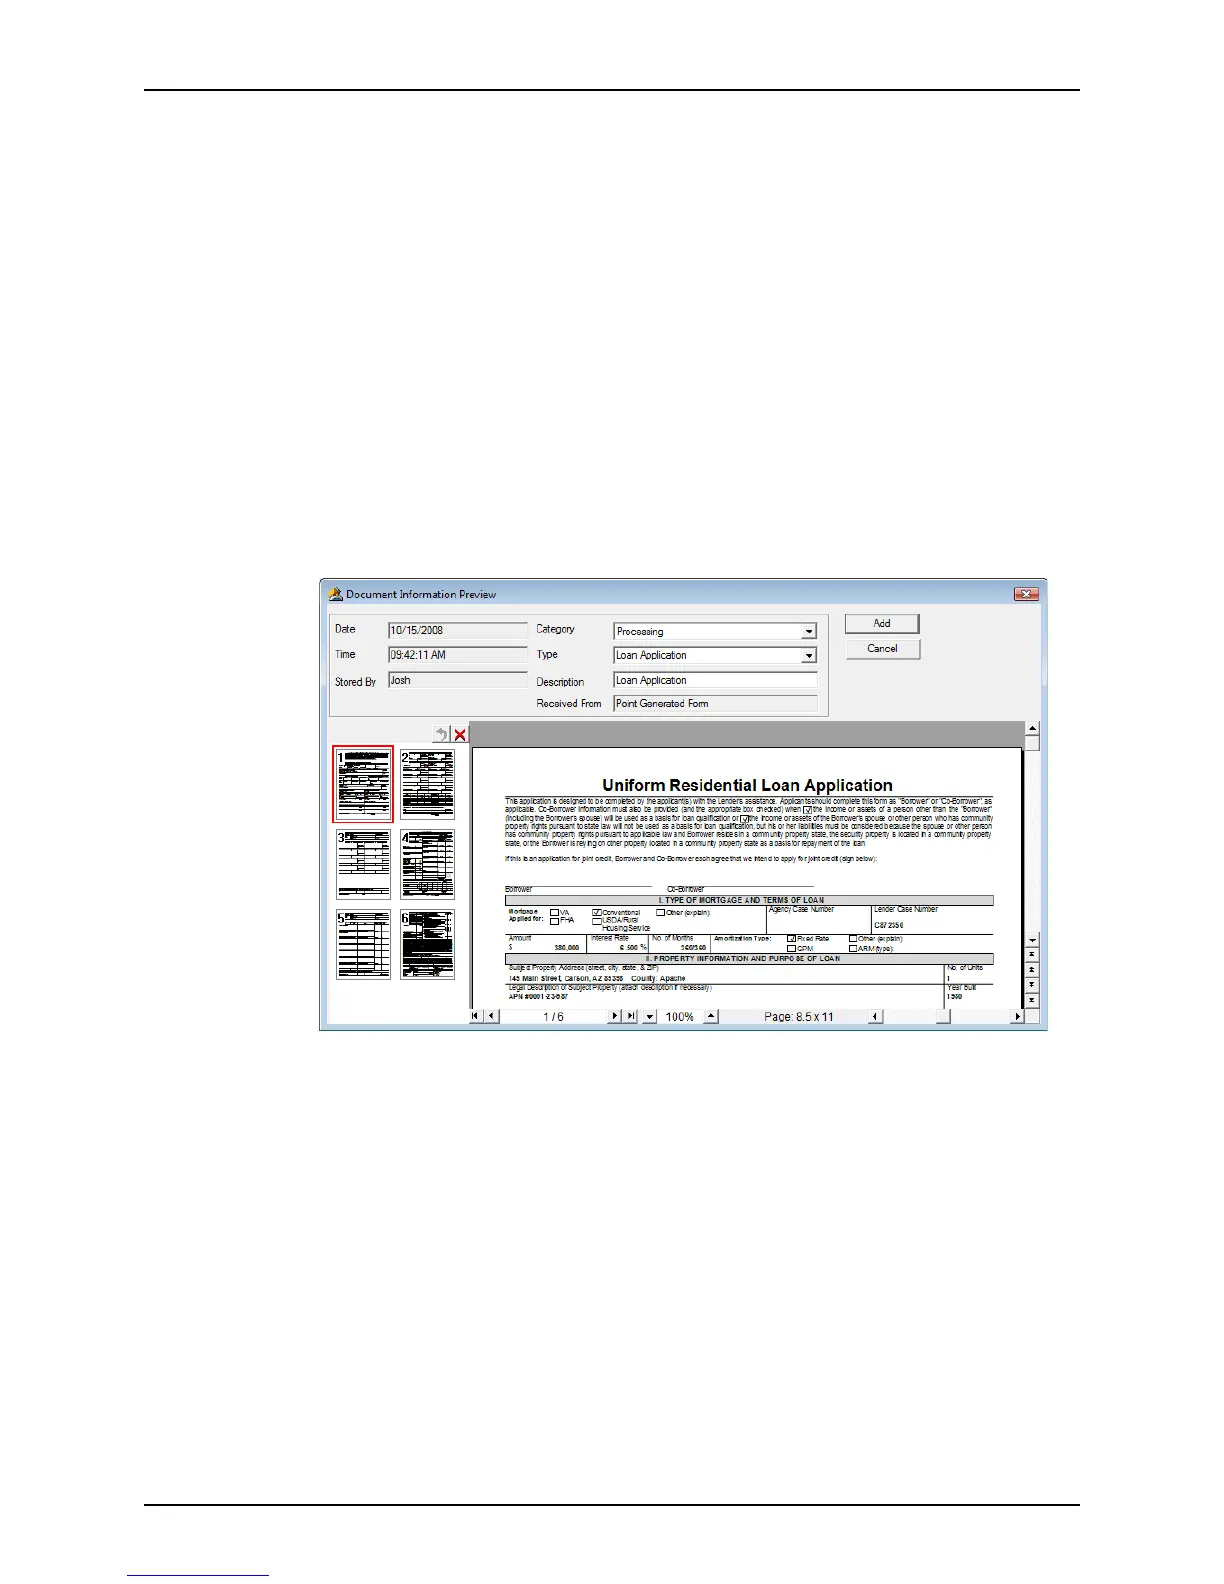
The
Document Information Preview dialog box contains a preview of the
document, the date and time the document was added to the document repository, the
name of the user who made the request, the document category, the MISMO type
,a
description of the document, and the source of the form (
ReceivedFrom field).
A document thumbnail is displayed next to the preview page. To view a different page
in a multiple-page document, click the thumbnail of the page you want to view. To
delete a page, select the thumbnail and click the red X button. If you delete a page in
error, click the Undo button next to the X button to restore the page. To restore
multiple deleted pages, click the Undo button until you restore every page. The Undo
button is inactive when there are no pages to restore.
You can also use the controls at the bottom of the dialog box to scroll through the
pages or to enlarge the view.
9 Review the document and click Add to add it to the repository.
If multiple PDF files were generated, the next file is displayed.