52 Calyx Software
Utilities configuration
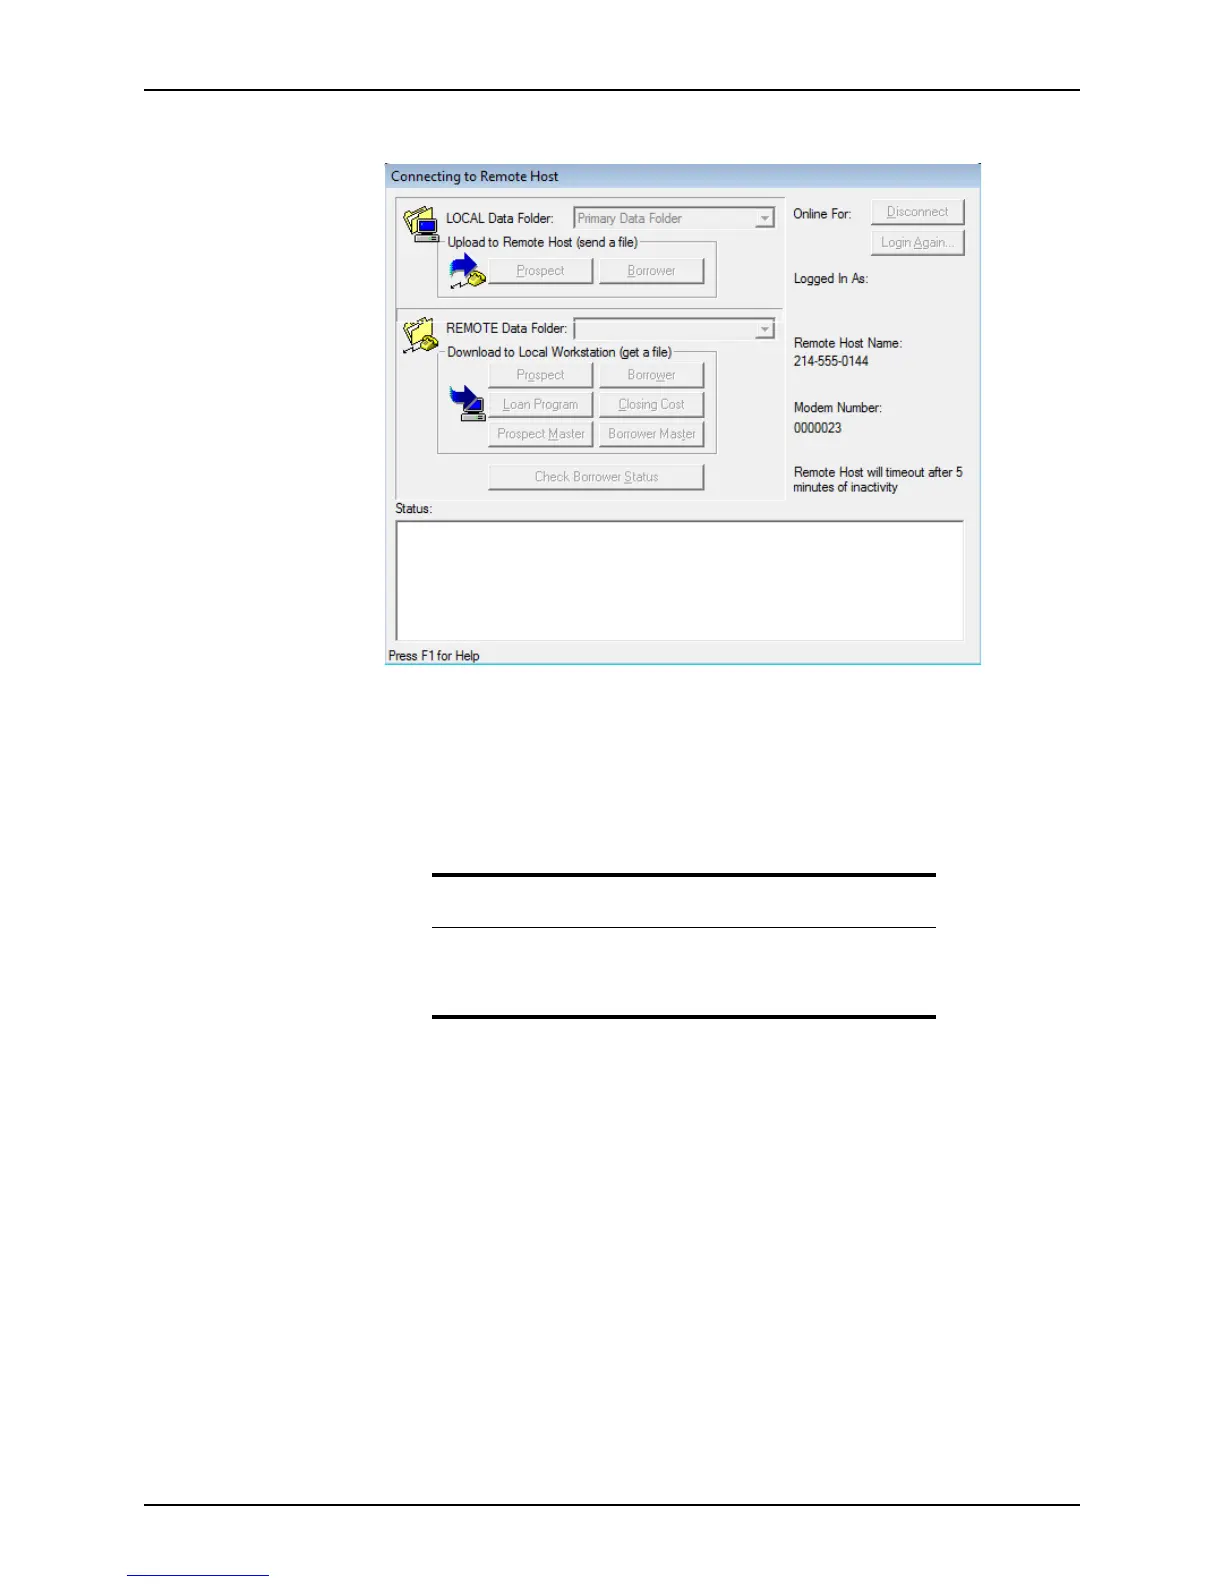
The Connecting to Remote Host dialog box is displayed.
If any of the data folders on the computer in Host mode have security activated, you
are prompted for a user ID and password.
6 Enter your user ID and password to access the protected data folders.
7 If the values in either the LOCAL Data Folder
dropdown list (the data folder from which
you are sending the file) or the REMOTE Data Folder
dropdown list (the data folder to
which you are sending the file) are incorrect, select the correct data folders.
8 In the
Upload to Remote Host (send a file) section, click Prospect or Borrower to
access the type of file to send.
9 Select the files to send.
When you select a prospect or borrower file to be sent, all attached files are
automatically sent as well.
10 Click Select All to select and send all the listed files.
A confirmation box is displayed that prompts you to confirm sending the number of
files requested.
11 To initiate another transmission, repeat the process. Otherwise, click Disconnect.
The new files are automatically added to the correct data folder and the prospect or
borrower file list on the Host computer.
Attention
If neither computer contains multiple data folders, you can accept the
Primary Data Folder default.
Rebuilding the file lists is not necessary.