GARD 8000 SYS RFL Electronics
November 28, 2017 vii (973) 334-3100
LIST OF FIGURES
Figure 2-1. Web Browser Interface Overview ......................................................................................................................................2-2
Figure 2-2. GARD 8000 3U Chassis Front and Rear View................................................................................................................2-4
Figure 2-3. GARD 8000 6U Chassis Front and Rear View................................................................................................................2-4
Figure 2-4. GARD 8000 Conceptual design .........................................................................................................................................2-6
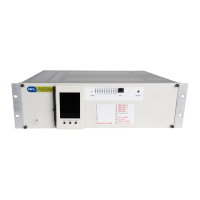
Figure 2-5. Front and Rear of 3U Chassis ............................................................................................................................................2-8
Figure 2-6. GARD 8000 DC Connection diagram, 3U Distance Relay Plus Teleprotection System .........................................2-9
Figure 2-7. Alarm configurations ..........................................................................................................................................................2-11
Figure 2-8. Antenna ................................................................................................................................................................................2-12
Figure 2-9. Programmable LED’s, 3U Chassis...................................................................................................................................2-14
Figure 2-10. Programmable LED’s, 6U Chassis ................................................................................................................................2-15
Figure 2-11. Typical LED Color Configuration for a GARD 8000 with a PLC FSK Module. .................................................2-16
Figure 2-12. Communication interface.................................................................................................................................................2-18
Figure 2-13. T1/E1Drop and Insert and Terminal Pass Thru ...........................................................................................................2-20
Figure 2-14. Typical GARD 8000 Aux Communication Channel Application ............................................................................2-27
Figure 2-15. Remote Access Service Channels ..................................................................................................................................2-28
Figure 4-1. Mounting dimensions for GARD 8000 .............................................................................................................................4-3
Figure 4-2. Location of Protective Earth Stud ......................................................................................................................................4-7
Figure 4-3. Location of TB1 ....................................................................................................................................................................4-8
Figure 4-4. Location of Synchronous multi-protocol interface..........................................................................................................4-9
Figure 4-5. Pin-Outs RS-449, X.21, V.35............................................................................................................................................4-10
Figure 4-6. Pin-Outs G.703 ....................................................................................................................................................................4-11
Figure 4-7. Pin-Outs, T1/E1 ...................................................................................................................................................................4-11
Figure 4-8. Pin-Outs, RS-232.................................................................................................................................................................4-12
Figure 4-9. Pin-Outs, Audio Tone Module..........................................................................................................................................4-12
Figure 4-10. Terminal Block Connections, Metering Module ........................................................................................................4-13
Figure 4-11. Terminal Block Connections, Telemetry Transmitter Module .................................................................................4-13
Figure 4-12. Power Supply I/O Module (Teleprotection Commissioning)....................................................................................4-18
Figure 4-13. GARD 8000 Controller Module (Teleprotection Commissioning)..........................................................................4-19
Figure 4-14. Power Supply I/O Module (Audio-Tone Commissioning)........................................................................................4-31
Figure 4-15. GARD 8000 Controller Module (Audio-Tone Commissioning) ..............................................................................4-32
Figure 4-16. PLC Analog Module Test Points....................................................................................................................................4-46
Figure 4-17. Location of 50W Power Amplifier ................................................................................................................................4-50
Figure 4-18. 50W Power Amplifier Circuit Board.............................................................................................................................4-51
Figure 4-19. PLC Rear of 50W RF Chassis ........................................................................................................................................4-52
Figure 4-20. GARD 8000 Controller Module (Commissioning, Current Diff) ............................................................................4-55
Figure 4-21. Current Diff. Relay Wiring..............................................................................................................................................4-56
Figure 4-22. GARD 8000 Current Diff Relay, I/O Connections .....................................................................................................4-56
Figure 5-1. GARD 8000 Log-In Page ....................................................................................................................................................5-1
Figure 5-2. Front View of the 6U Chassis showing location of the RJ-45 port ..............................................................................5-2
Figure 5-3. Rear View Of 6U Chassis showing location of RJ-45 (or Fiber Optic) and RS-232 ports ......................................5-3
Figure 5-4. Front view of 3U chassis showing the location of the RJ-45 port ................................................................................5-4
Figure 5-5. Rear view of 3U chassis showing the location of the RJ-45 (or Fiber Optic) and the RS-232 ports......................5-4
Figure 5-6. Communication Overview (Typical) .................................................................................................................................5-5
Figure 5-7. Connecting the GARD to a PC ...........................................................................................................................................5-6
Figure 5-8. GARD Login Access ............................................................................................................................................................5-7
Figure 5-9. TCP/IP Address setup...........................................................................................................................................................5-8
Figure 5-10. Typical Chassis Configuration Status page for the 3U chassis .................................................................................5-17
Figure 5-11. Typical Chassis Configuration Status page for 6U chassis. ......................................................................................5-18
Figure 5-12. Touch Screen Display in 3U Chassis. ...........................................................................................................................5-19
Figure 5-13. Touch Screen Orientation ................................................................................................................................................5-20
Figure 5-14. Touch Screen Initialization. ............................................................................................................................................5-20
Figure 5-15. TSD LED Labels...............................................................................................................................................................5-21
Figure 5-16. Measured Values...............................................................................................................................................................5-22