5. Hold the paper roll beneath and feed the paper edge into the guides behind the paper
roll.
When set correctly, the paper is pulled into the machine and the beeper sounds.
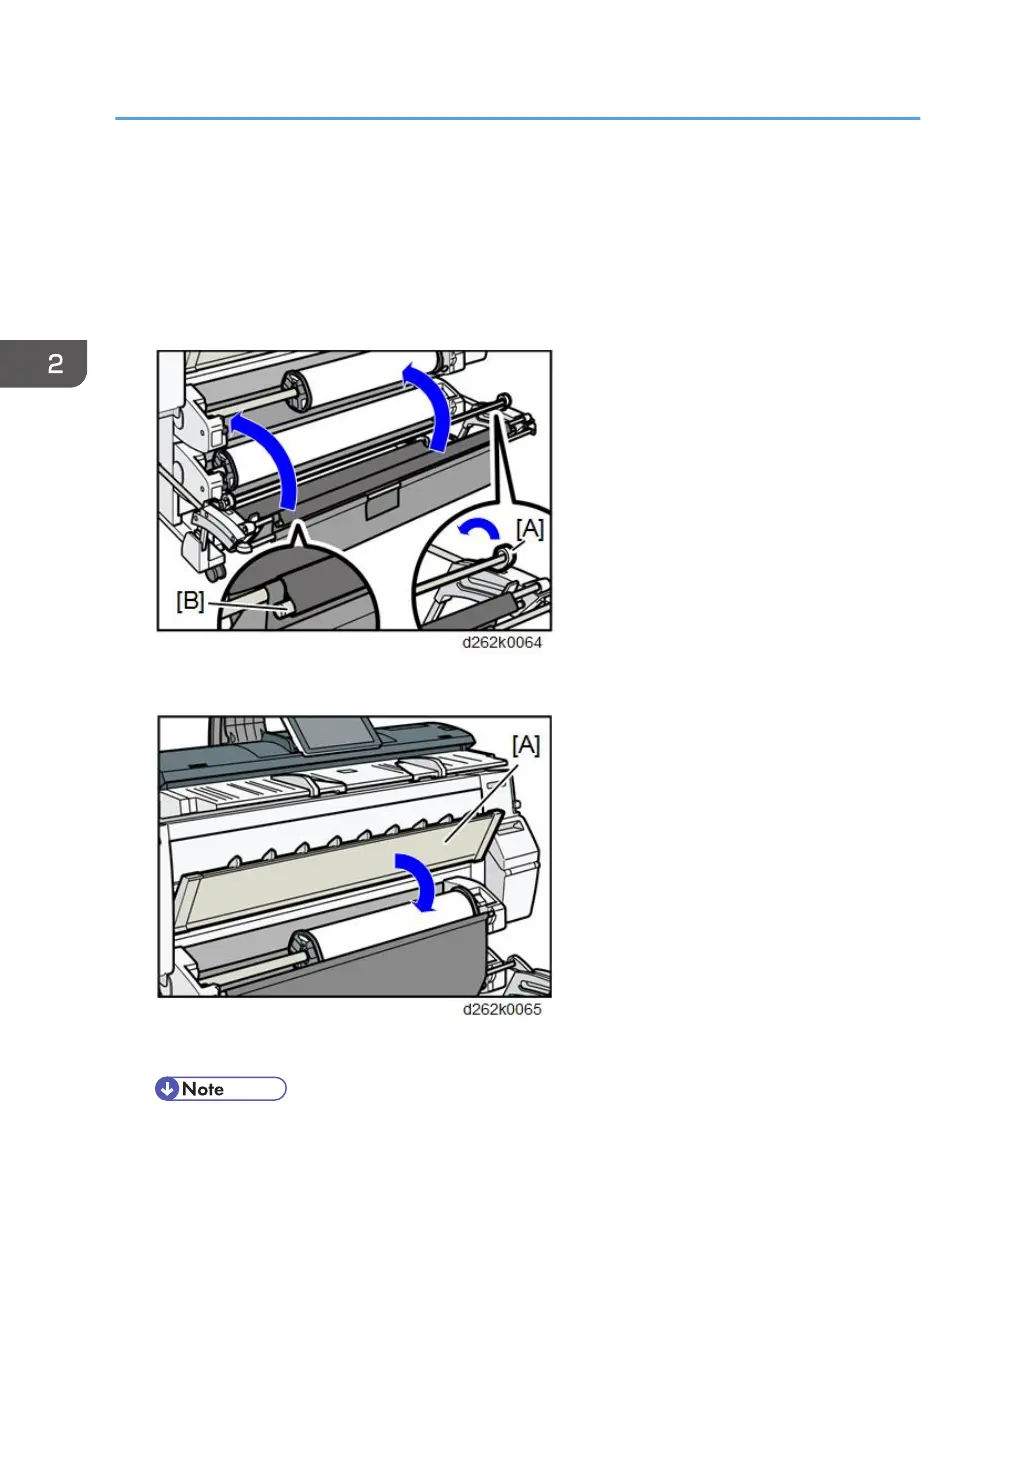
6. Return the bar [B] of the output basket.
Push bar [A] into the machine, and then lift bar up and hook it.
7. Lower the paper input location cover [A].
8. Select whether or not to cut off the edge of the paper roll on the screen.
• Select [Cut] when the edge of the paper is cut manually, such as with scissors, or the paper is
danp.
9. Follow the on-screen instructions to specify the paper type and thickness of the paper roll.
Touch [Matches] if the paper type and thickness of paper roll you loaded are the same as those
displayed on the screen.
If the paper type and thickness are different from those displayed, touch [Does not Match]. Select
the proper items according to the paper type and thickness you want to use, and then touch [OK].
2. Installation
134