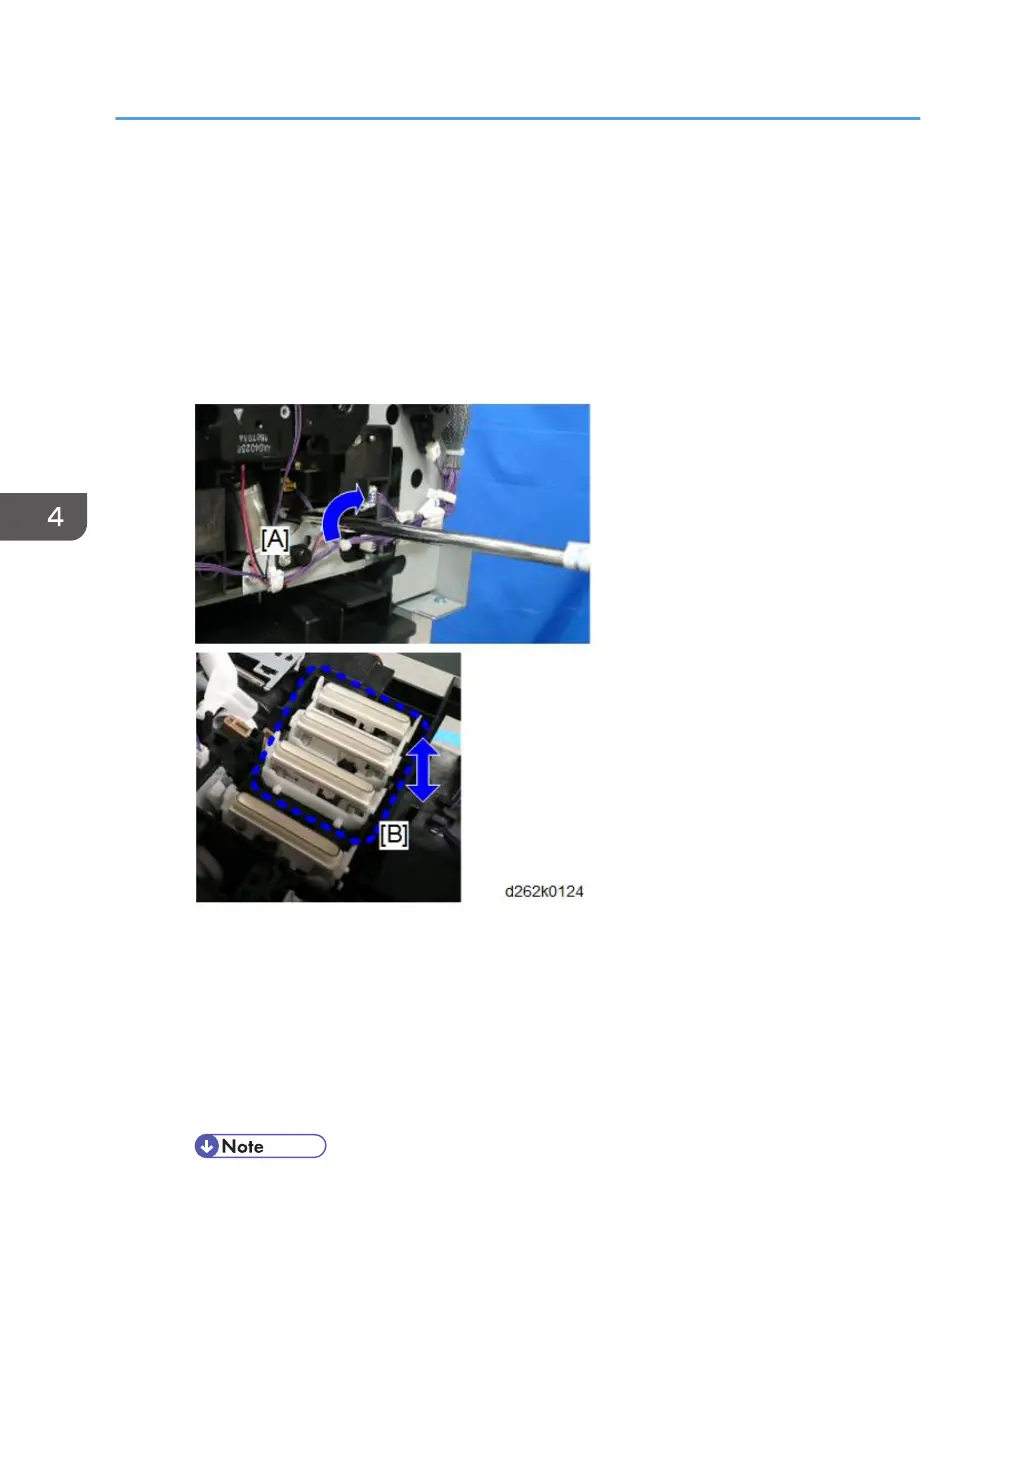
2nd Point: Print Caps (K2, M1Y1, C, M2Y2)
• Rotating the hex socket at [A] raises and lowers print head caps [B] which cover the K2,
M1Y1, C, and M2Y2 print heads.
• Normally, these print head caps are up and engaged with the K2, M1Y1, C, and M2Y2 print
heads of the carriage unit to keep them from drying out.
• The print head caps must be lowered before the carriage can be moved away from the right
side of the machine.
Procedure
1. Raise the front cover (p.249).
2. Raise the paper holding lever [A].
3. Side a sheet of paper [B] into the machine as far as the gap between the raised
rollers and the platen.
4. Lower the paper holding lever [C] to hold the paper in place.
• This paper protects the platen from ink that may leak from the carriage unit after it is
moved away from the right side of the machine.
4. Replacement and Adjustment
270