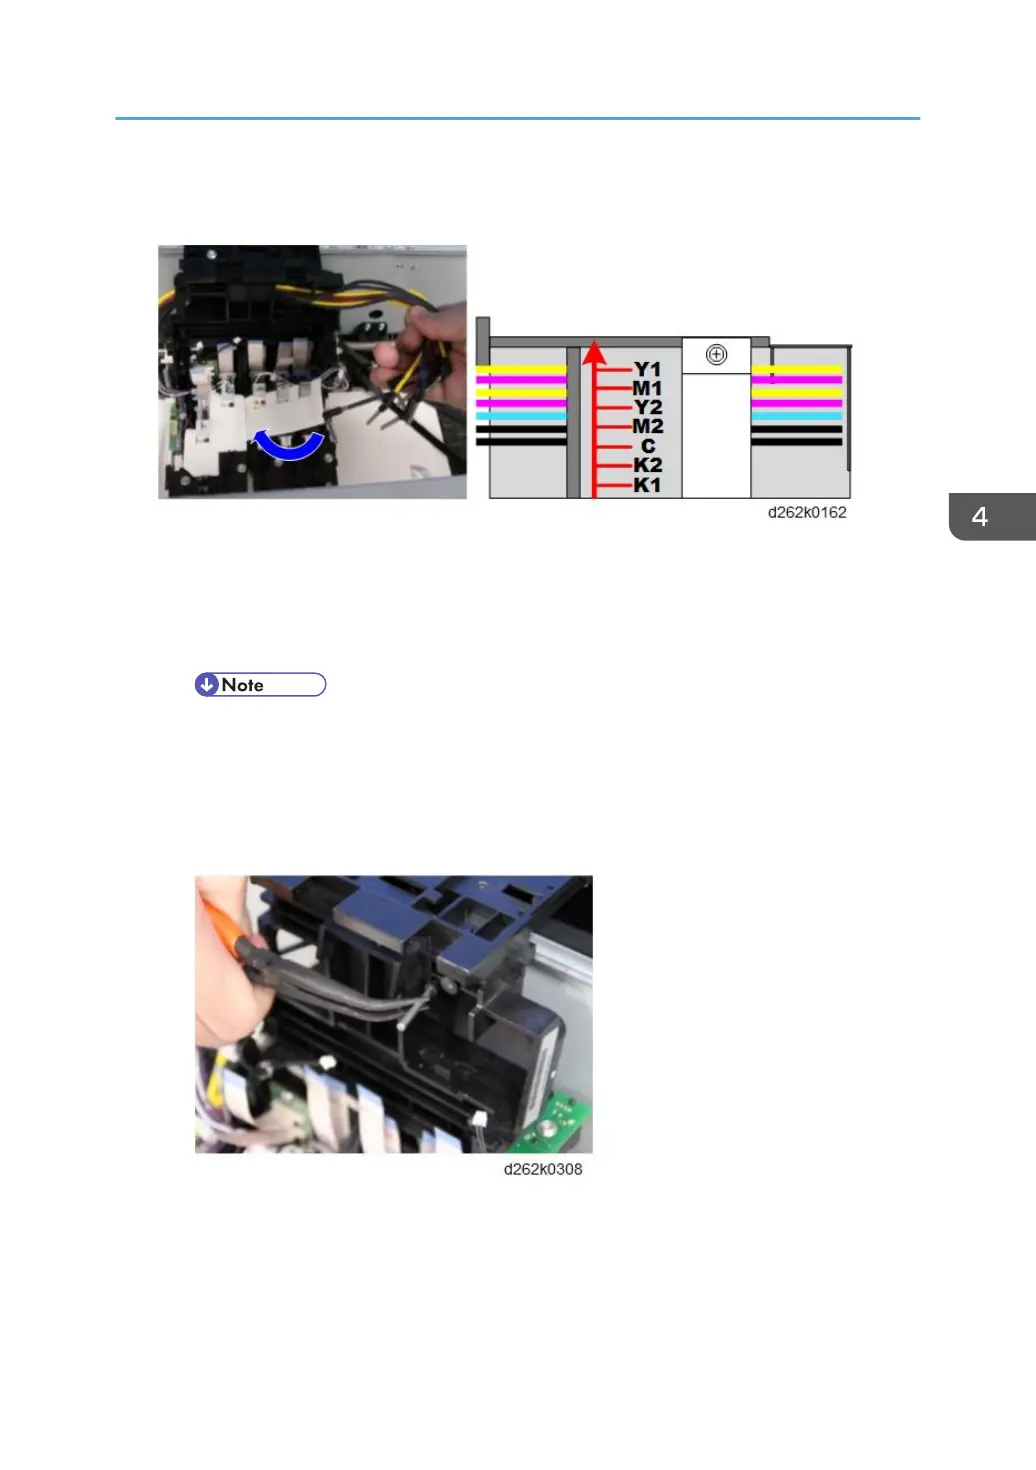
Before attaching the bracket to secure the ink tubes, check that the ink tubes are lined correctly
as shown below.
1. Pass the ink tubes, K2, K1, Y1, M1, C, Y2, and M2 in this order one by one through the
upper part of the carriage unit.
2. Pass the ink tubes from left side to the right side of the carriage unit in the order described
above.
• Then the tubes are prevented from crossing inside the carriage unit.
• If the ink tubes are crossed, the bracket to secure the ink tubes may not be attached
correctly.
3. If the plugged ink tube is hard to pass the upper part of the carriage unit, pull it out using the
longnose pliers.
Place the ink tubes on the print head in the procedure below.
1. Remove the plugs of the ink tubes (K1) and (K2) and the ink supply ports of the print head.
2. Attach the ink tubes (K1) and (K2) to the ink supply ports and place them on the path of the
print head in the order of K2 and K1.
Carriage Unit
499