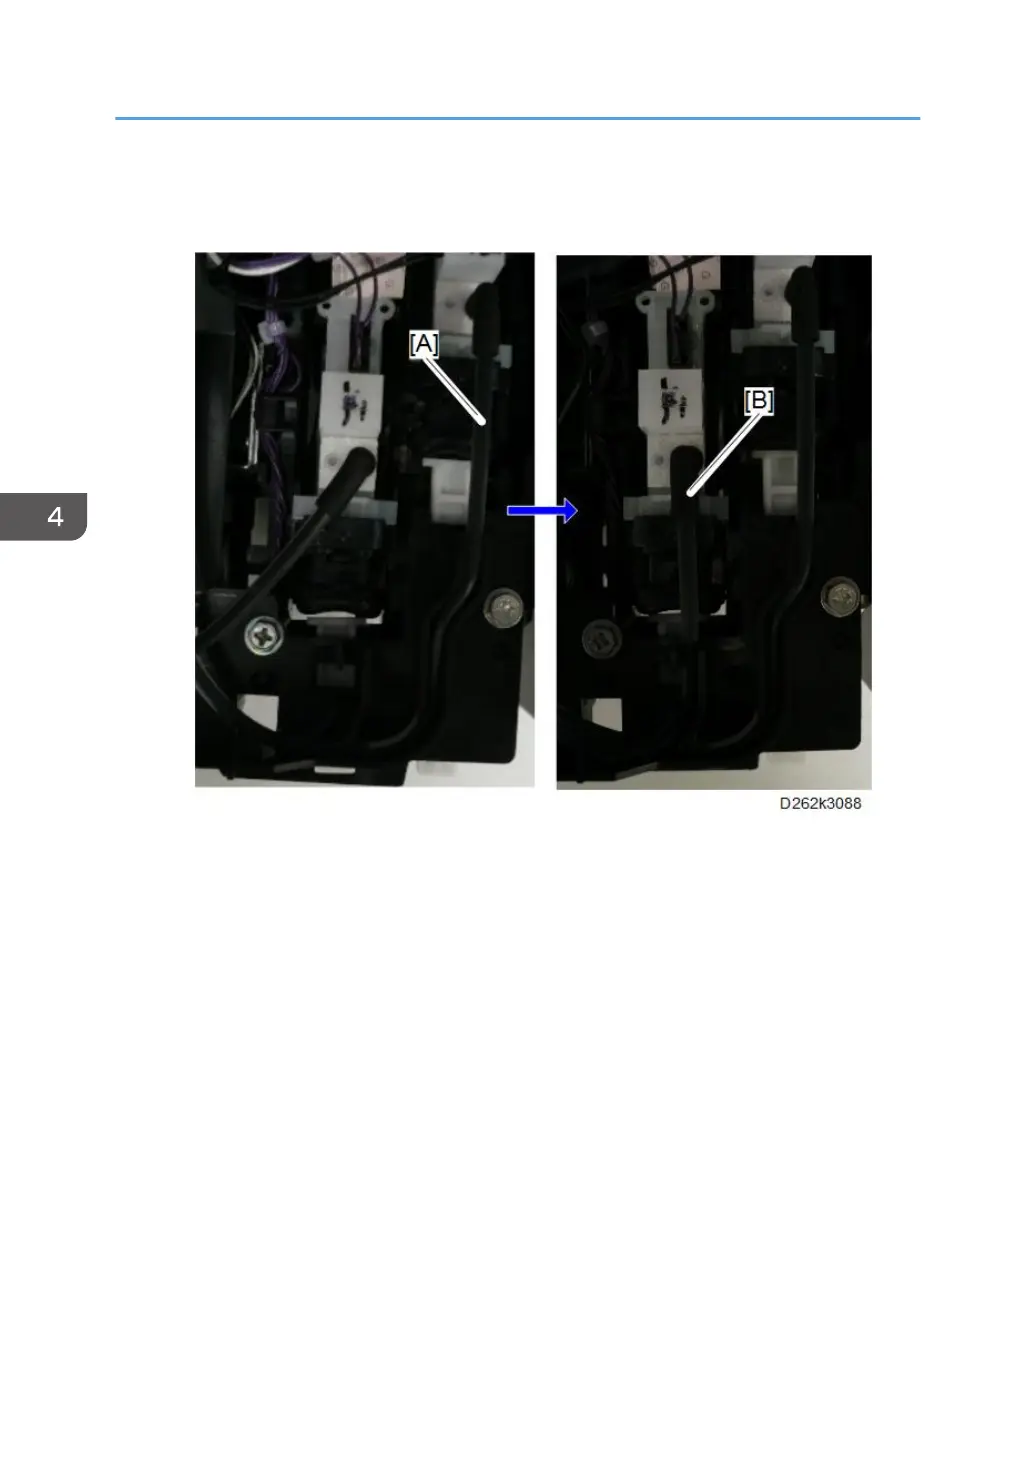
Place the ink tube (K2) [A] on the path of the print head first.
Then place the ink tube (K1) [B] upon the ink tube (K2) on the path of the print head.
3. Remove the plugs from the ports of the ink tubes (Y1), (M1), (C), (M2), and (Y2) and the ink
supply ports of the print heads.
4. Place the ink tubes on the path of the print head, from right to left in order of Y1, M1, C, Y2,
and M2.
• Place the ink tube (Y1) on the path of the print head first. [A]
• Then place the ink tube (M1) upon the ink tube (Y1) on the path of the print head. [B]
• Then place the ink tube (C) upon the ink tube (M1) [C] and the ink tube (Y2) upon the ink
tube (C) on the path of the print head. [D]
• Last of all, place the ink tube (M2) upon the ink tube (Y2) on the path of the print head.
[E]
4. Replacement and Adjustment
500