When the carriage unit installation completes, move the unit right and left to check that it does
not fall down from the rail.
• If the ink tube falls down, the ink tube is loosely attached on the left of the carriage unit.
Remove the bracket to secure the ink tubes and pull the ink tube from the left of the carriage
unit as possible to remove the looseness.
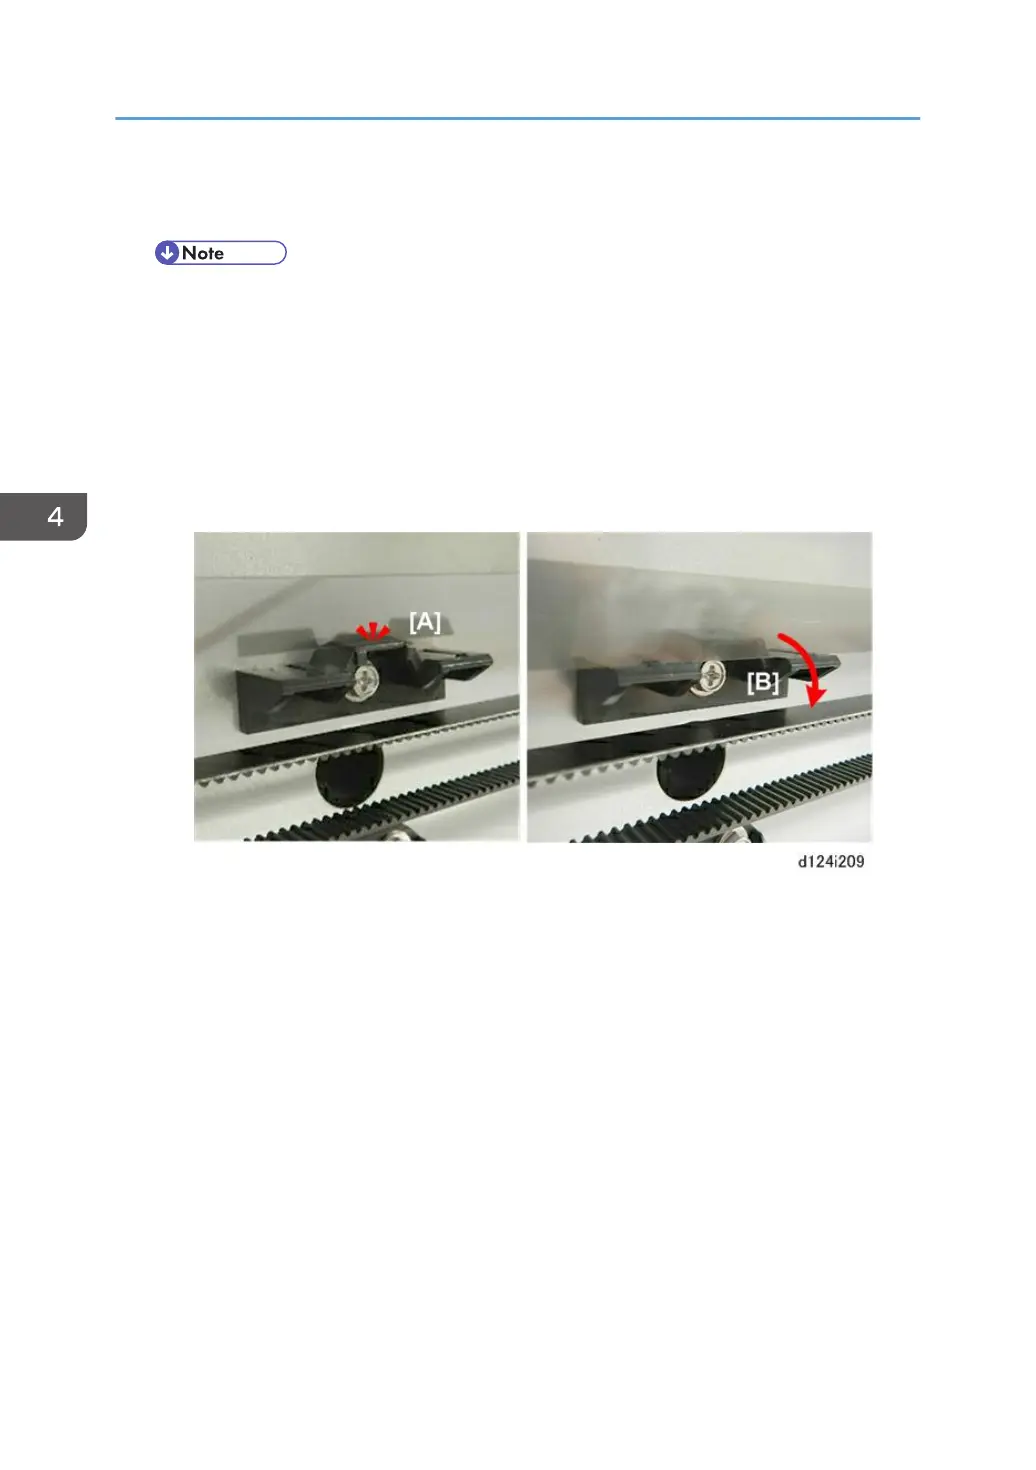
Before you turn the machine on, check the position of the horizontal encoder strip on the left.
• If the encoder strip is up on the bracket as shown at [A], pull it forward and down so it is in
front of the bracket as shown at [B].
• If the machine is turned on with the strip positioned as shown at [A], the movement of the
carriage unit may scratch the surface of the encoder strip.
After attaching the ink supply unit, perform the operations described below.
1. Attach the carriage front cover, upper cover, and left cover to the carriage unit.
2. Open the ink-cartridge cover, and remove the customer's ink cartridge.
3. Attach the service ink cartridge to the ink supply unit and close the ink-cartridge cover.
4. Turn the machine on.
5. Flush the print heads (p.878).
6. Set SP2-012-001 to “0”.
7. Open the ink cartridge cover and remove the service ink cartridges in the ink supply unit.
8. Attach the customer’s cartridges and close the ink cartridge cover.
9. Turn the main power switch OFF and back ON.
10. Print a Nozzle Check Pattern and check the condition of the print heads. (Nozzle Check
Pattern Print)
11. Obey the local laws when you dispose of the ink sump holding the drained ink.
4. Replacement and Adjustment
520