Instructions for use Zeus Infinity Empowered SW 2.n 247
Monitoring
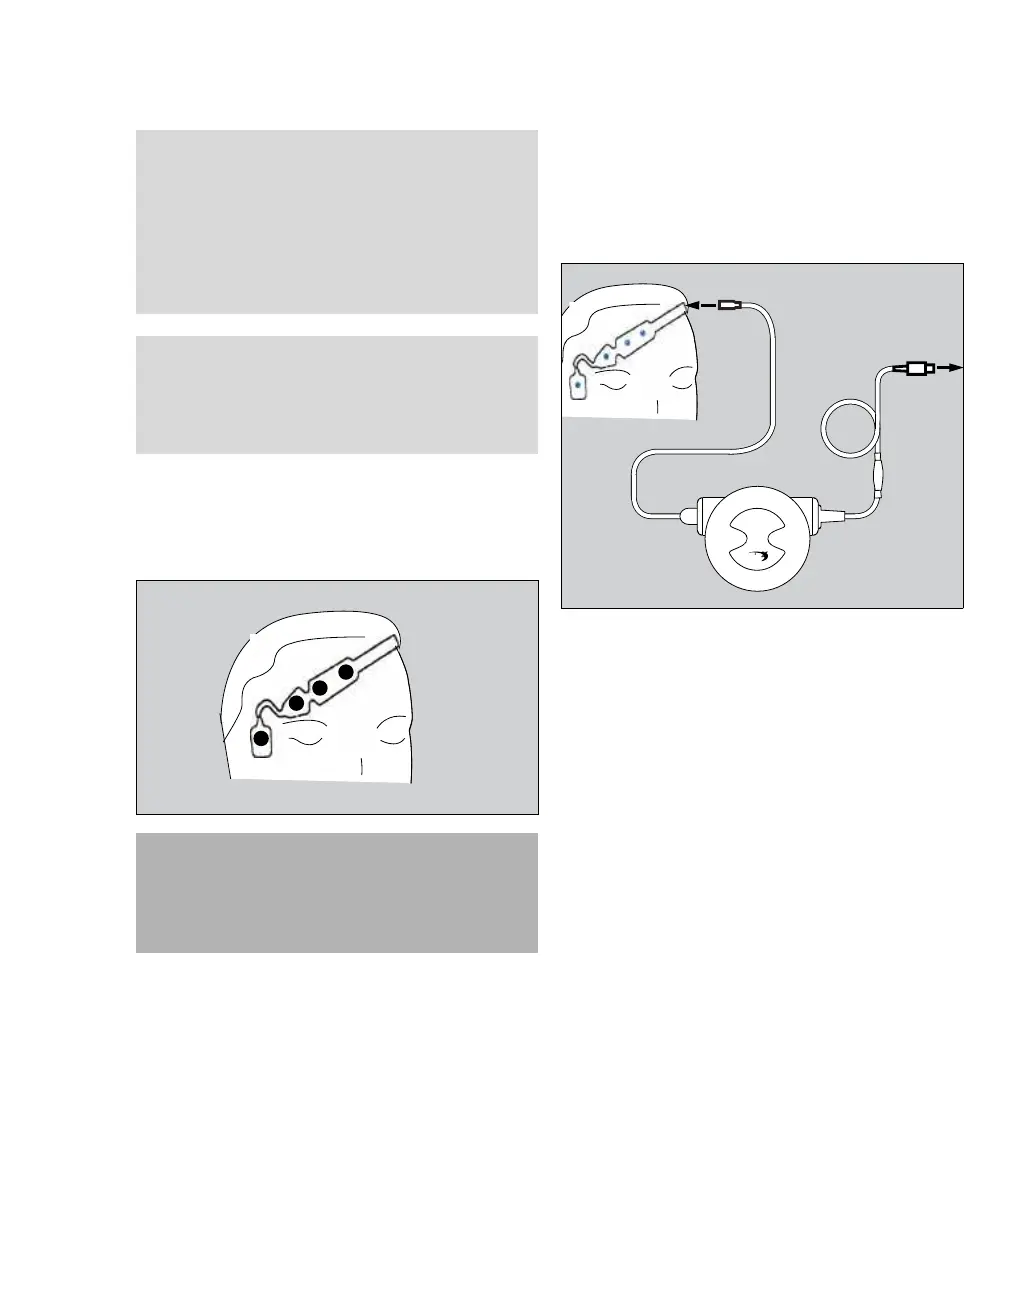
Attaching the BIS sensor
z Follow instructions on the sensor package for
skin preparation and correct positioning.
1 Observe the instructions and numbering of
electrodes on the sensor!
2 Position the adult sensor at an oblique angle
across the forehead:
– Electrode 1 approx. 5 cm above the nose
– Electrode 4 above the eyebrow
– Electrode 3 between the corner of the eye
and the hairline
3 For good contact on the skin carefully press all
the electrodes onto the forehead with a finger-
tip, for at least 5 seconds.
4 Fix the sensor in place with adhesive tape or
plaster.
5 Connect the patient connecting cable (A) to the
sensor. Lay and secure the cable carefully.
6 Connect the pod connecting cable (B) to the
Aux/Hemo 2/3 connector (see page 197) or to
the Trident NMT pod (see page 238).
7 Attach the BISx pod to a bracket or infusion ap-
paratus stand using the clip on the back of the
pod.
NOTE
Artefacts and inferior signal quality can lead to in-
correct BIS values. Possible artefacts can be
caused by inadequate skin contact (high imped-
ance), muscular activity or rigidity, head and body
movements, repeated eye movements, incorrect
sensor positioning and unusual or excessive elec-
trical interference.
NOTE
Carefully interpret BIS values for:
– Patients with known neurological diseases
– Patients taking other psychoactive drugs
– Children under one year of age
284
CAUTION
Only use the BISx Quatro sensor (for adults), the
BISx Pediatric sensor (pediatric applications) or
the BIS SRS sensor! Otherwise, incorrect meas-
uring results will be obtained.
1
2
4
3
275
BIS
X
A
B