MAINTENANCE AND SERVICING
4. Loosen compressor mounting hardware (B) and push
compressor towards engine to release tension.
5. Remove belt (A) from compressor.
Figure 5.112: A/C Compressor
6. Insert the drive end of a 1/2 in. drive ratchet wrench
into the belt tensioner (B).
7. Rotate tensioner counterclockwise until fan belt (A)
can be slipped off pulley (C). Release tensioner and
remove wrench.
8. Remove belt in order 1–2–3 as shown. Route fan belt
around fan and remove belt.
9. Install new belt (A) around fan and onto pulleys in
order 3–2–1.
10. Insert the drive end of a 1/2 in. drive ratchet wrench
into the belt tensioner (B).
11. Rotate tensioner counterclockwise until belt (A) can
be slipped onto pulley (C). Release tensioner and
remove wrench.
12. Check that belt is properly seated in all pulley grooves.
Figure 5.113: Engine Belts
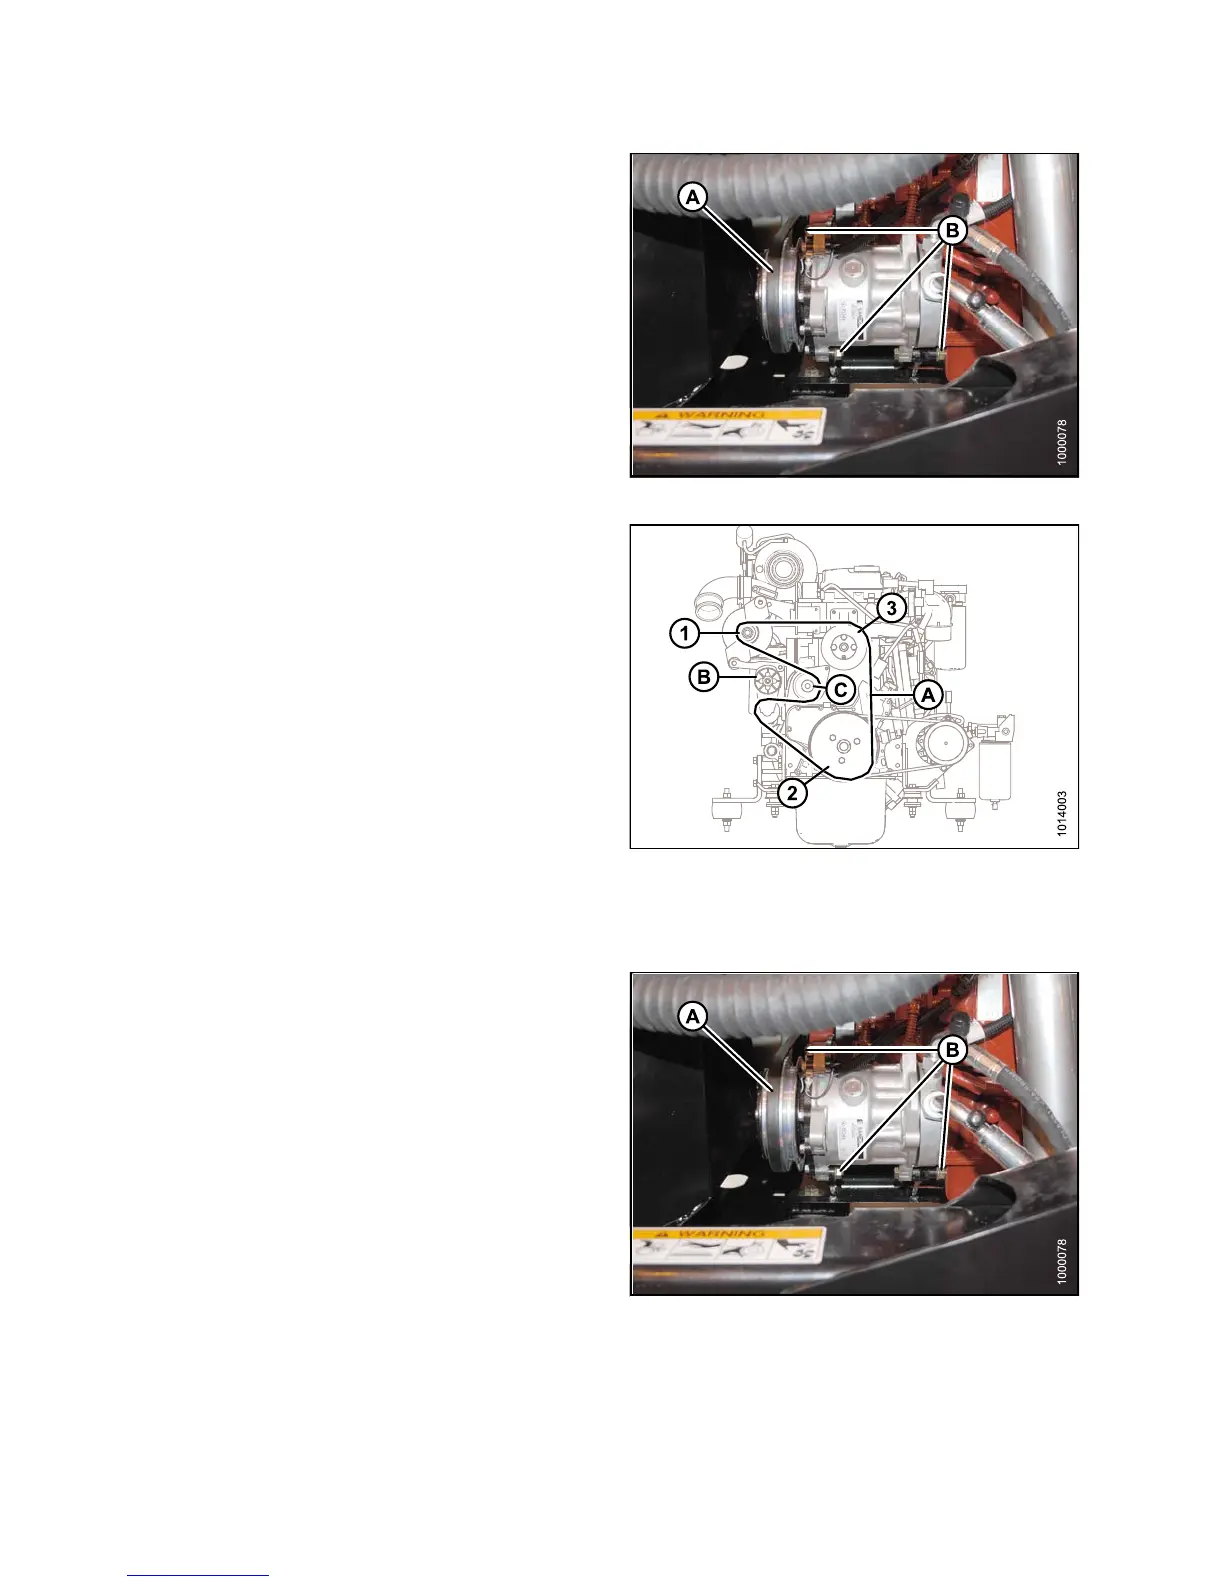
13. Install new compressor belt (A).
14. Pry compressor away from engine so that a force of
8–12 lbf (35–55 N) deflects the belt (A) 3/16 in. (5 mm)
at mid-spa n.
15. Tighten compressor mounting hardware (B).
16. Recheck tension and readjust as required.
17. Close the hood, refer to 5.2.2 Closing Hood (Lower
Position), page 307.
18. Close the platform, refer to 5.3.2 Closing Platforms
(Standard Position), page 310.
Figure 5.1
14: A/C Compressor
147649 366 Revision A