6 Vehicles Autopilot system setup
1. Navigate to the GUIDANCE section of the vehicle setup panel:
a.
At the Home screen, tap . The Vehicle setup panel displays.
b. Tap Edit.
c. At the list on the left-hand side of the setup panel, tap the name of the vehicle you want to
edit. The display changes the list item to a blue background with white text.
d. Tap Edit, then GUIDANCE.
2.
Tap CONTROLLERSETTINGS.
3.
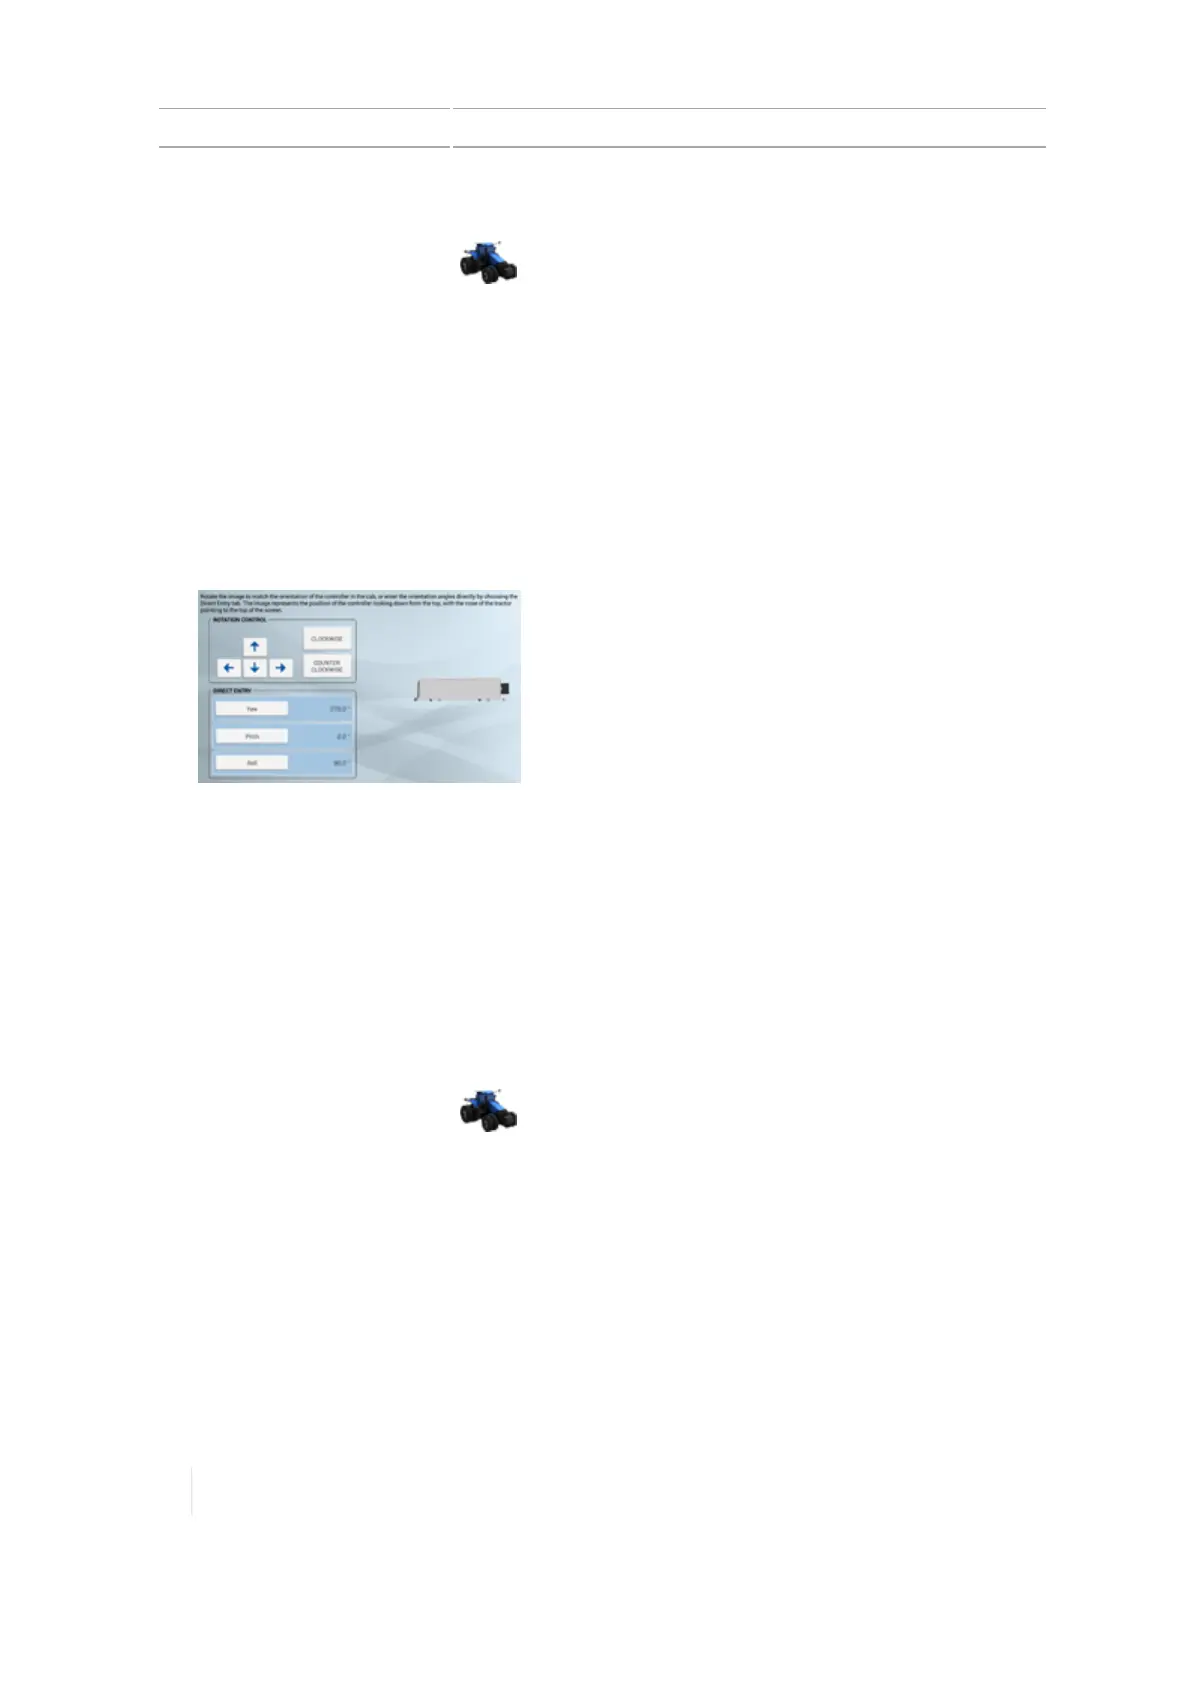
Rotate the on-screen controller to match the position of the actual controller in the vehicle as
you are looking down from the top, with the nose of the tractor point to the top of the screen.
Tap the arrow buttons to move the on-screen navigation controller clockwise or
counterclockwise.
4. Optionally you can directly enter the degrees of the position by tapping Yaw, Pitch and Roll.
Non-orthogonal entries will not show the orientation on the display.
5. When the controller position on the screen matches the controller installed in the vehicle,
continue to the sensor settings. See Sensor settings for Autopilot system, 148.
Sensor settings for Autopilot system
Note – Adjust sensor settings only if necessary to improve steering performance.
1. Navigate to the GUIDANCE section of the vehicle setup panel:
a.
At the Home screen, tap . The Vehicle setup panel displays.
b. Tap Edit.
c. At the list on the left-hand side of the setup panel, tap the name of the vehicle you want to
edit. The display changes the list item to a blue background with white text.
d. Tap Edit, then GUIDANCE.
2.
Tap SETTINGS. Complete the information at the SETTINGS section.
Note – Not all setting items will be available for all vehicles. Setting items are only available to
the applicable vehicle types.
148 TMX-2050 Display User Guide Version 1.075, Revision C